How to Make a TikTok Video with Dialogue
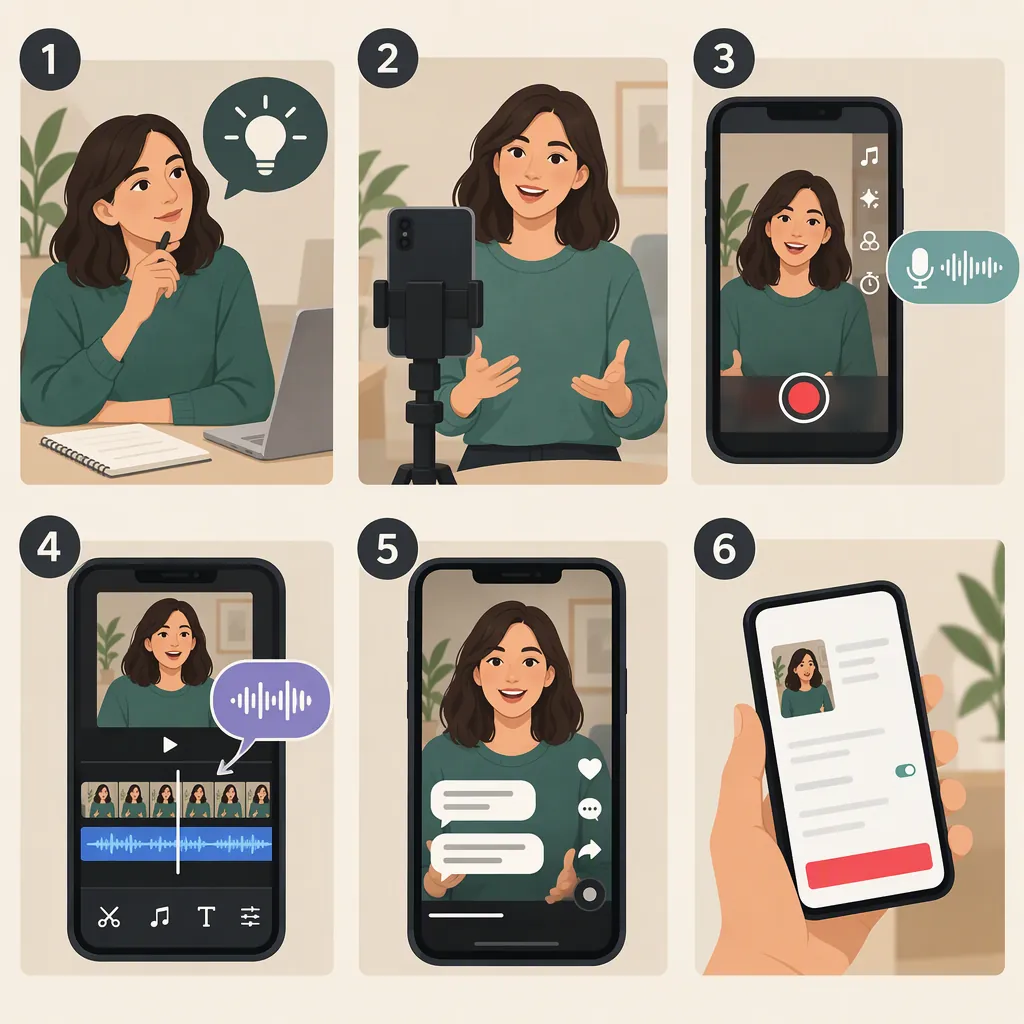
To make a TikTok video with dialogue, write a short script, record yourself speaking during filming or record a separate voiceover, then edit the speech and visuals together. For voiceover, add the saved recording as an audio track and align each line with its matching shot. Check audio clarity, captions, and the final video in the TikTok posting preview before publishing.
The main workflow below is editor-independent. Specific caption instructions are included as an optional branch for TikTok Video Editor in Ads Manager, not the standard TikTok app. [source_1]
1. Choose Live Dialogue, Voiceover, or Both
Choose the recording approach based on what the viewer needs to see:
- Live dialogue or original speech: Record yourself speaking while filming. Use this when facial expressions, reactions, or a conversation are central to the video.
- Voiceover: Record narration separately and add it over footage. Use this when explaining a process, showing objects, or narrating a sequence without showing the speaker.
- A combination: Start with an on-camera line, then switch to narration over supporting footage.
For a two-person exchange, write each speaker’s lines separately. If you play both roles, plan a consistent position or visual cue for each character so viewers can follow the conversation.
These are production choices, not requirements imposed by TikTok.
2. Write a Script That Matches the Visuals
Give the video one clear purpose: explain something, show a decision, or stage a short exchange. Write in everyday language and read the lines aloud before filming.
For each line, note what should appear on screen. For voiceover, identify the action or object the sentence describes. For a conversation, mark speaker changes and reaction shots. Remove dialogue that only repeats information already clear in the visuals.
Dialogue Planning Template
- Purpose: What should the viewer understand?
- Format: Live speech, voiceover, or a combination.
- Opening visual: What appears first?
- Opening line: Introduce the question or situation.
- Speaker A: First point or question.
- Speaker B or narration: Response or explanation.
- Supporting visual: Show the object, action, or reaction.
- Closing line: Resolve the exchange or summarize the point.
- Editing notes: Pauses, speaker changes, and caption corrections to check.
Use this as a planning worksheet, not a fixed timing formula.
Example: Match Each Line to a Shot
This illustrative example combines an on-camera question with a voiceover explanation:
| Dialogue | Visual | Recording method | Editing treatment |
|---|---|---|---|
| “Which notebook should I use?” | Speaker holding two notebooks | Live speech | Keep the recorded speech attached to the matching video. |
| “This one fits in my bag.” | Close-up of the smaller notebook going into a bag | Voiceover | Start the line as the notebook is shown; keep the shot long enough for the sentence. |
| “That’s the one I’ll take.” | Speaker holding the selected notebook | Live speech | Leave a brief pause before the closing line. |
If the second sentence continues after the shot changes, extend the notebook shot or shorten the sentence. Avoid rushing the delivery just to fit the original cut.
3. Record Clear Speech
Choose a quiet location and make a short test recording. Listen back for room noise, unclear words, and changes in loudness before recording the full script.
For Live Dialogue
Keep your distance from the recording device reasonably consistent. Leave a brief pause before and after each line so you have room to trim.
For multiple speakers, check that everyone is understandable in the test. If you film each side of a conversation separately, record the full line and a short reaction pause rather than cutting the recording immediately after speaking.
For Voiceover
Rehearse while watching the footage so you can judge whether each sentence fits its shot. Record in manageable segments, leaving small gaps between sentences.
Save the recordings somewhere you can find them and label them by line or scene, such as “opening” or “notebook explanation.” Keep alternate takes until the edit is finished.
If a line feels rushed, shorten it or allow more time in the edit. Use your recording device or editor’s available audio tools; exact recording controls and menu names vary. This guide does not verify a particular Voiceover button or menu location in the standard TikTok app.
4. Add the Dialogue and Sync It with the Video
Put the video clips in the order of the conversation or explanation. Then follow the branch that matches your recording approach.
If You Recorded Speech While Filming
Keep the live audio aligned with its corresponding video, especially when the speaker’s mouth is visible. Trim the clip and its matching audio together rather than shifting the speech independently.
Preserve pauses that help the exchange make sense. For a two-person scene, check that each reply follows the previous line naturally.
If You Recorded a Separate Voiceover
- Add the saved recording to the edit. Use an editor that supports adding recorded audio to video. Import or insert the recording as an audio track; the exact control depends on the editor.
- Place each segment beside its matching shot. Move the narration so the sentence begins when the relevant action or object appears.
- Decide what to do with the footage’s original sound. Keep useful sound, such as an action being demonstrated, if it does not compete with the narration. Lower or mute unwanted background noise or duplicate speech.
- Trim the edges of each recording. Remove unnecessary lead-in and trailing silence without cutting off words or breaths.
- Listen across the joins. Check for clipped syllables, repeated words, abrupt volume changes, and pauses that sound unnatural. Adjust spacing or re-record a segment if needed.
- Recheck the visuals. Make sure every sentence still describes the shot beneath it after trimming.
For a mixed video, preserve the on-camera speech and add voiceover only where planned. Listen at the transition to check that one voice does not accidentally overlap another.
Balance Dialogue, Music, and Effects
Add optional music or effects after the speech is in place. Keep them low enough that every spoken word remains easy to hear, and compare the loudness of separate dialogue takes.
Listen through once without watching to check the conversation itself. Then watch again to check timing and visible mouth movements. If the edit feels crowded, simplify the script or extend the relevant shot.
5. Add and Review Captions
Add captions after the dialogue edit is stable. Use your editor’s available caption tools or enter the text manually, then check it against the final audio.
Review:
- Exact wording, including names and unfamiliar terms.
- Caption start and end times.
- Clear speaker changes where needed.
- Line breaks that preserve the intended meaning.
- Readable text placement that does not cover essential visuals.
Captions and spoken audio are separate parts of the video. Adding caption text is not a substitute for recording or adding the dialogue track.
Optional: Captions in TikTok Video Editor in Ads Manager
Use this branch only if you are working in TikTok Video Editor within TikTok Ads Manager. The documented steps should not be treated as instructions for the standard TikTok app. [source_1]
- With detectable voiceover: Open the Narration tab, select a language from the Caption dropdown, and click Generate to generate captions from the existing voiceover audio. [source_1]
- Without detectable voiceover: The documentation describes selecting Add Script, entering narration text, turning on Caption, choosing a subtitle language, and selecting Generate captions. It also describes selecting subtitles to edit their content and styling in a subtitle settings panel. [source_1]
The documented Add Script workflow generates captions; it does not establish that entering text creates spoken audio. Review the generated captions against your intended dialogue and timing. [source_1]
6. Check the Finished Video Before Posting to TikTok
Once the edit is complete, export or save the finished video if you worked in a separate editor. Play that saved version—not just the editing timeline—to check that the intended audio and captions are present.
Then open the video in your intended TikTok posting workflow and review the available preview before publishing. Check that the dialogue remains audible, the picture and speech stay synchronized, and any captions you added are still present and readable. Do not assume that elements visible in an editor will appear unchanged in the posting preview.
If something is missing or out of sync, return to the edit or adjust the available posting controls, then preview again.
Final Dialogue Review Checklist
- Every spoken line is understandable.
- Visible mouth movements match the speech.
- Voiceover describes the correct shot.
- Joins between recordings do not cut off words or create distracting jumps.
- Original footage sound is retained, lowered, or muted intentionally.
- Music does not overpower the dialogue.
- Captions match the final words and intended meaning.
- Speaker changes are clear.
- Caption text does not cover essential visuals.
- The saved video and TikTok posting preview have both been checked.
FAQ
Should I Record Dialogue While Filming or Add a Voiceover Later?
Record while filming when the speaker’s expressions or interaction matter. Record a separate voiceover when the visuals need explanation without showing the narrator. You can also combine an on-camera introduction with narration over supporting footage.
How Do I Add a Recorded Voiceover to My Video?
Save the recording, then use an editor that supports adding audio tracks to video. Add the recording, place each sentence alongside its matching shot, and lower or mute conflicting footage sound as needed. Listen across segment joins before adding music. Exact controls vary by editor.
Should I Mute the Original Video Sound When Adding Dialogue?
Mute it if it contains unwanted noise or speech that competes with the voiceover. Keep useful sound if it helps explain the action, but balance it so the dialogue remains clear. Check transitions between clips for unexpected changes in background sound.
Can TikTok Video Editor Generate Captions, and Does Add Script Create a Voiceover?
TikTok’s documentation says TikTok Video Editor in Ads Manager can generate captions from detectable voiceover through the Narration tab. It also describes an Add Script caption workflow for videos without detectable voiceover, but does not document spoken-audio generation from that script. These instructions do not verify the same controls in the standard TikTok app. [source_1]
What Should I Check Before Posting a Dialogue Video?
Check speech clarity, audio-to-video synchronization, recording joins, music levels, and caption accuracy. If you edited elsewhere, watch the exported file first, then review the video in the TikTok posting preview to confirm the intended audio and captions are present.
Sources
- [source_1] How to add captions with TikTok Video Editor