How to Make Singing Tiktoks
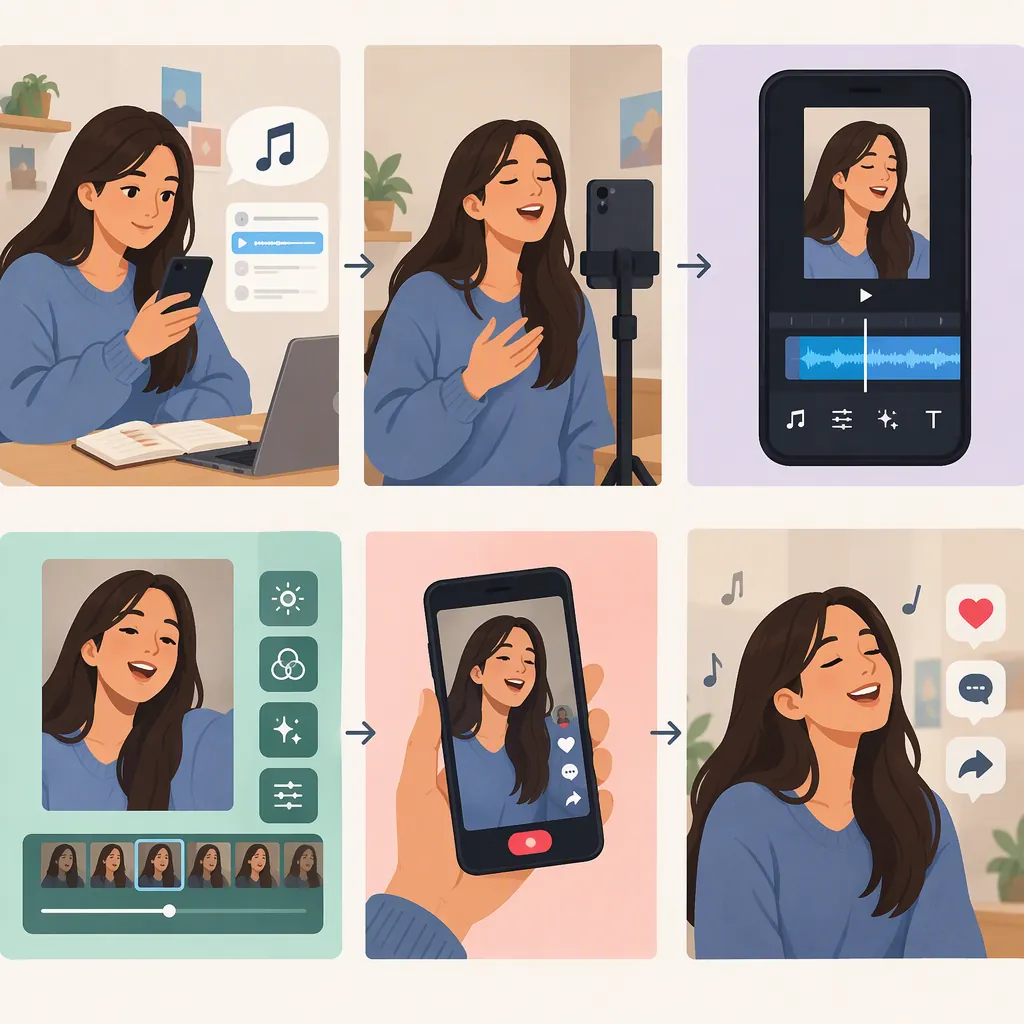
To make a singing TikTok, choose a short song passage, rehearse it, and decide whether to record your voice with the video or separately. Make a test recording, film your performance, then edit for clear vocals, accurate synchronization, and a clean start and finish. Import the finished video into TikTok and review it again before posting.
This is a general production workflow, not a guide to TikTok’s current button labels or account-specific features.
1. Choose Your Singing Format
Start by deciding what the viewer should hear and see. A manageable first project is one short passage performed in a single shot.
Choose an approach:
- Live vocal: Record your singing and video together, with or without accompaniment.
- Separately recorded vocal: Record your singing first, then film a performance that matches the finished audio.
- Singing challenge: Choose a passage that demonstrates a musical idea without pushing beyond your comfortable range.
- Expressive cover: Focus on the phrasing and emotion of a familiar song passage.
Snapchat’s “How To Sing On Tiktok” topic collection includes covers, challenges, humorous renditions, and expressive performances. It can provide format inspiration, but it is not an official TikTok recording tutorial or evidence that a format will attract views. [src_1]
If you mouth the words to someone else’s vocal recording rather than recording your own singing, describe the result as a lip-sync.
2. Prepare the Song and Recording Space
Choose a passage with a clear beginning and ending. Rehearse the opening note, difficult transitions, and final phrase. If a passage feels uncomfortable, choose another section or key rather than forcing it.
For a simple phone setup:
- Choose a space where you can control interruptions and background noise.
- Place the phone on a stable support in portrait orientation.
- Frame your face and enough of your upper body to show the performance naturally.
- Position a light so your face is easy to see.
- Record a short test at the volume and position you expect to use for the final take.
Listen before changing equipment. A phone-only setup is a starting point to evaluate, not a guarantee of a particular sound quality.
Pre-Recording Checklist
- Choose the song passage and performance format.
- Rehearse the opening, transitions, and ending.
- Check the background for private information.
- Stabilize the phone and check the framing.
- Record a short audio and video test.
- Listen before filming the full take.
3. Record Your Vocal Performance
Option A: Record Voice and Video Together
For a live take, record your voice and picture at the same time. Keep your position relative to the microphone consistent. If you use accompaniment, start with it quieter than your voice and adjust after listening to a test.
Check for these problems:
| Problem | What to try |
|---|---|
| The accompaniment makes the words hard to understand | Lower the accompaniment and record another test. |
| Loud notes sound rough or crackly | Lower the recording level, if available, or move slightly farther from the microphone. |
| Fans, notifications, or movement distract from the singing | Address the noise source before recording again. |
Record the full passage once the test sounds acceptable. Listen to the take before assuming it is ready to edit.
Option B: Record the Vocal Separately
Finish your vocal recording before filming the matching performance. Listen through the audio and choose the version you intend to use.
Play that recording while filming, matching your mouth movements, phrasing, and breaths to the sound. Keep the playback timing consistent rather than changing the performance between takes.
This route needs an editor that can add an independent audio track, adjust its position on a timeline, and mute the video’s recorded sound. The camera may capture the playback during filming; use that sound as an alignment reference, not as a second audible vocal in the finished video.
4. Combine Separate Audio and Video
If you recorded voice and video together, skip to the next section. If you have two separate files, assemble them before making the final trim:
- Import both files. Add the video and finished vocal recording to an editor that supports separate audio tracks.
- Find a matching moment. Use a clear consonant, mouth opening, or other recognizable moment to compare the picture with the sound.
- Move the audio into alignment. Adjust the audio track’s position until that moment matches. If the camera captured playback, it can help you locate the same phrase in both recordings.
- Mute the camera audio. Keep only the intended vocal recording audible, including any accompaniment you deliberately included in it.
- Check the beginning, middle, and end. Do not assume that matching one moment means the entire performance is synchronized.
- Export a test video. Watch and listen to the exported file, not just the editor preview.
If the beginning matches but the ending does not, check whether your filmed performance follows the recording throughout. A single timing adjustment may not fix an inconsistent performance; refilming may be simpler than forcing the edit.
5. Edit Without Distracting from the Singing
Trim unnecessary preparation and the pause after the ending. Leave enough space that the first syllable and final note remain intact.
Keep text purposeful. A brief label such as “live vocal” or “prerecorded vocal” can explain the format. Place text where it does not obscure your face or important performance details. If you add captions, check the words manually against the recording.
Listen once with headphones and once through the phone speaker. Use both checks to decide whether the voice and accompaniment sound balanced. Keep effects optional rather than adding them merely to fill the screen.
Final Edit Checklist
- The opening syllable and final note are intact.
- The intended vocal is audible throughout.
- Separately recorded audio matches the video at the beginning, middle, and end.
- No duplicate playback track is audible.
- Text is readable and does not obscure the performance.
- Captions match the words being sung.
- The format label accurately describes the recording.
- The exported video has been watched and heard from start to finish.
6. Review Permissions and Privacy
Before posting, check the current platform terms and any applicable permissions for the song, backing track, and other material you include. Do not treat a song credit or another creator’s use of a track as proof that your use is permitted. This article does not establish music rights or provide legal advice.
Review the frame for addresses, documents, screens, or people you did not intend to include. Check any on-screen text and description for personal information as well.
7. Import into TikTok and Preview Again
Once you have a finished video, use TikTok’s available upload workflow to import it. Keep this stage separate from the editor review: check the version you are preparing to publish, not only the original exported file.
Before deciding to post:
- Play the video from beginning to end.
- Confirm that your intended vocal is still audible and that any added sound does not mask or duplicate it.
- Check mouth-to-audio synchronization, especially if you recorded the vocal separately.
- Review text and captions in the platform preview.
- Check the description and available audience or visibility settings.
- Publish only when the preview and settings match your intentions.
If you notice a problem, return to the edit or adjust the available settings before posting. This workflow does not promise any particular reach or audience response.
FAQ
Is a Lip-Sync Video the Same as a Singing Video?
For clarity, distinguish the two. If the audience hears your own vocal, describe whether you recorded it live with the video or separately. If you mouth the words to someone else’s vocal recording, label the performance as a lip-sync.
How Can I Make a Singing TikTok with Only a Phone?
Start with a short phone-only test. Stabilize the phone, choose a quiet space, and sing at your intended performance volume. Listen for unclear words, distracting noise, and distorted loud notes before deciding whether additional equipment is necessary. Recording voice and video together avoids the extra step of combining separate files.
How Do I Add a Separately Recorded Vocal to My Video?
Use an editor that supports independent audio tracks and timeline adjustment. Import the video and vocal file, align a clear sound with the corresponding mouth movement, and mute the camera’s playback recording. Check synchronization at the beginning, middle, and end, then export and review the finished video.
What Kinds of Singing Tiktoks Can I Try?
Try a short cover, an expressive single-shot performance, or a singing challenge within your comfortable range. Snapchat’s topic collection includes covers, challenges, and expressive or humorous performances, but those examples do not establish that any format will produce a particular audience result. [src_1]
What Should I Check After Importing the Video into TikTok?
Review the sound, synchronization, text, captions, description, and available visibility settings. Make sure the version you are preparing to publish still presents the intended vocal clearly and accurately.
Sources
- [src_1] How To Sing On Tiktok Videos