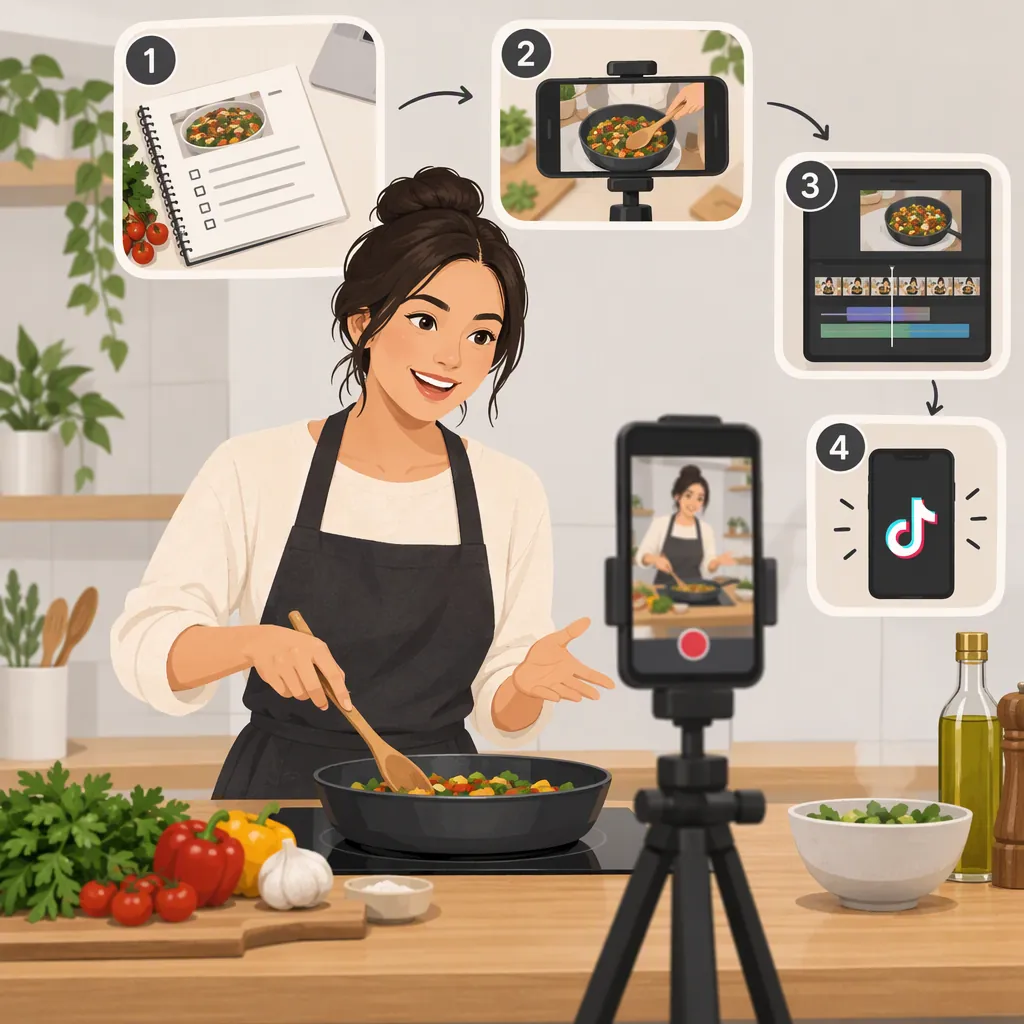
How to Make Cooking and Kitchen-Cleaning Videos on TikTok
To make cooking videos for TikTok, choose one recipe, outline its essential steps, and film vertical clips with a steady phone and clear lighting. Capture preparation, key cooking actions, and the finished dish; then trim pauses and add readable instructions or voiceover. A smartphone is enough to begin, and planning shots before cooking is recommended by the supplied production guides. [c1] [c2] For kitchen-cleaning videos, adapt that sequence to a before view, the process, and an after view.
Plan One Clear Cooking Demonstration
Start with a recipe you can explain without skipping essential instructions. Decide whether the video is a complete recipe or a demonstration of one technique, such as folding dough or mixing a dressing. Label it accordingly rather than presenting a partial demonstration as a full recipe.
Before filming, write down the ingredient quantities, the order of operations, and the moments viewers need to see. WP Tasty recommends picking a straightforward recipe, mapping the steps, choosing camera angles, and preparing the workspace in advance. [c2]
For your opening, consider a close-up of the finished dish followed by its name. This is an editorial option, not a requirement or a promise of better reach.
Fill-In Video Brief
Dish or technique: ___
Video scope: Complete recipe / single technique
Opening image: ___
Ingredient quantities to display: ___
Essential actions to show: ___
Cooking times and temperatures to retain: ___
Final texture or presentation to show: ___
Set up Your Phone and Workspace
Begin with the phone you have rather than treating new equipment as a prerequisite. Clare Langan's guide describes phone-based food-video production and hands-free supports; WP Tasty also identifies a smartphone as a starting option. [c1] [c2]
Use this setup checklist:
- Position the phone vertically for this TikTok-focused workflow.
- Use a stable support that leaves your hands free.
- Keep the support outside your cooking and walking paths.
- Clear unrelated objects from the frame and arrange ingredients in order of use.
- Compare a short test clip near a window with one under your existing lights.
- Check that your hands do not hide the action.
- Record a sound test if you plan to speak while cooking.
The guides recommend natural window light, organized ingredients, and a clear workspace. WP Tasty also recommends checking audio before recording. [c1] [c2] Review the test footage before starting a step you cannot easily repeat.
Capture the Steps Viewers Need
Assign each camera angle a job. Use overhead footage for ingredients and mixing, an angled view for actions that need depth, and close-ups for texture or the finished dish. WP Tasty describes overhead, medium, and close-up shots as useful options for cooking videos. [c2]
Record the beginning and result of each important transformation. For example, show the mixture before stirring and its consistency afterward. Avoid relying on a fast montage to explain a step that requires a visible technique.
You do not need to record every second of a long process. If you shorten a wait in the edit, retain the actual recipe time in text or narration. Treat the following shot list as a suggested structure, not a tested performance formula.
Cooking Video Shot List
1. Finished dish: A clear close-up to introduce the recipe.
2. Ingredients: An overhead view with quantities recorded for captions.
3. Preparation: The essential cutting, measuring, or mixing action.
4. Cooking: The important change in appearance or consistency.
5. Timing note: A shot or text cue identifying any omitted waiting period.
6. Assembly: Plating, layering, or finishing.
7. Final view: A detail shot that matches the dish introduced at the start.
Edit for Clarity Before Adding Effects
Arrange clips in recipe order, then remove setup time, mistakes, and unnecessary pauses. Both Langan and WP Tasty recommend trimming footage; WP Tasty advises keeping transitions and effects simple. [c1] [c2]
Add ingredient quantities, relevant times, and instructions that are not obvious from the images. If you use voiceover, align each explanation with the action it describes. Keep background music secondary to spoken instructions and useful kitchen sounds.
Watch the edit once without sound. Can a viewer identify the dish and follow the key actions? Then listen without watching to check that the narration is understandable. Preview the video in TikTok before publishing and move any text that the interface covers.
Choose duration based on the explanation, not a supposed universal ideal. The supplied sources are production guides, not official documentation of current TikTok limits or algorithm behavior.
Final Review Checklist
- The video clearly identifies its recipe or technique.
- Essential steps remain in order.
- Quantities, times, and temperatures match the recipe used.
- Any shortened waiting period is labeled.
- Text remains readable in the posting preview.
- Narration is understandable over other audio.
- The final shot matches the actual result.
- A separate finished copy has been saved.
Adapt the Workflow for Kitchen-Cleaning Videos
For a cleaning clip, replace the recipe sequence with a clearly identified task, the process, and the visible result. Keep the before and after views at the same angle and under comparable lighting so the presentation does not exaggerate the change.
Suggested sequence:
- Show the area and name the task.
- Show the materials used without making unsupported product claims.
- Record the actions in their actual order.
- Label any waiting period removed from the edit.
- Return to the original framing for the after view.
Follow the relevant product label and surface-care instructions rather than improvising a cleaning method for the camera. Describe the visible result narrowly; appearance alone should not be presented as proof of disinfection.
This cleaning sequence is an editorial adaptation of the cooking-video workflow. The supplied references do not establish cleaning-product effectiveness, chemical compatibility, or disinfection procedures.
Save Your Work and Review the Explanation
Keep a separate copy of the finished video before removing source footage. Langan cautions that deleting original clips may affect saved projects, depending on the editing app, and recommends preserving final cuts and footage worth keeping. [c1]
For the next video, choose one production issue to improve: blocked actions, inconsistent lighting, unclear quantities, or text that disappears too quickly. Use viewer questions as prompts to clarify instructions rather than assuming every low-view video has a technical problem.
These references support practical production guidance. They do not establish a guaranteed posting schedule, hashtag formula, or route to viral reach.
FAQ
Can I Make TikTok Cooking Videos with Only a Phone?
Yes. Both supplied production guides describe a smartphone as a starting option. Begin with clear framing and a stable setup; additional equipment is not a prerequisite for starting. [c1] [c2]
Do I Need to Show My Face in a Cooking Video?
No. Langan discusses overhead, hands-only videos, and WP Tasty describes overhead shots for showing ingredients and preparation. You can explain the process with hands-in-frame footage, text, or voiceover. [c1] [c2]
What Should I Learn First When Editing Cooking Videos?
Start by trimming the beginning and end of clips, then remove unnecessary pauses within them. Langan recommends this progression before developing more elaborate editing choices. Preserve the information needed to understand the recipe. [c1]