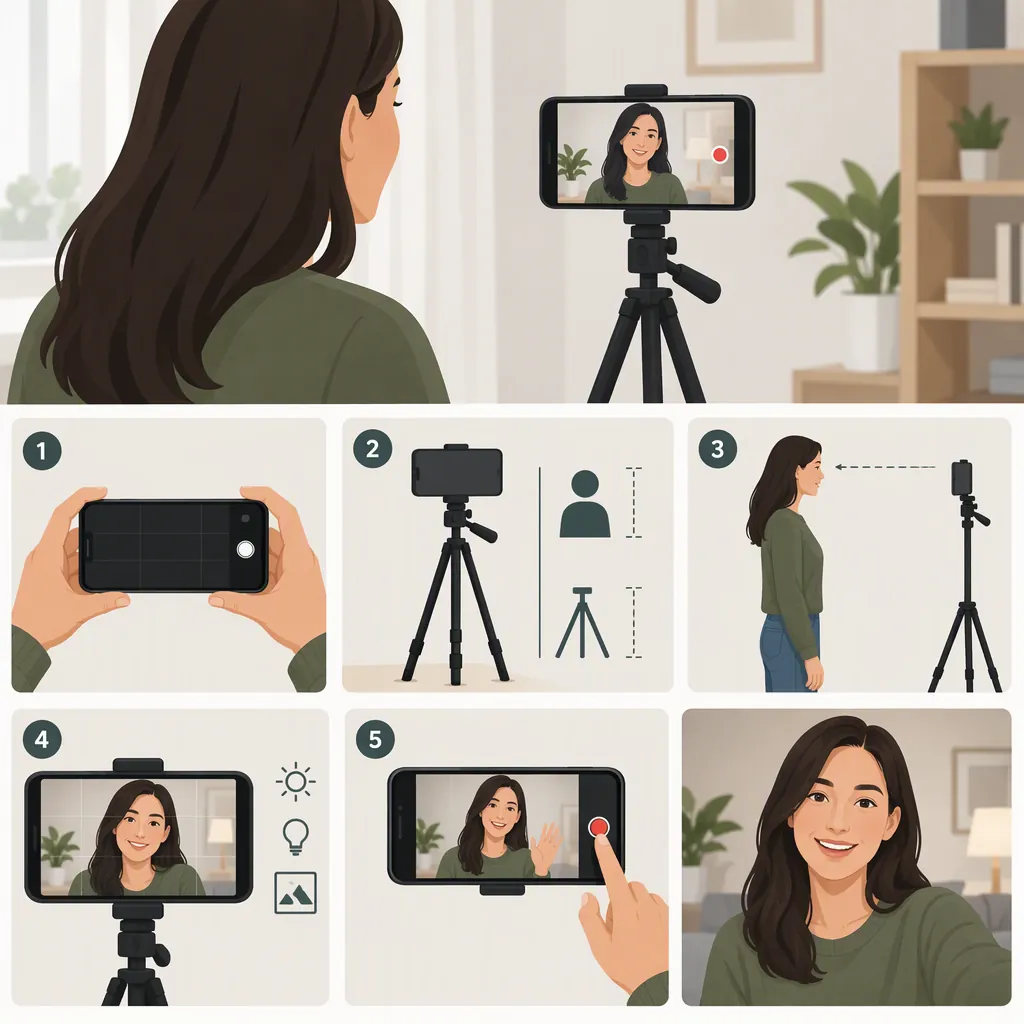
How to Film Yourself with a Phone: A Solo Setup Guide
Place your phone on a stable support, frame the spot where you will stand or sit, and record a short test. Watch and listen to that test before recording the full take. For a simple sequence, start with a static wide shot, then record medium shots and close-ups—a solo-filming approach described in the supplied reference. [ref_1] The setup and monitoring checklist below is practical guidance, not a device-specific feature guide.
Plan a Small Set of Shots
Before setting up the phone, decide what the viewer needs to see. For a short demonstration, try this sequence:
- Wide shot: Show yourself and the space where the action happens.
- Medium shot: Show the main explanation or activity more closely.
- Close-up: Show an important object, hand movement, or detail.
The supplied Instagram lesson describes starting with a static wide shot, then using medium shots, close-ups, simple movement, POV, and over-the-shoulder views for solo mobile filming. [ref_1] You do not need to use every shot type. As a starting exercise, choose one action and cover it from two or three fixed positions.
Three-Shot Planning Template
Wide shot: Show the location and the beginning of the action.
Medium shot: Show the main action or explanation.
Close-up: Show the detail the viewer needs to understand.
Continuity check: Start each repeated action from the same position.
Set up a Stable Frame
The reference presents filming alone with a phone and tripod as its basic setup. [ref_1] For your own setup, use a tripod or another secure support that does not require precarious balancing.
Choose portrait or landscape framing based on the intended video layout. Position the phone, clear distracting items from the background, and leave room for any gestures or movement. For a seated explanation, use a lens position near your eye line as a starting point, then adjust after checking playback.
Mark your standing or sitting position with a removable marker that will not create a trip hazard. Keep that position consistent between tests and takes. Treat these steps as a suggested workflow rather than a guarantee of a particular visual result.
Check Framing When You Cannot See the Screen
If your chosen camera lets you see the screen while you perform, use the preview to set your position. Once recording, direct your attention toward the lens rather than continually checking your image.
If the screen faces away from you, use a test-and-review loop:
- Start a short recording.
- Move to your marked position.
- Say a sample sentence and perform your largest planned gesture.
- Stop recording and review the clip.
- Adjust the phone or your position, then repeat if necessary.
Inspect the edges of the frame, not just your face. Check that your head, hands, and any objects remain visible throughout the action.
Remote previews, camera switching, and recording controls depend on the phone and app. The supplied reference does not document those features, so this guide does not assume they are available.
Framing Test Checklist
Record from the exact position you will use.
Perform the widest gesture or movement in the shot.
Review headroom, hands, objects, and background.
Adjust one thing at a time.
Repeat until the planned action stays within the frame.
Review Picture and Sound Before the Full Take
Use the same test clip to evaluate both picture and sound. These checks are practical recommendations; the supplied reference does not provide detailed lighting or audio instructions.
For the picture, check whether your face and the important action are easy to see. If they are not, try a different position relative to the available light, then record another test. Check focus during your actual movement rather than judging only a still preview.
For sound, speak at the volume and distance you intend to use. Play the recording back and listen for unclear words, background noise, or clothing brushing against a microphone, if one is attached. Address the problem and test again before committing to a long take.
Also check that the phone is ready for the planned recording, including battery and available storage. Avoid relying on a setup you have not tested.
Record in Short, Reviewable Takes
As a manageable solo workflow, record one section or action at a time. Leave a brief pause before speaking and after finishing so you have room to trim the clip.
Review the first complete take before moving the phone. If it works, record a closer view or detail shot from your shot plan. The reference includes multiple shot sizes and viewpoints in its approach to building a basic visual story. [ref_1]
For repeated actions, check that objects and your starting position match closely enough for the intended edit. Add movement only after the fixed shots are working. Do not attempt to reposition an unsecured phone while performing.
Source limitation: The supplied evidence is one Instagram lesson caption, not a phone manual or a comparative equipment test. It supports the broad shot-planning approach, but does not establish specific camera settings, accessory compatibility, or image-quality advantages.
Solo Recording Routine
Set the frame and mark your position.
Record a short picture-and-sound test.
Review and correct the setup.
Record one complete section.
Review it before changing the camera position.
Record the next planned angle or detail.
FAQ
Should I Use the Front or Rear Camera?
Choose the camera that gives you workable framing and an acceptable test recording on your phone. If you can see yourself on the screen, use that preview to set up. If you cannot, record and review a short test from your marked position. The supplied reference does not establish a front-versus-rear camera quality comparison.
Do I Need a Tripod to Film Myself?
The supplied lesson uses a phone and tripod as its basic solo setup. [ref_1] For this workflow, the practical requirement is a secure, stationary phone position; avoid improvised supports that can slip or fall. No particular tripod model or compatibility claim is supported by the reference.
How Can I Check the Shot Without a Live Preview?
Mark your position, record a brief sample with your planned speech and movement, then watch and listen to it. Adjust the framing and repeat as needed. Review the first full take before changing the setup. This is a recommended workflow, not a remote-monitoring feature documented by the supplied source.
Sources
- [ref_1] Instagram