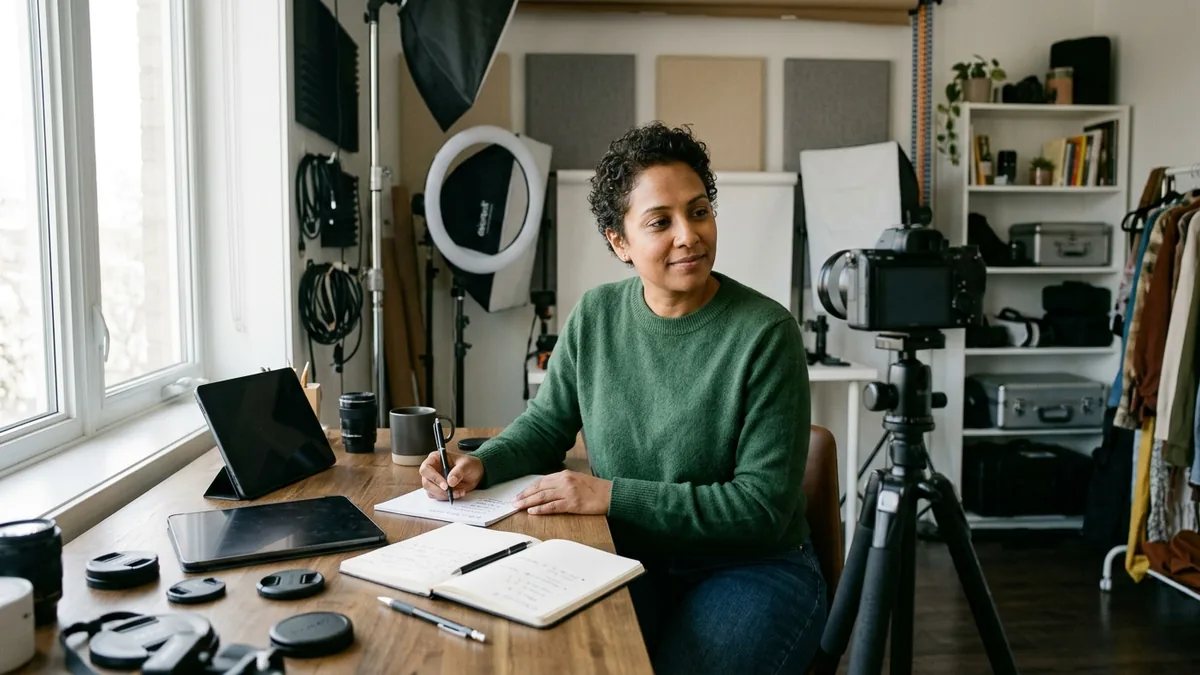
How to Film Yourself: A Practical Solo-Filming Setup Guide
To film yourself, secure your phone, frame the action you need to show, face a soft light source, choose a quiet space, and record a short test before the full take. Check framing, focus, light, and speech in the test, then record in manageable sections. Prioritize a clear image and understandable sound before effects or advanced editing.
1. Define the Job of the Video Before Setting Up
Start with one sentence that says what the viewer should get from the recording. For example: “Show how to repot this plant,” “Explain the three changes in this project,” or “Demonstrate how this tool works.” A clear purpose helps you decide how close the camera should be, whether your hands need to be visible, and which extra shots you need.
Use vertical framing when the video is primarily intended for phone-first viewing. Use horizontal framing when your subject needs side-to-side room, such as a desk demonstration, cooking tutorial, exercise movement, or widescreen presentation. Neither orientation is universally better; choose the one that fits the subject and where people will watch.
Prepare a short beat list instead of trying to memorize every sentence. An example list might be: opening point, problem, first step, second step, result, and closing action. Keep it close to the camera so you can glance at it between takes. If you need to show an object, write that into the beat list so it does not become an afterthought.
Before recording, ask three questions: Can a viewer understand the purpose in the opening? Does the frame fit the destination? Which actions need a separate close-up?
2. Prepare Your Phone and Recording Space
A reliable solo setup begins before you press record. Charge the phone, make room in storage for several takes, clean the lens with a soft lint-free cloth, and reduce interruptions. A storage alert, incoming call, low battery warning, or fingerprint-smudged lens can interrupt or weaken an otherwise good take.
Choose a room where you can control noise and light. Close a door or window if traffic, voices, or wind are obvious. Pause a fan, appliance, or other repeating sound when it is safe to do so. Look behind you as well as at yourself: a simple background generally makes it easier for viewers to focus on your explanation. Remove distracting clutter rather than trying to hide it with effects later.
If you use the rear camera for a potentially better image, monitoring yourself may be harder. That is manageable: mark where you will stand or sit, make a short test, and review it. If the front camera lets you frame yourself more reliably, it can be the more practical choice. The best camera is the one that produces a usable recording in your actual conditions.
Avoid digital zoom when possible. Move the phone closer, change your own position, or record a dedicated close-up. Moving closer can preserve more useful detail than a large digital crop; keep the support stable while changing position.
3. Stabilize the Camera and Frame Yourself Deliberately
For a direct-to-camera video, place the lens at eye level or slightly above it. A low camera angle can emphasize the ceiling and make the image feel less intentional. Tilt the phone only enough to level the frame. Check that vertical lines in the room are not obviously slanted unless that angle is a deliberate creative choice.
Use a tripod, phone clamp, shelf, or another secure fixed support. You do not need a particular product, but the phone must not wobble, slide, or be easily knocked over. If the phone rests on a table, avoid touching that table during the take. A steady image is one of the most visible improvements you can make without changing the phone itself.
For a talking-head shot, frame from roughly mid-chest upward when facial expression is important. Leave a modest amount of space above your head, but do not place yourself so far away that your face is tiny. For a demonstration, test the widest gesture or furthest reach you expect to make. If hands leave the frame, raise or widen the camera position, or record a separate overhead or close detail shot.
Look into the lens for the lines intended to feel direct. Looking at your own image on the screen is natural, but it may appear to the viewer as if you are looking slightly away. Use the preview to establish framing, then return your attention to the lens.
4. Light Your Face from the Front
The simplest lighting approach is to face a broad, soft source of light, such as a window. When light comes from in front of you, your face is generally easier to see. If a bright window is behind you, the camera may expose for that window and leave your face looking dark.
Try a basic window setup: sit or stand facing the window, place the phone at eye level, and keep the background several feet behind you if possible. If sunlight is harsh, change position, use a sheer curtain where appropriate, or record at a time when the light is less direct. You are aiming for an evenly lit face, not necessarily the brightest possible image.
If you use a lamp, put it in front of you and a little to one side rather than directly overhead. Ceiling lights alone can create strong shadows under the eyes and nose. Also look for mixed lighting: daylight can be cooler in color than household bulbs. You do not need a perfect studio match, but choosing one main source or turning off a competing source can make the image more consistent.
Do a test while wearing the clothes you will use. Highly reflective glasses, shiny objects, or very bright clothing can change how the phone handles the image. Small adjustments in angle are often enough to reduce distracting reflections.
5. Make Understandable Audio a Separate Priority
A phone image can be simple and still work well, but unclear speech makes instructional video difficult to follow. Choose the quietest practical room, move close enough for the phone to capture your voice clearly, and make a short audio test before committing to a longer recording.
Listen for repeated sounds, not just obvious loud noises. Air conditioning, a refrigerator, traffic, computer fans, jewelry, clothing rustle, and wind can become distracting over a full clip. Softer furnishings, curtains, rugs, and upholstered furniture may reduce a hollow room sound, while an empty hard-surfaced room may create more audible echo.
An external microphone can be useful, but only if it is actually being used by the recording setup. Confirm that your phone and recording app receive audio from it, then test normal speech, a quieter sentence, and any movement you will perform. Listen with headphones if available. Check whether each word is understandable, whether room noise competes with the voice, and whether handling or airflow creates pops and rustles.
If your voice is distant in a talking-head shot, first try moving closer rather than assuming editing will repair it. A closer position often improves both speech clarity and the sense that you are speaking directly to the viewer.
If you need a full-body shot or wide demonstration, do not narrow the frame just to improve audio. Instead, consider a compatible lavalier microphone near your mouth or a separate audio recorder positioned closer to you. With separate recording, you will need to align the audio with the video during editing. If you have no extra equipment and the demonstration does not require live speech, another option is to record narration separately in a closer, quieter setup.
6. Monitor Yourself When No One Is Behind the Camera
When you film alone, a short test clip is your most dependable monitoring method. Stand in position, speak at normal volume, perform the largest gesture you expect, then watch and listen. Fix one category at a time: framing, focus, lighting, and sound. Changing everything at once makes it harder to learn what solved the problem.
Check Focus at Your Recording Position
Replay the test and confirm that your face is sharp, not just the background. If you can see the preview, use the app’s supported focus control to select your face, where available. Controls and support vary by phone, camera, and recording app.
For a fixed camera and a fixed standing or seated position, try locking focus and exposure after setting them at your actual recording position, if the app supports it. This can help prevent unwanted changes during the take. If you move toward or away from the camera, test continuous autofocus through the full movement instead; a fixed focus setting may leave you blurry when your distance changes.
If you cannot see a rear-camera preview, use physical markers. Put a small piece of removable tape where your feet should go. Place a prop near the intended edge of the frame during setup. If you must return to the setup later, take a reference photo of the phone position, light direction, and background.
Start Recording and Leave Room to Trim
A timer or remote trigger can make starting easier, but first confirm that your camera app supports a video countdown or remote video recording. A photo timer or shutter remote may not start video in your chosen app.
If those options are unavailable, start recording manually, walk to your marked position, and settle before speaking. Leave two or three seconds of stillness before your first line and another short still moment after your last line, before reaching for the phone. Trim the walk-in, walk-out, and extra pauses during editing. These pauses also help prevent the first or last word from being cut off.
Do not watch yourself continuously during delivery if a preview is available. It can pull attention away from the lens and make your delivery feel less direct. Check the preview between sections instead.
7. Record in Sections and Review Before Teardown
Long takes are sometimes appropriate, but they leave more chances for one interruption or mistake to spoil useful material. For most tutorials, record an introduction, each major step, a demonstration, and a conclusion as separate sections. If you stumble, restart the sentence or section rather than continuing through a confusing explanation.
Add supporting shots only when they clarify the point. For example, a tutorial about connecting a cable benefits from a close-up of the port; a cooking explanation benefits from a view of the ingredients and the pan; and a workspace walkthrough benefits from a wide overview plus closer views of important details. Supporting footage should provide information, not just visual movement.
Maintain continuity if your video spans multiple takes. Keep camera height, light direction, clothing, and major prop placement similar. A floor mark and setup photo help if you need to resume later. Before dismantling the setup, watch at least one representative clip from beginning to end. Confirm that the image is sufficiently sharp, the face is not too dark, speech is understandable, and the action stays in frame.
When you find a problem, fix the cause. A dark face calls for a lighting or camera-position change. Shaky footage calls for better support. Distant audio calls for a closer microphone or quieter setup. Diagnosing the cause is more reliable than relying on a later edit to hide the symptom.
8. Solo-Filming Checklist and Troubleshooting Guide
Use this sequence before every self-shot recording:
- State the video’s purpose in one sentence and write three to five beats.
- Choose vertical or horizontal orientation based on the viewer’s likely screen and the action being shown.
- Charge the phone, clear storage, clean the lens, and limit interruptions.
- Secure the phone at eye level for a talking-head shot, or at a position that shows the demonstration clearly.
- Face a soft light source and reduce strong backlight.
- Choose the quietest available space and position the phone or microphone for clear speech.
- Record a short test of normal speech and the biggest expected movement.
- Review framing, focus, light, and sound.
- Record in sections, leaving stillness before and after each take.
- Review a representative final clip before taking the setup down.
| Problem | What to try |
|---|---|
| Your face is dark while a window looks bright | Face the window or reposition the camera so the bright window is not behind you. |
| Your face is blurry but the background is sharp | Set focus on your face at your recording position, if supported, then retest. For movement, check whether autofocus keeps you sharp throughout. |
| The image looks shaky | Secure the phone rather than cropping tighter. Avoid touching its supporting surface during the take. |
| Your hands disappear during a demonstration | Widen or reposition the frame, or record a dedicated close-up. |
| Your voice sounds distant or echoey | Move the phone or microphone closer and choose a quieter, softer-furnished room. If a wide shot is essential, use closer audio capture or separately recorded narration. |
These are practical starting points, not fixed rules for every phone or location. Test your actual camera, light, movement, and audio.
FAQ
Do I Need a Tripod to Film Myself?
No. You need stable support, which may be a tripod, clamp, shelf, or other secure fixed surface. A tripod is convenient because it makes height and angle easier to adjust, but the essential requirement is that the phone stays still and cannot fall during the recording.
Should I Use the Front or Rear Phone Camera?
Use the option that best balances image quality with reliable framing. A rear camera may be useful when image quality is important, while a front camera can make it easier to see yourself while recording. Test both in your actual lighting and choose the one that gives you a dependable result.
Where Should I Look When Filming Myself?
Look into the lens for the parts where you are speaking directly to the viewer. Use the preview to set the composition, but avoid watching your own image throughout the take. A small reminder near the lens can help you keep your eye line consistent.
How Far Should My Phone Be from Me?
Put the phone far enough away to show the required action. For seated direct-to-camera video, a medium close frame is often practical and may keep the phone close enough for clear speech. For full-body movement or a hands-on demonstration, move farther back and test the largest motion.
If that wider framing makes speech hard to hear, keep the required view and improve audio separately with a compatible microphone near your mouth, a separate recorder, or narration recorded afterward.
What Is the Best First Upgrade for Filming Yourself?
Improve the weakest part of your current setup. If the video shakes, get stable support. If speech is difficult to hear, prioritize a quieter space or a closer microphone position. If your face is dark, change the direction or softness of the light. A useful upgrade solves a specific problem you can identify in a test clip.
Should I Make One Long Take or Record Multiple Clips?
For most solo tutorials, multiple short sections are easier to manage. You can redo only the section with an error, review important demonstrations immediately, and trim the clips more cleanly. One long take may suit a natural presentation, but it requires more preparation and leaves less room for correction.