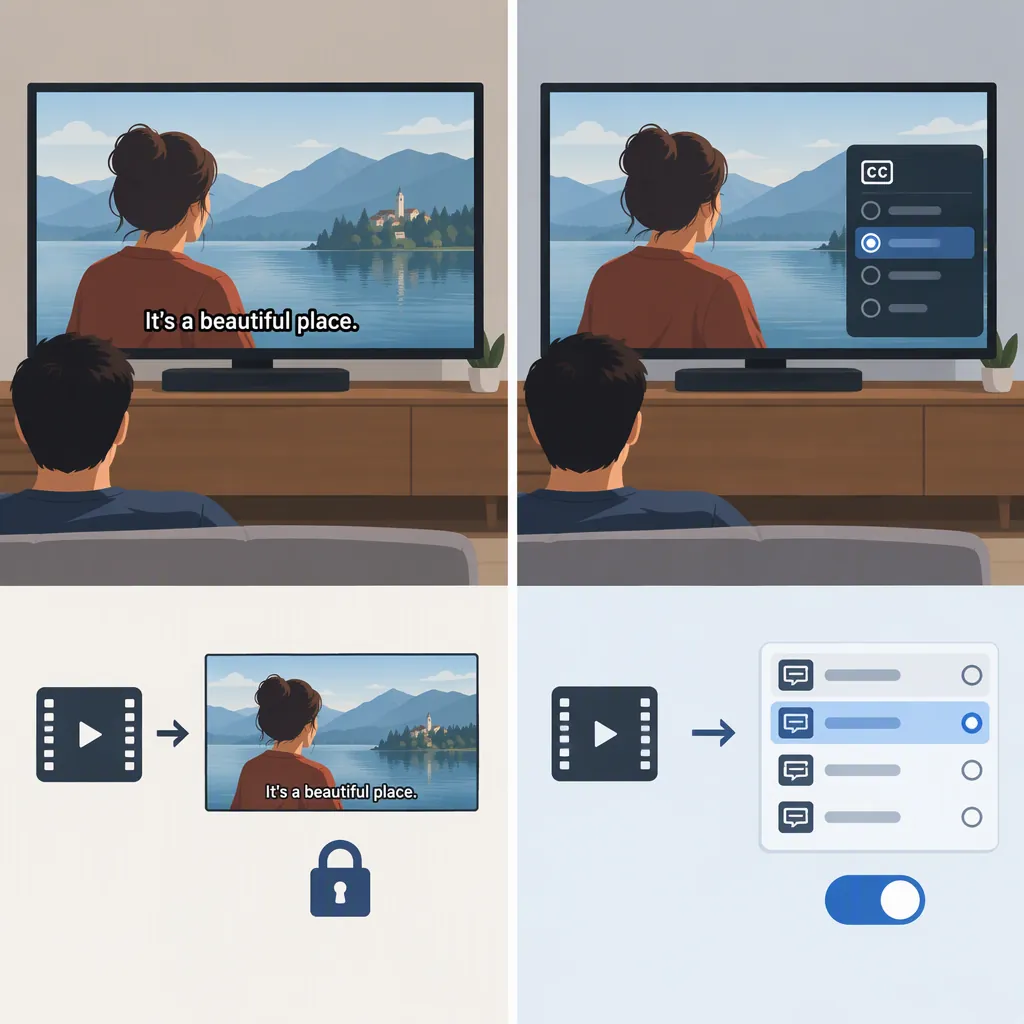
How to Hardcode Subtitles and When to Keep Them Switchable
To hardcode subtitles, prepare timed subtitle text, correct it, choose its appearance, and export the video with the text burned into the image. The subtitles become part of the video pixels, so viewers cannot switch them off. Keep subtitles separate when viewer control or later text corrections matter more than permanent display.
Hardcoded Vs. Switchable Subtitles
Hardcoding, also called burning in subtitles, writes the text into the video image. Switchable, or soft, subtitles remain separate from that image and are displayed by a compatible player. The supplied guides describe SRT and VTT files as examples of separate subtitle files. [c1] [c2]
| Consideration | Hardcoded Subtitles | Switchable Subtitles |
|---|---|---|
| How text is stored | Rendered into the video pixels | Kept separate from the video image |
| Viewer control | Cannot be switched off as a subtitle track | Can be enabled or disabled in a supporting player |
| Appearance | Fixed in the exported image | May be adjustable through player controls |
| Corrections | Require a new burned-in export to replace the text | Can be made in the subtitle file |
| Subtitle support | Does not depend on a separate subtitle file being loaded | Depends on the player or destination supporting the subtitles |
These are format-level differences, not guarantees that every destination will display a video without cropping or other changes. Treat claims that burned-in subtitles work “everywhere” as shorthand for not needing a separate subtitle renderer. [c1] [c2]
Choose the Format Before Editing
Choose hardcoded subtitles when the delivered video needs to show a specific caption design without asking the viewer to load or enable subtitles. Choose switchable subtitles when the viewer should have the option to hide the text. Those choices follow directly from how the two formats display subtitles. [c1] [c2]
For a flexible workflow, keep an uncaptioned master, editable subtitle text, and a separate burned-in delivery copy. This is a preservation recommendation: corrections to burned-in text require creating a new version rather than editing a switchable track in the existing export. [c2]
Before choosing burn-in, check the intended destination's current subtitle controls and preview behavior. The supplied references are vendor-authored guides, not comprehensive documentation of every platform's current requirements.
A Practical Subtitle Burn-In Workflow
The provided guides describe the same broad sequence: prepare subtitles, review the text and timing, style them, then render the video. Exact controls depend on the editor. [c2] [c3]
- Keep the source video unchanged. Work toward a separate output file so you retain an uncaptioned version.
- Prepare timed subtitles. Import an existing subtitle file where supported, or generate a transcript and turn it into timed captions. An SRT file contains numbered entries and start/end timecodes; it is not a video file. [c1]
- Correct the text. Review names, punctuation, missing words, and any transcription mistakes before rendering. The supplied guides explicitly include a correction stage. [c2] [c3]
- Check timing and line breaks. Play the sequence with audio and review where each caption starts, ends, and breaks onto another line. [c2] [c3]
- Set the appearance. Preview font size, color, background, and position. Avoid placing text at the extreme edges, especially when preparing different aspect ratios. [c3]
- Select burn-in output. Use an export option that renders the captions into the image—not merely a subtitle-file download.
- Inspect the exported file. Open the output independently of the editing project and confirm that the text remains visible without loading a separate subtitle file.
Do not assume that seeing subtitles in an editor or player means they have been hardcoded. The VLC guide distinguishes adding a subtitle file for playback from the later transcoding and overlay steps that make the text permanent. [c1]
Burn-In Export Checklist
- [ ] Preserve the uncaptioned source video.
- [ ] Save the editable subtitle text and timing.
- [ ] Review spelling, names, timing, and line breaks.
- [ ] Preview text size and position at the intended aspect ratio.
- [ ] Select a subtitle burn-in or overlay export option.
- [ ] Export to a new filename.
- [ ] Open the exported video without a separate subtitle file.
- [ ] Check the beginning, middle, end, and any recently corrected passages.
Hardcoding Subtitles in Vlc
The supplied Wondershare guide describes a VLC workflow using Media → Stream. It is a third-party walkthrough, not official VLC documentation, so menu names and availability should be checked in the installed version. [c1]
Its core sequence is:
- Add the source video in the Stream dialog.
- Enable Use a Subtitle File and select the subtitle file.
- Choose File as the destination and specify a separate output file.
- Enable Activate Transcoding and select a suitable profile.
- Open the profile settings, select the Subtitles tab, and enable both Subtitles and Overlay subtitles on the video.
- Save the profile settings and start the stream/export process. [c1]
The key distinction is the overlay step. Simply using Subtitle → Add Subtitle File displays subtitles during playback; the guide treats permanent embedding as a separate operation. Test a short representative clip before relying on this workflow for a full export. [c1]
Review the Export and Understand the Limits
A burn-in render preserves subtitle decisions in the delivered image—including mistakes. If you spot an error afterward, return to the editable source, correct it, and produce a replacement export. Switching off a subtitle track will not remove text already burned into the image. [c2]
For review, check the exported video at its intended viewing size. Look for difficult-to-read text, awkward breaks, timing errors, and captions close to crop boundaries. The Streamlabs guide specifically warns about subtitle placement across different aspect ratios. [c3]
This article does not establish rendering speed, transcription accuracy, file-size changes, or lossless output. The supplied sources include promotional claims about those subjects, but they do not provide independent testing here. Inspect the actual output rather than assuming a particular quality result.
FAQ
Does Adding an SRT File Hardcode Subtitles?
Not by itself. An SRT file supplies timed text for playback or editing. Hardcoding happens when that text is rendered into the video image during export. Adding an SRT in a player can leave the subtitles switchable.
Can Viewers Turn Off Hardcoded Subtitles?
No. Burned-in text is part of the image, not a subtitle track that a viewer can disable. To deliver a version without that text, use the uncaptioned source. The cited guides do not establish a method for recovering the original image from a burned-in copy.
Can I Correct Subtitles After Burning Them In?
You can correct the editable subtitle text and render a new video. You cannot edit the already burned-in text as a separate subtitle track in the existing export, so retain the source video and subtitle project.
Are Hardcoded Subtitles Better than Switchable Subtitles?
Neither is universally better. Hardcoding provides fixed text display without a separate subtitle file. Switchable subtitles preserve viewer control and keep the text separate from the image. Choose according to the delivery requirement rather than treating burn-in as an automatic upgrade.