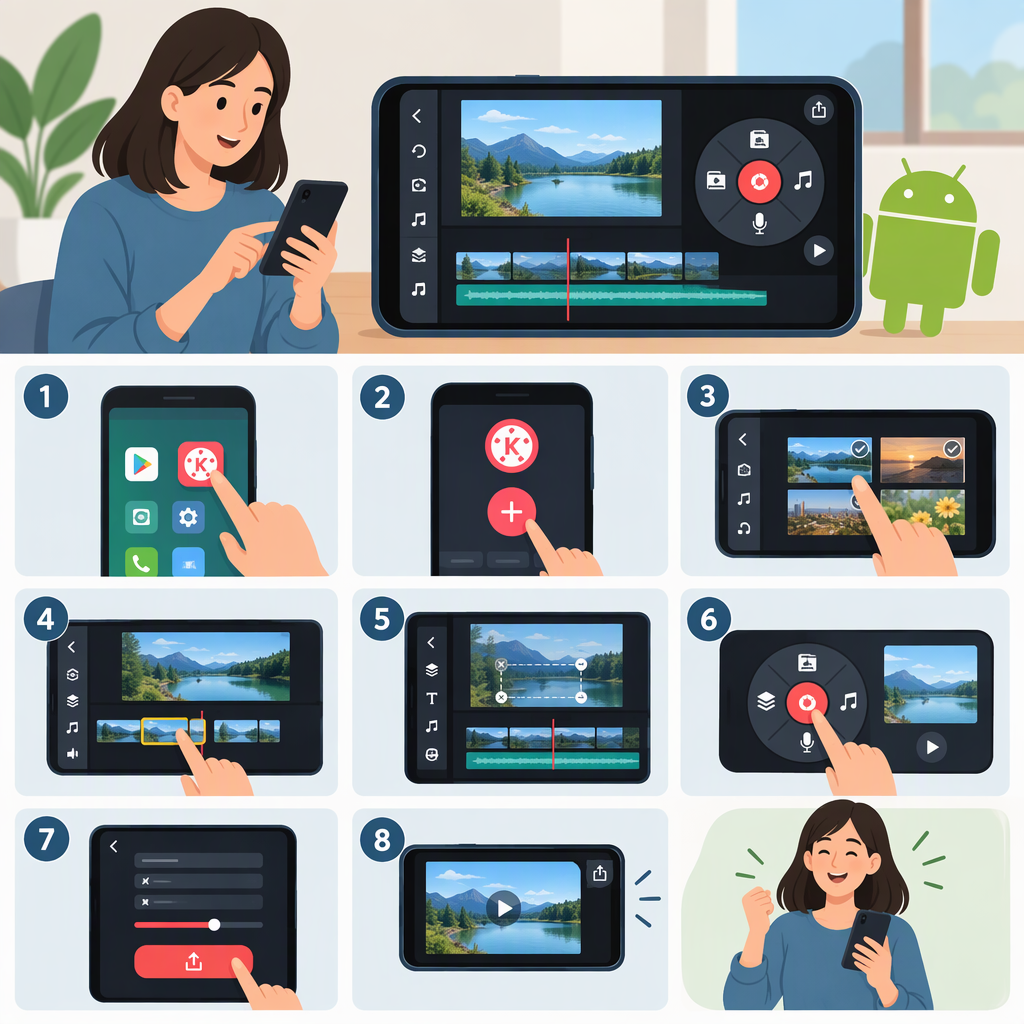
How to Use Kinemaster on an Android Phone: A Beginner’s Guide
KineMaster’s basic workflow is: create a project, add video or photos, edit the timeline, preview the result, then export a video file. The instructions below focus on that beginner workflow. KineMaster 8.0 introduced an optional portrait-oriented editing interface, and the official site announced version 8.2 in October 2026, so your screen layout or some controls may differ by app version and interface orientation. (kinemaster.com)
1. Create a Project and Choose the Frame Shape
- Open KineMaster and tap Create New on the Create screen. The Media Browser should open so you can choose video or image files for the main track. (kinemaster.com)
- Choose the project’s aspect ratio if prompted. Pick a shape that suits where you plan to show the video: 9:16 for vertical video, 16:9 for widescreen, or 1:1 for square. KineMaster lists these among its supported aspect ratios; the best choice depends on your intended framing and destination. (kinemaster.com)
- Select a video or photo from your phone to add it as the primary media. You can add more media as you build the project. If the editing screen is horizontal or vertical in a way you don’t prefer, KineMaster’s editing settings include options for the portrait interface and auto-rotate. (kinemaster.com)
Example: For a vertical clip intended for a phone-first social post, choose 9:16 before editing. For a conventional widescreen video, choose 16:9. Choosing the frame shape early helps you spot unwanted cropping while you edit.
2. Arrange Clips and Trim Unwanted Footage
Your project appears on a timeline. The playhead marks the point in the video shown in the preview. Tap a clip or layer to select it and show its editing controls.
- Arrange: Put the footage in the order you want viewers to see it. Preview between changes to check the sequence and pacing.
- Trim: Shorten the beginning or end of a clip. For a layer, KineMaster describes dragging the yellow trim handles at its edges to set when it appears and disappears. (kinemaster.com)
- Split: Divide a clip at a chosen point when you want to remove or treat one section separately. Look for the split option in the selected clip’s editing tools; the exact control placement can vary with the interface layout.
A useful first edit is to remove a pause at the start or end of a recording. Move the playhead to check where the wanted action begins, then shorten the clip and preview the cut. Trimming changes a clip’s visible duration; splitting divides it into separate sections so you can edit them independently.
3. Add a Title or Background Music (Optional)
Keep finishing touches simple at first. A short title and quiet background music can be enough; preview the result to ensure text stays readable and music does not overpower speech.
Add a Title
- Tap Layer, then Text.
- Type the title and confirm it.
- Adjust its appearance in the styling panel and position it in the preview.
- Set how long it appears by adjusting the text layer’s timeline handles. (kinemaster.com)
Add Music
- Open the project and tap Audio.
- Browse or search the audio library, then preview a track.
- Tap the + button to add the selected track to the timeline.
- Trim or position the music to fit the video. If you use narration, lower the music so speech remains clear. KineMaster’s music feature page also describes Loop and Ducking options. (kinemaster.com)
Use audio you have permission to include. If choosing a track from KineMaster’s library, check the terms associated with that specific track and your intended use.
4. Preview, Make Corrections, and Export
Play the project from the beginning and watch through to the end. Check that the clips are in order, the framing looks right, titles appear for long enough, and audio levels are comfortable. Fix any issue on the timeline, then preview again.
When ready, open KineMaster’s save or export controls. Available settings can depend on the phone and app version. KineMaster lists export options including SD, HD (720p), FHD (1080p/2K), and QHD (4K), frame rates up to 60 fps, H.264 or H.265, and adjustable bitrate. A phone may not support every setting; KineMaster’s guidance says to check Settings → Device Performance for device capability. (kinemaster.com)
For a straightforward first export, choose a resolution and frame rate suited to your source footage and intended use rather than automatically selecting the highest setting. Larger or more demanding exports can require more device capability and storage. After exporting, check the completion screen; if you need to locate the video afterward, look in your phone’s Gallery or Photos app. The exact save location can vary, so check the app’s export screen or your device’s file browser if it is not immediately visible.
Quick First-Project Checklist
- Choose the aspect ratio before editing.
- Add your footage and arrange it in viewing order.
- Trim unnecessary pauses; split only when you need to edit sections separately.
- Add text or music only if it helps the video.
- Preview the full project before exporting.
- Pick export settings your phone supports, then confirm the resulting video is saved.
Terms: The timeline is where clips and layers are arranged over time. Trimming shortens a clip or layer. Splitting divides a clip into separate sections. Aspect ratio is the shape of the video frame, such as vertical 9:16 or widescreen 16:9.