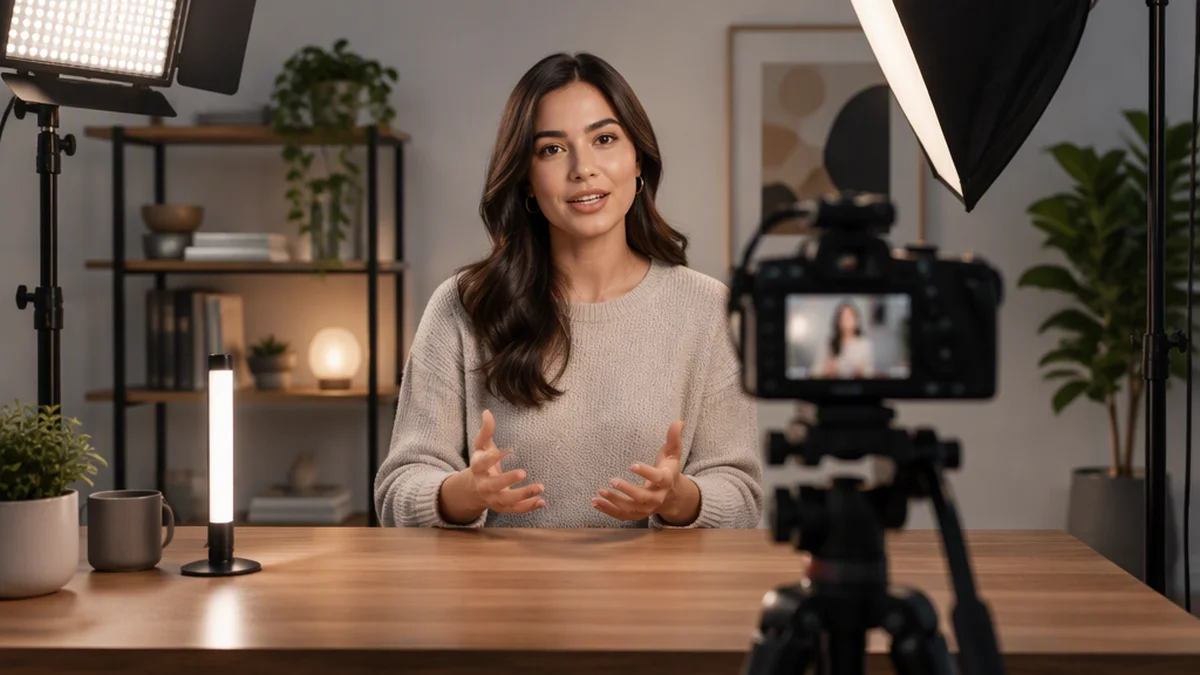
GVM Light: How to Choose the Right GVM Lighting Setup for Filming
Choose a GVM light by matching the fixture type, output, softness, power options, and mounting requirements to your filming space. A panel is a practical starting point for desk videos and interviews; a COB or monolight-style fixture is worth considering when you need directional light and compatible modifiers. Tube and pocket lights can be useful for accents or tight spaces, but their suitability as a key light depends on the exact model’s output.
This guide helps you choose a GVM lighting category and setup, rather than ranking individual models. The GVM lighting installation and use guide describes fixture categories and panel installation, but does not provide the model-specific specifications needed for a product comparison.
Start with the Filming Task
Before comparing products, decide what the light must illuminate and where it can be placed.
- Talking-head videos and livestreams: Prioritize a fixture that fits near the camera, is easy to adjust, and provides enough output at the presenter’s distance. Check operating noise if a microphone will be nearby.
- Interviews: Allow room for a stand and diffusion. Compare output at the actual subject distance, not just the fixture’s wattage.
- Product filming: Look for controllable brightness and flexible positioning. Reflective products often need a broad, soft source whose reflection can be shaped.
- Full-body subjects or larger scenes: Check coverage as well as output. A light that works close to a face may not illuminate a larger area evenly.
- Location work: Give more weight to carrying weight, setup time, supported power options, and secure mounting.
Use these priorities to identify a suitable category, then check the exact product’s manual and specification sheet before buying.
Choose the GVM Light Type
The official GVM guide lists panels, monolights, softlights, tube lights, pocket lights, flexible lights, and streaming lights. Use the following category comparison as a starting point, not as a claim about every model.
| Light type | Useful starting applications | What to check before buying |
|---|---|---|
| LED panel | Desk videos, interviews, livestreams, general content | Output at the subject distance, emitting surface size, diffusion options, stand or camera mounting |
| COB or monolight-style fixture | A key light that needs directional control or modifiers | Exact modifier mount, compatible softboxes or reflectors, output with the intended accessory, stand requirements |
| Softlight or flexible light | Broad illumination or placement in awkward spaces | Emitting area, output, supported mounting method, power requirements |
| Tube or pocket light | Background accents, edge light, small-space fill | Output and beam coverage before relying on it as the main light |
| Streaming light | A fixed desk or camera-facing setup | Placement options, controls, power method, and coverage of the presenter |
A larger emitting surface generally produces softer shadows when it is close to the subject. A small source farther away appears smaller and tends to produce harder shadows. Moving a light closer can soften its shadows, but may also change coverage and exposure; reduce brightness as needed.
For COB or monolight-style fixtures, do not assume that a softbox, grid, or reflector fits simply because it is sold for studio lighting. Verify the mount and accessory compatibility for the exact fixture.
Compare Specific Candidates at Your Working Distance
Once you have chosen a category, shortlist exact GVM models—not just product families or kit names. Compare the specifications that affect your setup, and mark missing information as not provided rather than inferring it from another model.
Wattage alone does not tell you how much light reaches the subject. Look for illuminance, usually reported in lux, measured at a stated distance and under stated conditions.
Use this template for each candidate:
| Field | What to record |
|---|---|
| Exact model | Product name and version, if applicable |
| Fixture type | Panel, COB or monolight-style fixture, tube, or another category |
| Illuminance and test conditions | Published lux value, measurement distance, color temperature, brightness setting, modifier, and measurement position |
| Color functions | Fixed or adjustable white light, stated color-temperature range, and supported color modes |
| Modifier compatibility | Exact mount and supported accessories |
| Power | Supported mains adapter or battery system |
| Included equipment | Stand, modifier, batteries, chargers, or other accessories supplied with that listing |
| Data source | Exact model’s specification sheet, manual, or manufacturer response |
Example comparison rule: A value measured at 1 meter with a reflector is not directly comparable to a value measured at 2 meters through a softbox. Different beam widths can also produce different center readings without providing the same coverage.
Distance generally reduces illumination, while diffusion and other modifiers can reduce the light reaching the subject. A high center reading therefore does not establish that a fixture will evenly illuminate a face, product, or full-body subject.
If useful output data is missing:
- Ask the manufacturer for the measurement distance, color temperature, brightness setting, and modifier used.
- Avoid ranking products from wattage or an unexplained brightness claim.
- If you can test the fixture before committing, use your intended camera settings, light position, and modifier. Confirm that it achieves the exposure and coverage you need, ideally with some output available for adjustments.
There is no single lux target for every filming setup: camera exposure, ambient light, subject distance, and the intended look all affect the requirement.
Check Color, Power, Controls, and Space
Color Control and Reproduction
For interviews, talking-head videos, and natural-looking product footage, prioritize usable white light. Adjustable color temperature can help match daylight, indoor lighting, or another fixture; a fixed-color light may be sufficient in a controlled scene.
Color-temperature range does not establish color accuracy. Check how skin tones and relevant product colors look on camera, particularly when the GVM light is mixed with other sources. If a listing provides CRI or TLCI ratings, note the stated test conditions rather than treating a headline score as a substitute for a camera test.
For colored backgrounds or creative effects, verify that the exact model supports the RGB or other color modes you need. Adjustable white-light color temperature is not the same feature as selectable colored light. If colored output will illuminate the subject rather than just the background, test its exposure and appearance in the intended mode.
The GVM guide describes brightness adjustment and color-temperature mode switching for a panel without clearly identifying its model. Verify the range, modes, and adjustment method on each candidate.
Power and Portability
Mains power may be simplest for a fixed desk or studio. For location work, confirm:
- The supported battery system, if any
- Whether batteries, chargers, and adapters are included
- Runtime information under stated operating conditions
- The space needed for cables and power accessories
Do not infer battery compatibility from the brand or fixture category alone.
Controls and Remote Operation
The official guide mentions rear-panel controls and a GVM mobile app, but it does not establish app compatibility across the range. Check support for the exact fixture and the functions you need.
Remote control is useful when reaching the light would disturb the shot. For a simple, accessible one-light setup, physical controls may be enough.
Space and Operating Noise
Allow room for the fixture, stand, modifier, cables, and safe movement. A softbox can make a compact fixture into a much larger setup.
If the light will be close to a microphone, check documented fan or operating-noise information where available. During a test recording, listen for noise rather than evaluating the image alone.
Example GVM Lighting Setups
These are illustrative arrangements, not performance claims or recommendations for specific models.
Desk-Based Video
Start with a compact panel slightly above eye level and to one side of the camera. Adjust its angle and brightness while monitoring facial shadows and exposure. Add compatible diffusion if the light appears too hard, allowing for the resulting output loss.
When comparing candidates, prioritize mounting that fits your desk area, convenient controls, and enough output at your seated distance.
Interview in a Small Room
Use a larger panel or a COB-style fixture with a compatible soft modifier as the key light. Begin with that one source, then decide whether the background or subject separation needs another fixture. Keep stands and cables clear of the interview area.
Compare candidates with the intended modifier in mind: bare-fixture output alone will not tell you how the finished setup performs.
Reflective Product
Position a broad, diffused source so that its reflection looks controlled on the product. Change the source angle and size before simply increasing brightness. Black cards or flags can help shape unwanted reflections without obstructing ventilation.
Check both the reflection shape and the product’s color on camera before recording.
Compact Location Scene
Confirm power, mounting, and output at the planned distance before choosing a portable fixture as the key light. A small tube or pocket light may be more useful as an accent than as the main source for a large scene.
Verify the Setup Before Recording
The GVM installation guide describes attaching a panel to a U-shaped bracket with a locking knob, connecting a power adapter, and using stand or tripod mounting options. Because the panel model is not clearly identified, follow your exact product manual rather than applying those instructions to every fixture.
Before recording, check:
- Stability: The stand and mounting hardware securely support the fixture and modifier.
- Cable safety: Cables cannot trip people or pull the light down.
- Ventilation: Modifiers, cards, and nearby objects do not block airflow.
- Image quality: Exposure, color, shadow softness, coverage, and reflections suit the shot.
- Recording behavior: No visible flicker or unwanted exposure changes appear at the camera settings you intend to use.
- Sound and heat: Operating noise is acceptable, and the fixture is used within its documented requirements.
Do not use damaged cables or unstable hardware. Add suitable stand weight where appropriate, and allow hot equipment to cool before packing.
FAQ
Does a Brighter GVM Light Always Produce a Better Image?
No. More available output can help at longer distances or when using diffusion, but excessive illumination can clip highlights or make the subject uncomfortable.
Brightness and shadow hardness are different issues. Dimming controls exposure; changing the source’s apparent size controls softness. A small source can still cast hard shadows when dimmed. Use a larger source, suitable diffusion, bounce, or closer placement when softer shadows are needed.
Can One GVM Light Be Enough?
Yes, for some scenes. Start with one well-positioned key light and assess the result. Add another fixture only if you need separate control over fill, the background, subject separation, or reflections.
What Should I Do If a GVM Listing Omits Important Specifications?
Identify the exact model and request the missing information before buying—especially output test conditions, modifier compatibility, power support, and included accessories. The general installation guide does not establish those details for every product.