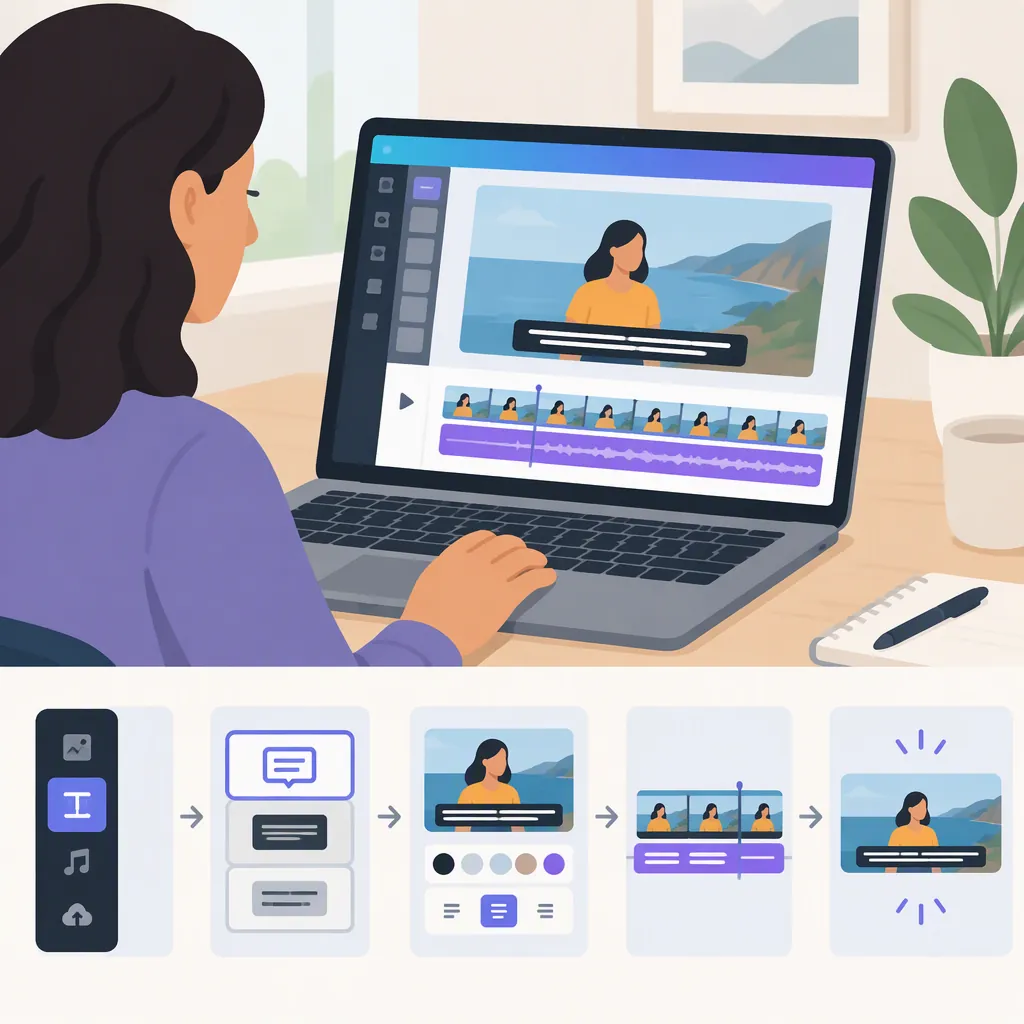
How to Add, Edit, and Time Subtitles in Canva
To add subtitles to a video in Canva manually, create a text box for each short caption. In the documented workflow, select all caption text, open the three-dot menu, choose Show Timing, and expand the timing view. Then adjust each text element to match the speech and preview the result. [c1]
This method creates timed text on the video’s picture; it should not be treated as a way to create an independent subtitle file or a viewer-toggleable caption track.
Scope and evidence: LaShonda Brown’s March 9, 2024 tutorial demonstrates this manual workflow in an Instagram Story–sized project intended for Reels. Controls may differ in your current Canva editor. The official Canva lesson cited here returned an “Unsupported client” notice, so it does not verify current automatic-caption features, supported languages, plan requirements, or subtitle-file import support. [c1] [c3]
Choose a Subtitle Workflow
For a short clip with only a few captions, manually placed and timed text boxes are a straightforward starting point. Brown’s tutorial documents uploading a clip, preparing caption text, styling text boxes, and using Element Timing to control their appearance. [c1]
For longer recordings, prepare a transcript or subtitle draft before placing text. A transcription tool can provide a starting draft, but review it against the recording. HappyScribe’s page describes generating subtitles, editing wording and timing, and exporting subtitle files or a video with subtitles burned in. These are third-party descriptions, not confirmation that Canva accepts those subtitle files. [c2]
Workflow Decision Checklist
- A few caption segments: Start with manually timed text boxes.
- An existing transcript: Divide it into short phrases before placing text.
- An SRT or VTT file: Verify import support in your current project before relying on a file-based workflow.
- A video with subtitles already burned in: Keep the original recording and editable subtitle source for corrections.
Prepare the Video and Caption Text
- Upload and prepare the video. Complete the major cuts and visual adjustments before timing captions. Brown’s tutorial begins by uploading and preparing the clip. [c1]
- Listen and transcribe. Write down the speech, using the recording—not an assumed script—as the final check.
- Split the transcript into short phrases. Use natural pauses and avoid placing an entire paragraph in one caption.
- Check the wording. Review names, numbers, specialized terms, omissions, and punctuation before adding the text.
Brown drafts captions line by line in the Notes area before copying them into text boxes. If that area is unavailable in your layout, use a separate plain-text document as your working draft. [c1]
Caption Planning Worksheet
Copy these fields for each caption:
- Caption number:
- Start time:
- End time:
- Words spoken:
- Text to display:
- Spelling or punctuation checks:
- Timing checked: Yes / No
Illustrative example—not a transcript of your video:
| Field | Example |
|---|---|
| Caption number | 1 |
| Start time | 00:00:01.000 |
| End time | 00:00:03.500 |
| Words spoken | Let’s review the first step. |
| Text to display | Let’s review the first step. |
| Wording check | Confirm against the audio. |
| Timing checked | No |
Add Text Boxes and Set Their Timing
The sequence below follows Brown’s 2024 tutorial. It records a short, vertical-video workflow rather than verifying identical controls in every current Canva project. [c1]
- Add the first caption. Open the Text tab, add a text box, and paste the first phrase.
- Choose a readable style. Set a clear font and place the caption where it will not obscure important visual content. Consider a background behind the text if the footage makes it difficult to read.
- Duplicate the text box. Replace the wording in each copy with the next caption segment. Reusing the box keeps styling consistent. [c1]
- Select all caption text. In the tutorial, the timing setup begins with all the caption text selected—not just one caption.
- Open the timing controls. Click the three-dot menu and choose Show Timing.
- Expand the text-element list. Click the small arrow in the timing view to reveal the individual text boxes. [c1]
- Adjust captions individually. Select each text element and adjust when it starts and stops. Match its appearance to the relevant speech rather than leaving it visible throughout the clip.
- Preview and correct. Play the video, then adjust captions that appear too early, too late, or too briefly. The tutorial explicitly includes playback to check timing. [c1]
If you cannot find Show Timing, check the controls available in your current editor. The cited tutorial does not establish that the label or location remains the same across interfaces.
Edit Subtitles and Check Synchronization
Review wording, appearance, and timing separately so that one type of correction does not distract from another.
- Wording: Compare each caption with the audio. Correct omissions, duplicated words, names, numbers, and punctuation.
- Appearance: Check contrast, line breaks, and placement across both light and dark scenes.
- Timing: Listen for the first and last word of each phrase while watching when the text appears and disappears.
- Continuity: Look for unintended gaps, overlapping captions, or a previous caption lingering into the next sentence.
To revise the manual captions, change the wording in the relevant text box and recheck its timing. If the replacement text is substantially longer, consider splitting it into shorter segments.
Preview playback after making changes; this is part of the documented manual workflow. If you change the video’s cuts or duration afterward, repeat the synchronization check. [c1]
Save, Export, and Review the Finished Video
After editing, confirm that your latest changes are saved, then use the video-export options available in your current Canva project to obtain the finished video file.
The cited manual tutorial does not document the export sequence, so this guide does not specify a current button path or promise particular format options. [c1]
Check the downloaded file rather than relying only on the editor preview:
- Watch with sound to assess whether captions match the speech.
- Watch muted to assess readability and whether the text communicates the intended content.
- Return to the editable project if corrections are needed, then export and check the revised file again.
Final Subtitle Review Checklist
- Every intended spoken segment has matching text.
- Names, numbers, and specialized terms match the audio.
- Captions start and stop with the corresponding speech.
- Text remains readable across changing backgrounds.
- Captions do not cover important visual details.
- No unintended text overlaps remain.
- The exported video has been checked with sound and muted.
- The original recording and editable caption draft have been retained.
Understand Text Overlays, Subtitle Files, and Burned-In Subtitles
These outputs are not interchangeable:
- Timed text overlays: The method in this guide uses text boxes placed on the video and timed in the editor. It is not a documented SRT-export workflow. [c1]
- Subtitle files: SRT and VTT are separate files containing subtitle text and timing information. HappyScribe describes exporting these formats, but its claim that they can be imported and automatically synchronized in Canva is not independently verified here. [c2] [c3]
- Burned-in subtitles: The text is embedded in the video picture, rather than supplied as a separate, viewer-toggleable track. HappyScribe describes this as an alternative when an editor does not accept subtitle files. Corrections should be made from the editable source and the video exported again. [c2]
Before choosing a file-based workflow, check the actual import options in your project. Uploading a video with captions already visible is not the same as importing editable subtitle text.
Keep the original recording, caption draft, and timing notes. Do not assume that creating timed text boxes will also produce an SRT file or switchable captions.
FAQ
Can Canva Automatically Generate Subtitles?
This guide does not confirm current automatic-subtitle availability. The cited tutorial documents manually timed text boxes, while the official lesson could not be accessed as instructional content. Check your current editor for available caption-generation options. [c1] [c3]
How Do I Change When a Caption Appears in Canva?
In the documented workflow, select all caption text, open the three-dot menu, choose Show Timing, and expand the text-element list. Then select each caption individually, adjust its start and stop timing, and preview playback. Current controls may differ from the 2024 tutorial. [c1]
How Do I Edit the Subtitle Wording?
For the manual text-box method, change the text in the relevant box, then preview it again. Check both the wording and the time available to read it; split a long replacement into shorter captions if needed. The tutorial uses separate, duplicated text boxes for caption segments. [c1]
Can I Import an SRT File into Canva?
HappyScribe says exported subtitle files can be imported into Canva, but that claim is not verified by usable official documentation here. Confirm support in your current project before relying on it. The documented alternative in this guide is manually timed text boxes. [c1] [c2] [c3]
Does This Method Create Subtitles Viewers Can Turn Off?
Do not treat this workflow as creating switchable captions. It documents timed text elements on the video, not an independent subtitle track or SRT export. If you need viewer-toggleable captions, verify the subtitle-file and playback requirements of the destination platform separately. [c1]