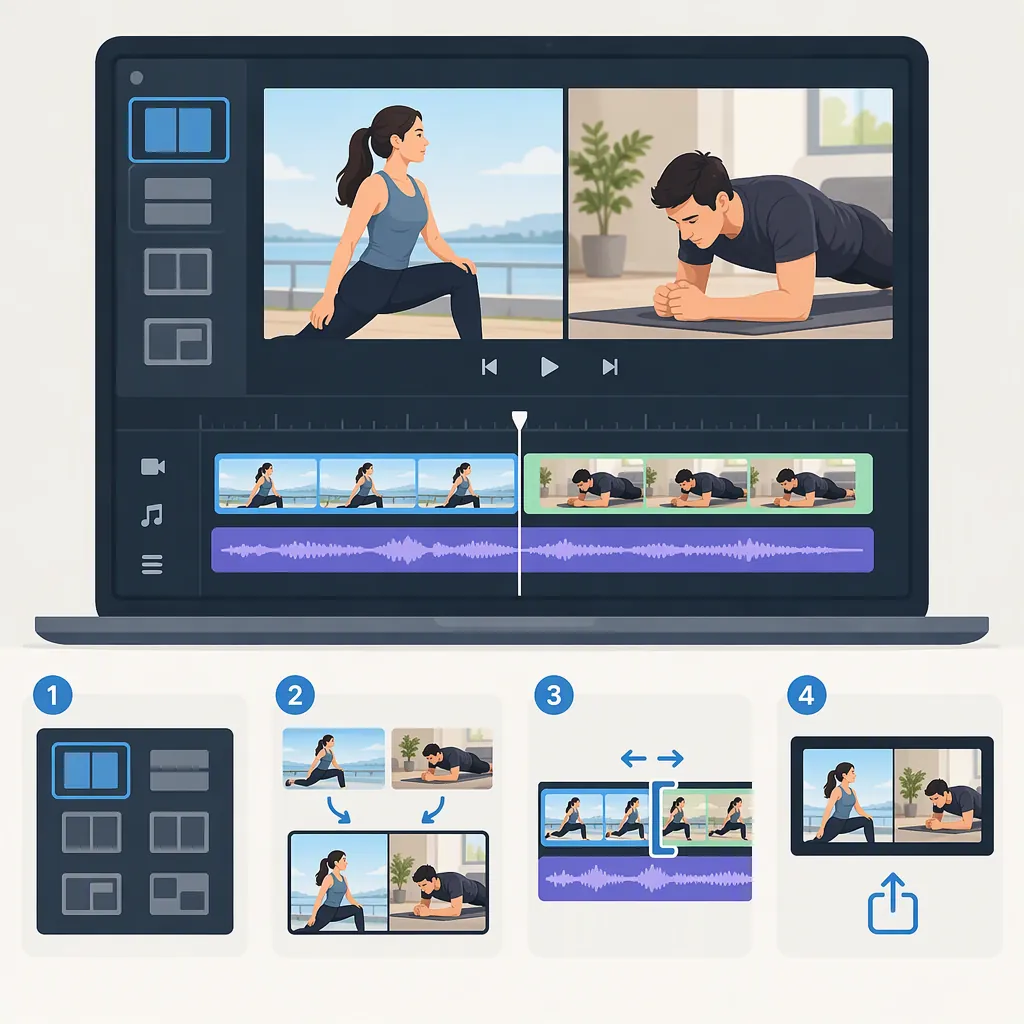
Split Screen Video Editor: How to Trim and Arrange Clips
A split screen video editor combines two or more video views inside one output frame. The basic workflow is to import clips, arrange them as separate layers or panels, resize or crop each view, and export the composition. Split screen describes the visual layout; trimming describes changes to a clip’s start or end. [src1] [src2]
Choose Controls, Not Just a Split Screen Label
Look for a workflow that lets you place multiple clips in the same frame and adjust their size and position. The supplied sources describe both layered compositing and preset layouts, including side-by-side views and grids. [src1] [src2]
Before committing to an editor, test these controls with a short sample:
- Can the required number of clips appear simultaneously?
- Can you reposition or crop each panel independently?
- Can you adjust each clip’s timing?
- Can you control which audio tracks remain audible?
- Does the exported file preserve the intended layout?
Treat these as evaluation questions, not promises about any particular application. A preset may be sufficient for a fixed two-panel composition; a more flexible layout is worth testing when panels need to appear at different times.
Editor Evaluation Worksheet
Required panel count: ____
Output shape: ____
Clips must appear simultaneously: Yes / No
Independent positioning and cropping tested: ____
Timing adjustments tested: ____
Audio controls tested: ____
Short export reviewed: ____
Unresolved limitations: ____
Trim and Align Clips Before Refining the Layout
Decide whether the clips should show the same moment or simply play together. For example, a proposed interview layout might require synchronized views, while a proposed comparison might use independently recorded footage.
Use this editing sequence as a practical starting point:
- Import the clips and keep the original files unchanged.
- Choose the material you want to retain in each clip.
- Trim unwanted material from the beginning and end.
- Place the clips so their intended visible intervals overlap.
- If the recordings share an event, use a clear sound or visible action as an alignment reference.
- Review both the beginning and end of the overlap before refining the composition.
The supplied split screen tutorial includes importing clips, choosing a layout, editing, and exporting. The alignment sequence above is general workflow guidance, not a verified set of application-specific commands. [src2]
Clip Timing Plan
Clip label: ____
Material to retain: ____
Planned appearance time: ____
Planned disappearance time: ____
Shared alignment event, if any: ____
Audio to keep or mute: ____
Beginning and end reviewed: ____
Arrange Panels and Check the Result
Split screen is a composition inside a single video frame, not a collection of separate desktop windows. A supplied forum explanation describes resizing, moving, and potentially cropping individual video layers to create that composition. [src1]
Start with a simple arrangement: two equal panels for a balanced comparison, or a larger main view with a smaller supporting view when one subject should take priority. These are design suggestions rather than rules.
For each panel, check that the intended subject remains visible throughout the retained footage. Avoid stretching the image merely to fill a panel; instead, decide whether to crop the edges or leave space around the image. Review captions and labels at the intended viewing size.
Before exporting the full project, make a short test that includes a panel entrance or exit and any important shared action. Review the exported file—not only the editing preview—for timing, framing, unintended empty panels, and the audio you intended to retain.
Export Review Checklist
- Confirm that every intended panel appears.
- Check panel entrances and exits.
- Check that important subjects are not cropped out.
- Check labels and captions at the intended viewing size.
- Listen for unwanted audio tracks.
- Check shared actions for alignment.
- Inspect the finished file’s shape and framing.
Understand the Source Limitations
The references used here provide a vendor-authored split screen tutorial and a community discussion. The tutorial supports the basic composition workflow; the discussion explains layering and includes individual users’ software suggestions. Neither is an independent comparative test. [src1] [src2]
This guide therefore does not rank editors or verify current pricing, device compatibility, export limits, or performance. Use a representative sample project to assess those requirements in the version and environment you plan to use.
FAQ
Is Splitting a Clip the Same as Making a Split Screen Video?
No. Splitting a clip refers to dividing footage into timeline segments. Split screen refers to displaying multiple views inside one frame, as illustrated by the supplied side-by-side and grid layout tutorial. Check which operation an editor’s “split” command performs. [src2]
Can I Use One Video in Multiple Panels?
Yes. The supplied tutorial describes copying a single video and cropping or trimming the copies to produce multiple views within the same frame. Decide what each panel should show before adjusting the copies. [src2]
Do I Need a Split Screen Template?
Not necessarily. The supplied sources describe both preset layouts and manual arrangement through resizing and positioning. A template can provide a starting arrangement, while manual controls allow you to shape the composition around your footage. [src1] [src2]