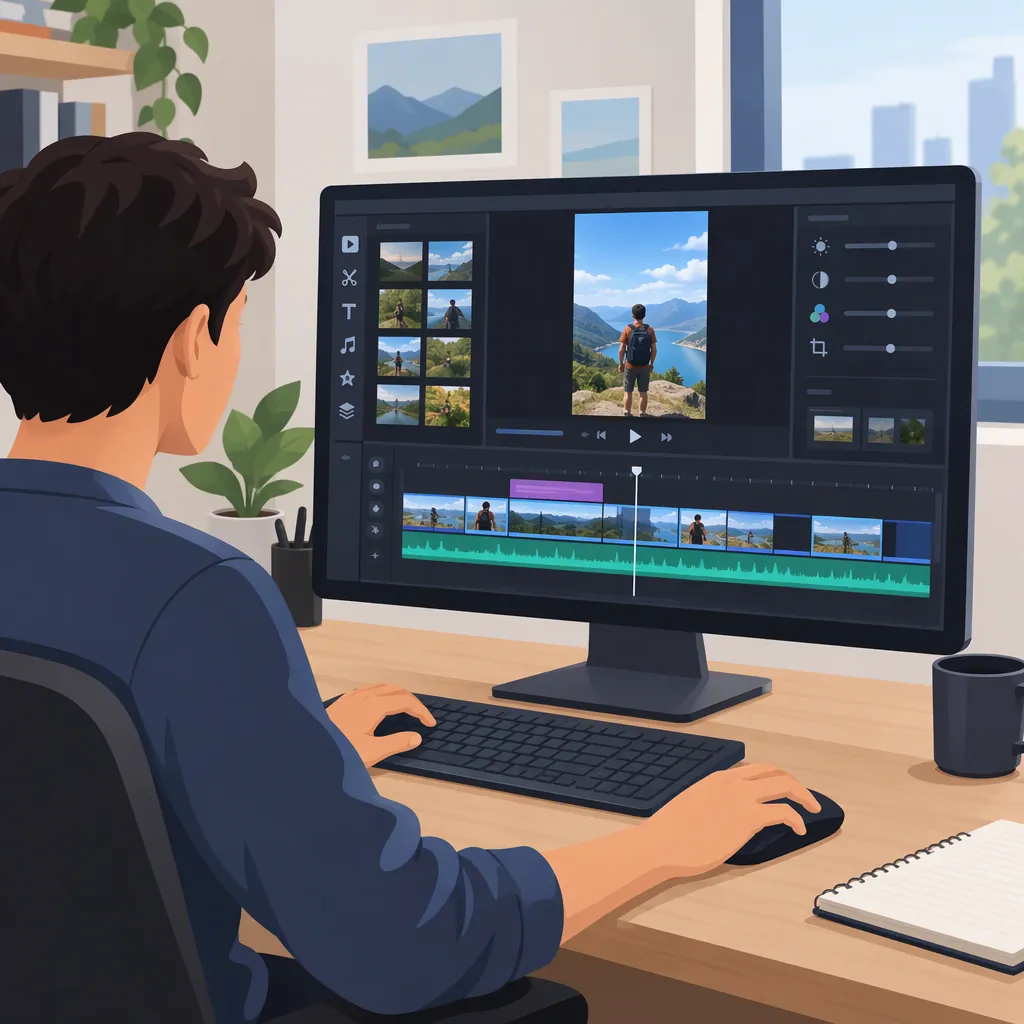
How to Edit TikTok Videos on PC: A Step-By-Step Workflow
To edit TikTok videos on a PC, import your footage into a video editor, trim and arrange it on the timeline, set vertical framing, add captions, balance the audio, and export a finished file. For a vertical video, 9:16 at 1080 × 1920 pixels is a practical starting point—not a universal upload requirement. WeVideo’s guide describes the import–customize–export workflow and lists these dimensions. [c1]
The steps below explain a tool-independent PC workflow, including how to use the timeline and remove mistakes. Menu names and available controls depend on your editor.
1. Choose and Test Your PC Editor
Choose an editor that works in your Windows environment and provides the controls your project needs:
- Importing your footage and audio files
- Trimming, splitting, and rearranging clips
- Setting a vertical canvas and repositioning footage
- Adding text or captions
- Adjusting audio levels
- Exporting a video file
Keep editing and publishing separate: prepare the video on your computer, then check it in TikTok’s upload preview before posting.
Run a Short Test Project
Before spending time on the full edit, test the complete workflow with one expendable clip:
- Import the clip: Add it to the editor’s media area, then drag it onto the video timeline.
- Trim the beginning: Select the timeline clip and move its left edge inward to remove unwanted opening footage. If your editor uses a separate trim panel, adjust the starting point there.
- Set vertical framing: Choose a 9:16 canvas or vertical preset, then reposition the picture so the subject remains visible.
- Add text: Insert a short label and set its duration to cover only the relevant part of the clip.
- Export the test: Save a video file and open it outside the editor.
- Check the result: Look for unwanted watermarks, cropping, unreadable text, or sound problems before starting the full project.
Tool and Specification Notes
This is a general editing method, not a guide to a particular software interface. Hollyland’s editing guide supports the sequence of trimming, splitting, and reordering before styling, but its detailed controls are primarily mobile-oriented. [c3]
TikTok’s business Creative Center includes a page titled “TikTok official free editing platform | TikTok Video Editor.” The available page excerpt does not establish its full controls, account eligibility, or suitability for ordinary creator posts, so it should not be assumed to duplicate the mobile editor on PC. [c2]
2. Organize Footage and Set Vertical Framing
Create a project folder with separate locations for original clips, audio, and exports. Keep the originals unchanged so you can return to them if an edit goes wrong.
Import the footage you expect to use. Review each clip, then drag the useful clips onto the timeline in the intended story order.
For a vertical TikTok project, choose a 9:16 canvas. Consider 1080 × 1920 pixels for the output, as listed in WeVideo’s guide. These are practical starting settings, not a statement that TikTok accepts only this size or orientation. [c1]
Reframe Each Shot
Select a clip and inspect it in the preview:
- For vertical footage: Check whether the subject fits the canvas without unnecessary cropping.
- For horizontal footage: Choose between cropping around the subject and preserving the wider picture with space above and below it.
- For moving subjects: Play the entire shot to ensure the subject does not leave the visible area.
- For stretched footage: Correct the scaling so people and objects retain their proportions rather than forcing the picture to fill the frame.
Repeat this check for every clip. A framing adjustment that works for one shot may not work for the next.
3. Trim, Split, and Arrange Clips on the Timeline
Build the basic sequence before adding effects. Trimming, splitting, and reordering are foundational editing steps in Hollyland’s guide; the PC instructions here describe the method rather than its mobile button locations. [c3]
The timeline shows when clips play. The playhead marks the position currently shown in the preview. A clip’s left and right edges represent its starting and ending points.
Trim Unwanted Footage from the Ends
- Select a clip on the timeline.
- Move the playhead near its beginning and play the opening.
- Drag the clip’s left edge inward to remove setup time or an unwanted pause.
- Check the ending and drag the right edge inward to remove trailing footage.
- Play the trimmed clip to ensure you have not cut off a word or necessary action.
If your editor offers timeline zoom, enlarge the area around the cut for finer adjustment. Exact controls and labels vary.
Remove a Mistake from the Middle
For example, suppose a spoken clip contains a false start between two useful sentences:
- Locate the mistake: Play the clip and pause just before the unwanted passage.
- Select the clip: Make sure the split will affect the intended video segment.
- Split at the playhead: Use the editor’s split or cut command.
- Find the end of the mistake: Move the playhead just after the unwanted passage and split again.
- Delete the middle segment: Select only the unwanted piece and remove it.
- Check for a gap: Some deletion methods close the space automatically; others leave an empty interval. If a gap remains, move the following clip next to the preceding one.
- Review the join: Play from before the first cut to after the second. Adjust the clip edges if you have removed part of a word or left an awkward pause.
When rearranging clips, check whether associated audio, captions, or other elements have moved with them. Review their timing again after any sequence change.
Reorder and Review the Sequence
Move clips into the order that best explains the idea. Watch each join for missing information, abrupt movement, overlapping clips, or unintended gaps.
Let the content determine the pace. A demonstration may need a longer uninterrupted shot; a montage may use shorter clips. Add a transition only when it helps communicate a change of scene or time. This workflow does not promise a particular view count or algorithmic result.
4. Add Captions and On-Screen Text
Add captions once the main cuts are settled. If your editor offers automatic transcription, compare every line with the recording. Hollyland recommends correcting transcription errors, including those involving proper nouns and fast speech. [c3]
If automatic captions are unavailable, add short text segments manually and align each one with the corresponding speech.
For each caption or text element:
- Enter or correct the wording.
- Set its start and end points to match the relevant moment.
- Choose readable text with clear contrast against the footage.
- Position it away from the frame edges and important visual details.
- Play the section to check that the text remains visible long enough to read.
Inspect text placement again in TikTok’s upload preview. This tutorial does not specify a verified pixel-based safe zone.
Caption Review Checklist
- Compare each caption with the spoken words.
- Correct names, punctuation, and missing words.
- Check that captions appear and disappear at the intended moments.
- Preview text against both bright and dark footage.
- Confirm that text does not cover the subject or an important action.
5. Balance Speech, Music, and Other Audio
Start by listening to the spoken audio without background music. Then introduce music gradually and adjust its level so the words remain understandable. WeVideo and Hollyland both discuss adjusting audio levels and balancing added music with original sound. [c1] [c3]
Select the relevant clip or audio track and use your editor’s volume controls. Avoid treating a fixed volume percentage as a universal setting: recordings and music tracks differ.
Review quiet passages, loud passages, and the joins between clips. If available, use a short fade where it helps avoid an abrupt music start or stop.
Before adding external music, footage, or other assets, confirm that you have permission for the intended use. Do not assume a sound available in one tool is cleared for every publishing context.
Audio Review Checklist
- Listen for music masking speech.
- Check every cut for clipped words, clicks, or abrupt changes.
- Remove accidental silence or unintended overlapping audio.
- Confirm that the music starts and ends where intended.
- Recheck audio timing after moving or trimming clips.
- Confirm permission for externally sourced music and footage.
6. Export and Check the Finished Video
Save the editable project before exporting. Keep this project so you can make corrections without starting again from the finished video file.
As a starting export choice, use a 1080 × 1920-pixel MP4 if your editor supports it. WeVideo’s guide lists these vertical dimensions and identifies MP4 and MOV as supported formats, but it is not an authoritative, current TikTok upload specification. Verify file acceptance and any applicable limits in the upload interface. [c1]
Export a clearly named file, then open it outside the editor and watch it from beginning to end. If you find a problem, revise the saved project and export again rather than using the exported file as your new editing source.
Upload the finished file through the TikTok interface available to you. Review the preview, caption, and publishing settings before posting. Exact desktop controls, account limits, and current file-size or duration limits are not established by the references used here.
Final Export Checklist
- Save the editable project.
- Confirm the intended vertical framing and output dimensions.
- Export a clearly named final file.
- Play the exported file from start to finish.
- Check captions, audio balance, unwanted borders, and the ending.
- Inspect framing and text placement in TikTok’s upload preview.
- Review the audience and other available publishing settings before posting.
FAQ
Can I Edit TikTok Videos on a PC?
Yes. You can edit footage on your computer and export a file for posting to TikTok. WeVideo’s guide describes a desktop-browser editing workflow. The controls and export options depend on your chosen editor. [c1]
What Size Should I Use for a Vertical TikTok Video?
Start with a 9:16 canvas and consider 1080 × 1920 pixels for export. WeVideo lists these dimensions, but they are a practical vertical preset—not an exclusive TikTok requirement or a guarantee of upload quality. [c1]
How Do I Remove a Mistake from the Middle of a Clip?
Move the playhead just before the mistake, split the selected clip, then split again just after the mistake. Delete the middle segment, close any remaining gap, and play across the join to check the speech and movement. Hollyland describes splitting as a way to remove unwanted passages; command names and controls vary on PC. [c3]
Do TikTok Mobile Editing Instructions Work on a PC?
The editing principles transfer, but button locations and available controls may not. Use mobile instructions to understand actions such as trimming and splitting, not as an exact PC interface guide. Hollyland’s detailed workflow is primarily mobile-oriented, and the available TikTok Creative Center excerpt does not establish a matching desktop interface. [c3] [c2]
Should I Export Mp4 or Mov?
MP4 is a practical first choice if your editor supports it. WeVideo’s guide lists both MP4 and MOV, but check that your file is accepted by the TikTok upload interface available to you. [c1]