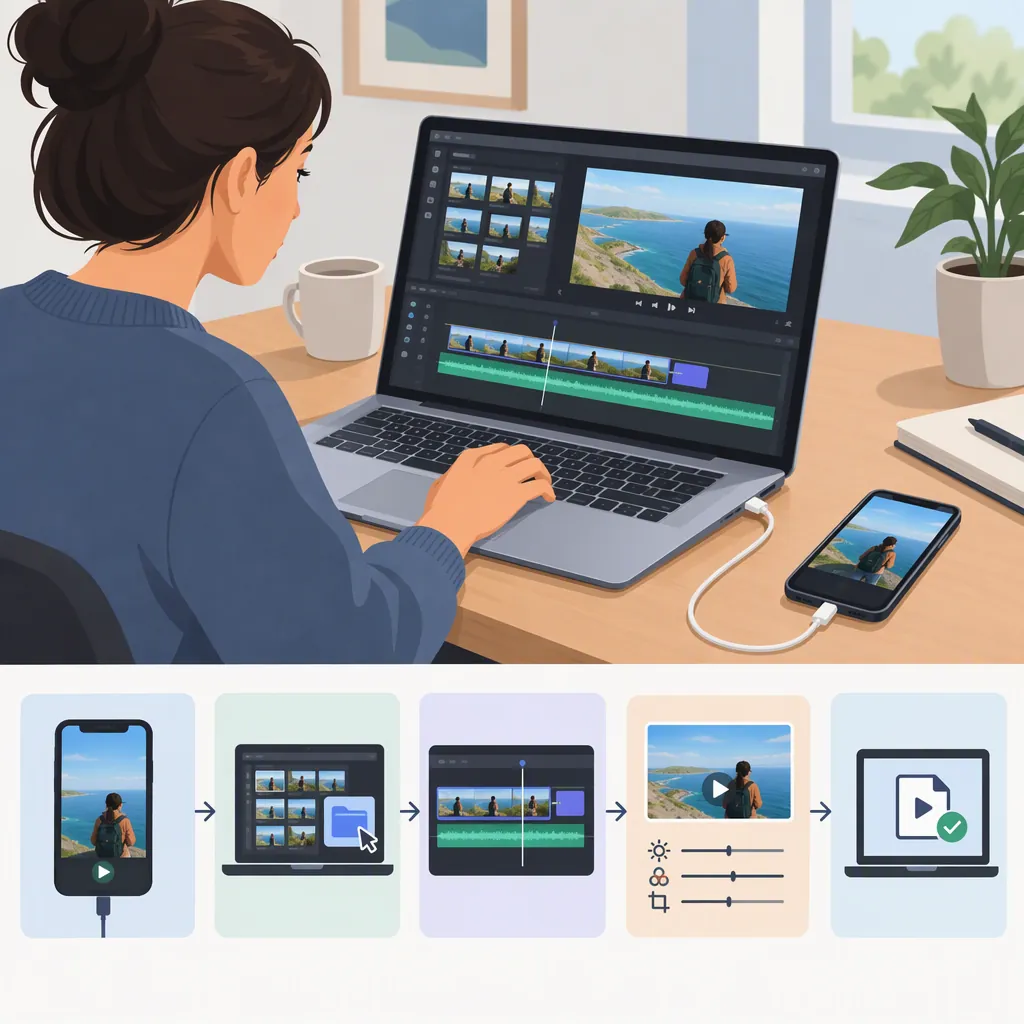
How to Edit Phone Videos on a Computer
To edit phone videos on a computer, copy the clips to a local folder, keep the originals, and import copies into a video editor. Arrange and trim the footage, check framing and sound, then export a finished file and watch it outside the editor. Adobe Express documents a browser-based upload, edit, and MP4 download workflow; Microsoft documents Clipchamp as a Windows editing option. Supported file formats and exact controls vary, so test one phone clip before starting a full project. [source-adobe] [source-microsoft]
1. Prepare and Transfer Your Phone Videos
Choose the clips you want to use. For a first edit, aim for one subject, a few clips, and a clear beginning and ending.
The goal of transfer is to have complete, playable video files on your computer—not just thumbnails or links to files still stored elsewhere.
Choose a Transfer Method
Use this decision process rather than assuming one method works for every device:
- Check what your phone and computer support. A cable import or downloading cloud-synced videos may be an option. Follow your device's instructions for connection, permissions, and file access.
- Save the selected videos to a local folder. Create a project folder with an
Originalssubfolder. Copy or download the clips there rather than editing the only copies on your phone. - Wait for the transfer to finish. If you use cloud storage, make sure the videos have downloaded locally before importing them into the editor.
- Open each copied file. Check its picture, orientation, sound, and duration. A thumbnail alone is not enough to confirm that the video transferred correctly.
- Keep the phone copies. Do not delete them until you have verified the transfer and reviewed the finished export.
If a copied file will not play, check whether the transfer completed and consult your device's instructions before proceeding. A file that plays on the computer still needs a separate import test in your chosen editor.
Project Folder Checklist
Keep these items together:
- Originals: Untouched copies of the selected phone clips.
- Project: The editor project and supporting files, if they can be saved locally.
- Exports: Finished video files.
- Edit notes: Intended viewing format, clip order, and planned audio or text changes.
Before editing, decide whether the finished video should be portrait, landscape, or square. This will guide your framing choices.
2. Choose an Editor and Test One Clip
Choose an editor for the work you need to do: import footage, arrange clips, trim or split sections, adjust framing, and export. Text and music are optional.
Two documented options are:
- Adobe Express: Its computer video editor page describes uploading media in a browser, cropping, trimming, splitting, resizing, and downloading the edited video as an MP4 file. [source-adobe]
- Clipchamp: Microsoft identifies it as the built-in Windows 11 video editor. To open it, search for Clipchamp on the taskbar or find it under Start → All apps. Microsoft also notes that the previous Video Editor option is no longer included in Windows Photos. [source-microsoft]
These are examples, not a ranking or a guarantee of compatibility with every phone recording.
Before importing all your footage:
- Start a new project.
- Import one representative clip.
- Play it and check orientation, picture, and sound.
- Trim a small section.
- Export that short test and open the resulting file.
If the editor rejects the clip or the test export looks wrong, check its supported input formats and relevant troubleshooting instructions before building the full edit.
Before uploading private footage to an online editor, review the service's current privacy terms and decide whether uploading is appropriate for that material.
3. Arrange and Trim the Clips
Import your selected clips into the project. If the editor uses a timeline, place them there in the order viewers should see them.
Make a rough cut before adding text, music, or transitions:
- Choose an opening shot that introduces the subject.
- Trim unwanted pauses and camera adjustments from each clip's beginning and end.
- Split around mistakes or interruptions within a clip and remove the unwanted section.
- Watch each cut to check that the action or explanation still makes sense.
- Remove repeated material unless it adds useful context.
Adobe Express documents trimming and splitting in its computer editing workflow. Other editors may use different button names and controls. [source-adobe]
Example: Make a Short Video from Three Clips
Suppose your phone footage contains an introduction, a demonstration, and a finished result. This is an illustrative task, not a required structure.
- Arrange: Put the introduction first, the demonstration second, and the result last.
- Trim the opening: Move the introduction's starting boundary past any blank footage or camera setup, without cutting off the first useful words.
- Remove a middle mistake: In the demonstration, split just before and just after the unwanted section. Delete that section, then check for an empty gap.
- Trim the ending: End the result clip after viewers have enough time to understand what they are seeing.
- Preview: Play the sequence from beginning to end. If a cut feels confusing, adjust its boundary or restore a little surrounding footage.
Start with straightforward cuts. Add a transition only when it helps communicate a change of scene or time.
4. Check Framing, Audio, and Text
Review the edit in its intended viewing shape. When mixing portrait and landscape footage, decide whether to preserve the full image with surrounding space or crop it to fill the frame.
Preview every cropped shot: a framing choice that works at the beginning may cut off a moving subject later.
Adobe Express documents cropping and resizing tools. Microsoft lists text, transitions, and music among Clipchamp's editing features. [source-adobe] [source-microsoft]
Use this review checklist:
- Framing: Keep faces, hands, and important objects visible throughout each shot.
- Sound: Listen for abrupt volume changes between clips.
- Music: If you add it, keep spoken words understandable.
- Text: Include only useful context, and leave it on screen long enough to read.
- Accuracy: Proofread names, dates, and captions, including any generated text.
- Permissions: Use music and other assets only when you have permission for the intended use.
Do a full preview after these adjustments rather than checking only the individual clips.
5. Choose Export Settings and Review the File
Save the editable project if your editor supports it, then export a separate finished video. Adobe Express's documented workflow ends with downloading an MP4 file; another editor may offer different export options. [source-adobe]
There is no single resolution, frame rate, or bitrate that is best for every phone video. Choose settings by checking your footage and the intended destination.
What the Main Settings Mean
| Setting | What it controls | How to approach it |
|---|---|---|
| Aspect ratio | The frame's shape, such as portrait, landscape, or square | Choose the intended viewing shape, then check every shot for cropping or surrounding space. |
| Resolution | The exported frame's pixel dimensions | Check the source footage and destination requirements. Do not assume a larger export will create detail missing from the recording. |
| Frame rate | The number of frames shown per second | Check the source clips and destination requirements. If clips differ, test a section with movement before committing to the full export. |
| Bitrate or quality preset | How much data is used to encode the video | If available, compare a short export for visible quality and file size rather than choosing by the label alone. |
A Practical Selection Order
- Check the source clips' properties where your computer or editor displays them.
- Check the intended destination's current upload or delivery requirements.
- Set the viewing shape and preview the framing.
- Choose compatible export settings from those your editor offers.
- Export a short section containing movement, speech, and any text.
- Watch the test outside the editor before exporting the whole project.
After the final export, open the file outside the editor and watch it from beginning to end. If the video is intended for phone viewing, also check it on a phone when possible.
Final Export Review
- The exported file opens and plays.
- The first and last frames are intentional.
- No unwanted sections or empty gaps remain.
- Framing preserves important subjects.
- Speech is understandable, including when music plays.
- Text is readable and correct.
- The file meets the intended destination's requirements.
- Originals and the editable project are retained.
If you find a problem, return to the project, correct it, and export again. Keep the originals and project until you are satisfied with the finished file.
FAQ
Can I Edit Phone Videos on a Computer Without Installing an Editor?
Yes, a browser-based editor is one option. Adobe Express documents uploading and editing videos in a computer browser, then downloading an MP4. Test a representative phone clip first because supported formats vary, and review the service's privacy terms before uploading personal footage. [source-adobe]
Where Is the Video Editor in Windows 11?
Microsoft identifies Clipchamp as the built-in Windows 11 video editor. Search for Clipchamp on the taskbar, or open Start → All apps and find it in the list. Microsoft also states that the previous Video Editor option is no longer included in Windows Photos. [source-microsoft]
What Should I Check Before Importing Phone Videos?
Confirm that each video has finished copying or downloading to a local folder, then open it to check picture, sound, and duration. Next, import one clip into your editor and make a short test export. Adobe Express documents an upload-to-export workflow, but that does not establish compatibility with every phone recording format. [source-adobe]
What Settings Should I Use to Export My Phone Video?
Start with the destination's requirements and the properties of your source clips. Choose the frame shape, then review resolution, frame rate, and any quality controls your editor offers. Test a short section with movement, speech, and text before exporting the full video. Adobe Express documents MP4 download, but that format alone does not determine the other export settings. [source-adobe]
Sources
-
[source-adobe] Free Video Editor Online for Computers | Adobe Express
-
[source-microsoft] Create films with a video editor | Microsoft Support