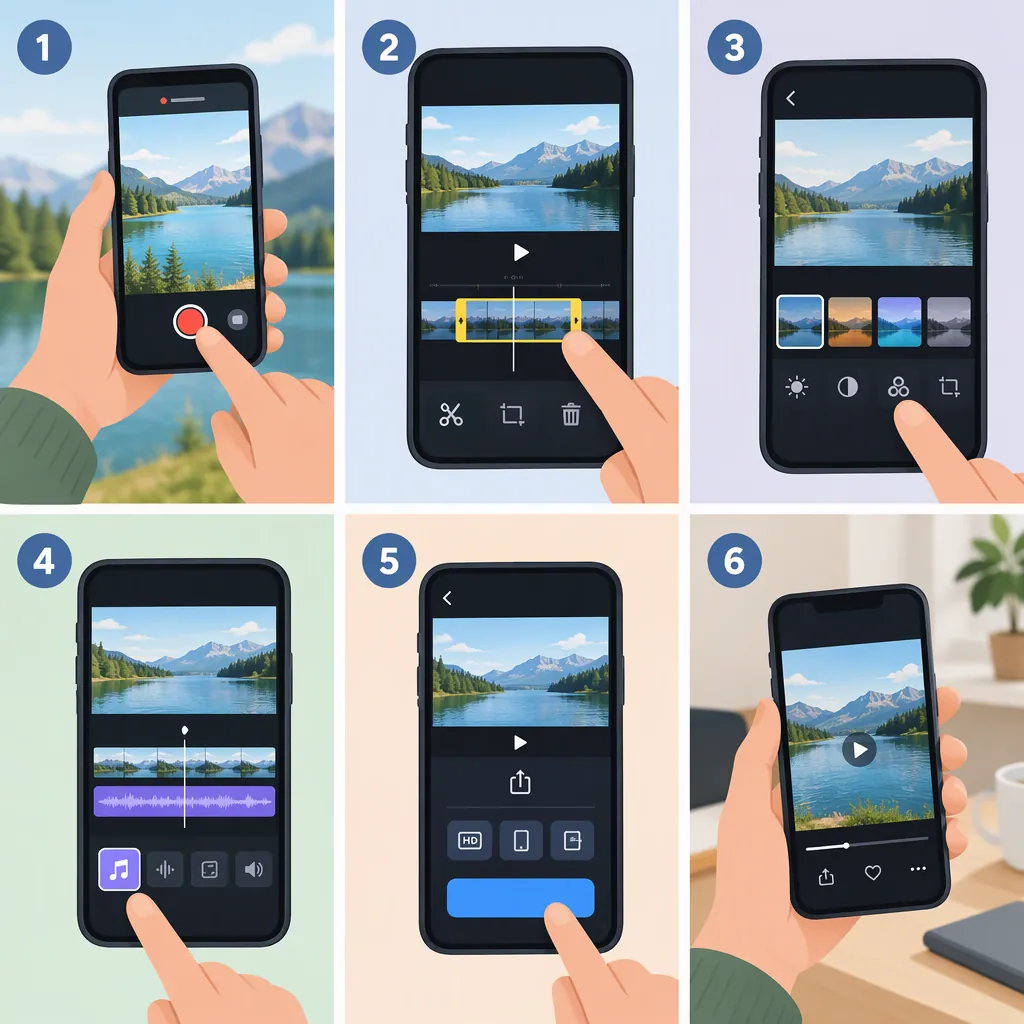
How to Edit Videos on Your Phone: A Beginner’s Guide
To edit videos on your phone, open a clip in your photo app or import clips into a video editor. Trim unwanted footage, arrange the clips, choose the frame shape, add captions if needed, balance the audio, and save or export the result. Finish the basic sequence before adding effects. Available tools and button names vary by app and version, so the steps below describe a general workflow rather than one exact interface. [c1] [c2]
1. Choose a Tool for the Edit You Need
Start by deciding whether you need to edit one clip or combine several clips.
For a simple trim, crop, or brightness adjustment, check the editing controls in your phone’s photo app first. For a sequence with multiple clips, text, and music, look for an editor with a timeline and the specific controls you need. The references describe both basic photo-app editing and timeline-based workflows; they do not establish which features are available on every phone. [c1] [c2]
Open a clip and look for Edit, or open your chosen editor and look for a way to create a project and import footage. These are suggested labels to look for, not guaranteed button names. If a feature is missing, check the app’s available tools rather than assuming it is built in.
Editing Requirements Checklist
- [ ] Trim the beginning and end of a clip.
- [ ] Split or combine clips if the video needs several shots.
- [ ] Crop or change the frame shape if needed.
- [ ] Add and edit captions if the video includes speech.
- [ ] Adjust voice and music levels if using background audio.
- [ ] Save or export the finished video.
2. Trim and Arrange Your Clips
Select the footage that supports the video’s purpose before adding filters or text. The workflow reference recommends selecting usable material and building an assembly edit before polishing it. [c2]
- Trim the start and end. Look for handles at the edges of the clip preview or timeline. Move them inward to exclude unwanted footage, then preview the result.
- Remove unwanted material in the middle. If your editor offers a split tool, split before and after the unwanted portion, select that portion, and remove it.
- Arrange the remaining clips. If your editor supports multiple clips, place them in the order you want viewers to see them.
- Watch the rough cut. Check whether the sequence makes sense without music, captions, or effects.
As an editing exercise, try a simple order: introduce the subject, show the action or explanation, then show the result. Keep pauses that help understanding rather than removing every pause. These are suggested editing choices, not a required formula. [c2]
3. Crop and Check the Framing
Use the crop or aspect-ratio control, if available, to choose the shape of the finished video. Cropping, rotation, and aspect-ratio changes are among the editing operations described in the basic tutorial. [c1]
Choose the frame shape for the intended viewing context rather than assuming every video needs a vertical crop. Reposition the image so the important subject remains visible. Then play the entire clip: a crop that works at the beginning may exclude a moving subject later. The workflow reference discusses repositioning subjects when adapting footage to vertical framing. [c2]
Before moving on, check faces, hands, demonstrations, and any text already present in the footage. If an essential detail disappears, revise the crop or reconsider the frame shape.
4. Add and Review Captions
Once the cuts are settled, add captions if they are useful for understanding the video. The references describe caption tools and recommend short, readable phrase groupings with consistent placement. Feature availability depends on the editor. [c1] [c2]
If your editor offers automatic captions, use the generated text as a draft. Otherwise, add text manually if the editor supports it. Review each caption against the speech, correcting names, wording, punctuation, and timing.
Preview the video at normal phone viewing size. Keep captions readable and avoid covering the subject or an important demonstration. Check the video with sound off as a practical test of whether the text communicates the spoken content. [c2]
5. Balance Audio and Adjust the Image
Listen to the spoken audio before adding finishing effects. If you include music, lower it until speech remains easy to understand throughout the video. The workflow reference recommends keeping the voice dominant and checking audio with headphones. [c2]
Next, make modest image adjustments where needed. Look for exposure or brightness controls when a shot is too dark, and white-balance controls when colors look unnatural. Compare neighboring clips rather than applying a strong filter automatically. The references describe adjustment and filter tools, while the workflow guide recommends restrained color correction. [c1] [c2]
For a first edit, treat transitions, speed changes, and decorative effects as optional. Add them only when they support the explanation or sequence.
6. Save, Export, and Review the Finished File
Look for Save, Save Copy, or Export, depending on your app. Read the confirmation screen before proceeding; this guide does not verify whether a particular app replaces the original or creates a separate file.
If export settings are available, choose settings appropriate to the intended destination. There is no single resolution, frame rate, or aspect ratio established by these references as correct for every video. The basic tutorial discusses resolution controls, and the workflow reference recommends reviewing the finished export before uploading it. [c1] [c2]
Open the saved file and watch it from beginning to end. Review the actual export, not only the editing preview.
Final Export Review
- [ ] The video starts and ends where intended.
- [ ] Clips appear in the correct order.
- [ ] The crop keeps essential details visible.
- [ ] Captions match the speech and remain readable.
- [ ] Music does not obscure the voice.
- [ ] Color changes are consistent enough for the sequence.
- [ ] The exported file plays from beginning to end.
- [ ] The saved file is the version you intended to keep.
FAQ
Can I Edit Videos Without Installing Another App?
You may be able to handle basic edits using your phone’s existing photo app. The basic tutorial describes trimming, cropping, and adjustments using built-in tools or Google Photos, but it does not verify every feature on every device. Check your available controls first. [c1]
What Is the Difference Between Trimming and Cropping?
Trimming changes which part of the clip’s duration you keep. Cropping changes which part of the image remains visible. Use trimming to remove an unwanted beginning or ending, and cropping to adjust framing. [c1]
Should I Add Captions Before or After Cutting the Video?
Settle the basic cuts first, then add and time the captions. The workflow reference recommends establishing the story before styling captions because later cuts can require caption and music timing changes. [c2]
What Export Settings Should I Use?
Use settings suitable for the destination and check the exported file. The references discuss resolution and framing but do not establish a universal export preset. Confirm the destination’s requirements separately rather than treating one setting as correct for every use. [c1] [c2]