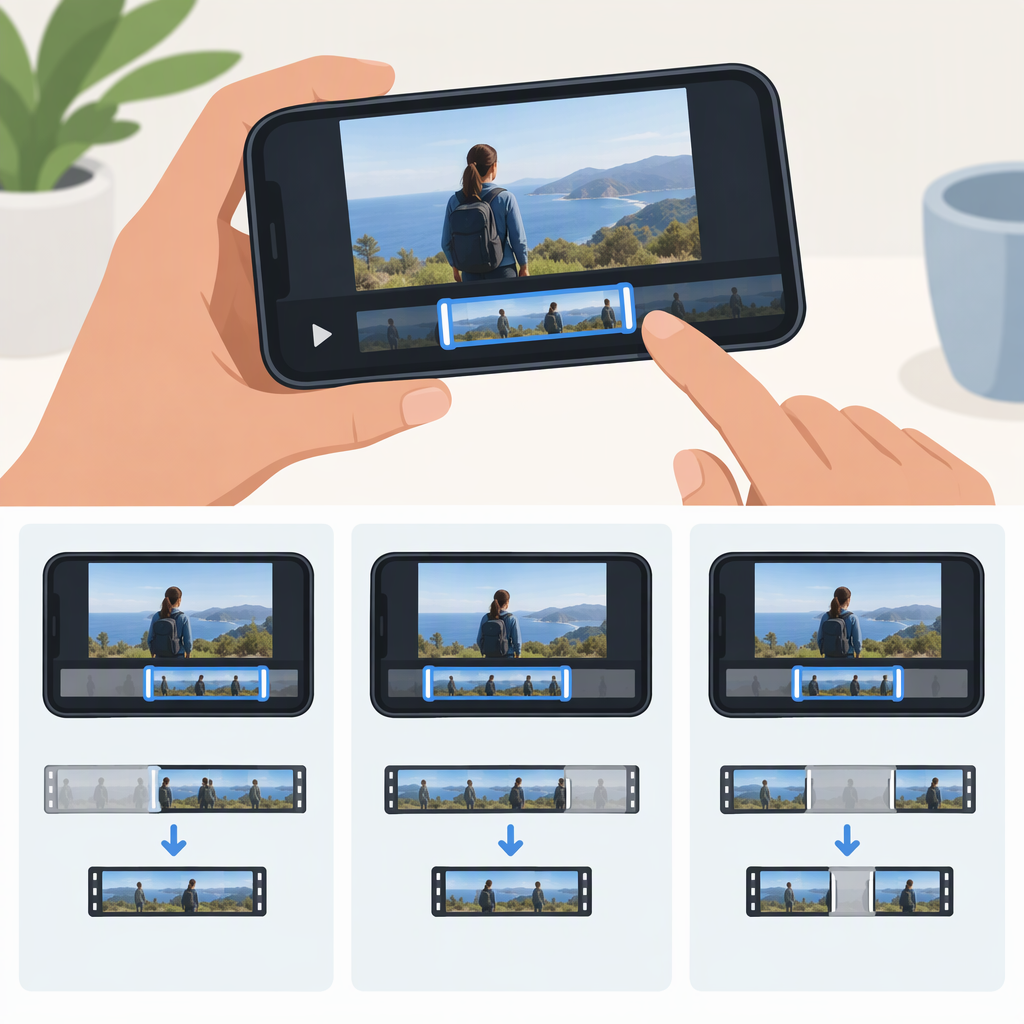
How to Cut a Video on Your Phone
To shorten the beginning or end of a video, open it in your phone’s video editor, move the start or end trim handle, preview the selected footage, and save. On iPhone, you can do this in Photos. On Android, this guide uses Google Photos; its controls and availability may differ from your phone’s built-in Gallery app.
Trimming an endpoint is different from removing a section from the middle. A middle cut usually requires a timeline editor that can split a clip and delete the unwanted part.
Trim the Beginning or End
On iPhone: Use Photos
- Open Photos and tap the video.
- Tap Edit.
- Drag the handles at either end of the timeline to set the new start and stop points.
- Tap Play to preview the trimmed video. Adjust the handles if needed.
- Tap Done, then choose Save Video or Save Video as New Clip.
Choose the save option carefully: Apple says Save Video saves the trimmed version, while Save Video as New Clip keeps the original and adds a trimmed version to your library. If you save a trim and later want to undo it, Apple’s instructions say to open the video in Photos, tap Edit, then Revert and Revert to Original. (support.apple.com)
On Android: Use Google Photos
These steps apply to the Google Photos video editor on Android—not to every manufacturer’s Gallery app.
- Open Google Photos and select the video.
- In the editor, touch and hold a trim handle, then drag the handles to select the portion you want to keep.
- Preview the selection and adjust the handles until the beginning and end are right.
- Tap Save at the top to save a copy of the edited video.
Google’s help page describes saving a copy with the edits. Look for that edited copy in Google Photos. The editor and its availability can vary: Google notes that non-Pixel Android devices running Android 9 do not support or have access to its video editing. (support.google.com)
Remove a Section from the Middle
If you want to delete a moment from the middle while keeping footage before and after it, endpoint trim handles alone won’t make that cut. Use an editor with a timeline, split, and delete controls.
On iPhone, Apple documents this workflow in iMovie:
- Add the video to an iMovie project and open the timeline.
- Move the playhead to the first boundary of the section you want to remove, select the clip, and choose Split.
- Move the playhead to the second boundary and split again.
- Select the separated unwanted segment and delete it.
- Play through the join to check that the remaining footage is in the intended order.
- To create a finished video in your Photos library, open the project’s sharing options and choose Save Video.
Apple’s iMovie guide describes splitting clips to remove unwanted sections and saving a completed movie as a video file. (support.apple.com)
On Android, the steps depend on the editor available on your phone. Google Photos’ documented trim instructions cover selecting the portion to keep with trim handles; they don’t provide a middle-section split-and-delete workflow. If your phone’s editor has a timeline with split and delete controls, use those and preview the join before saving. Otherwise, choose an editor that documents those controls for your device.
Preview and Check the Saved Video
Before you finish, play the edited video from start to end. Check that the new beginning and ending are right—or, for a middle cut, that the two remaining sections join where you intended. Then confirm that the saved result appears in your photo library or editing app.
If keeping the source matters, choose the option that explicitly saves a separate copy. On iPhone Photos, Apple identifies Save Video as New Clip as the option that keeps the original. For Google Photos on Android, Google documents Save as saving a copy of the video with your edits. (support.apple.com)