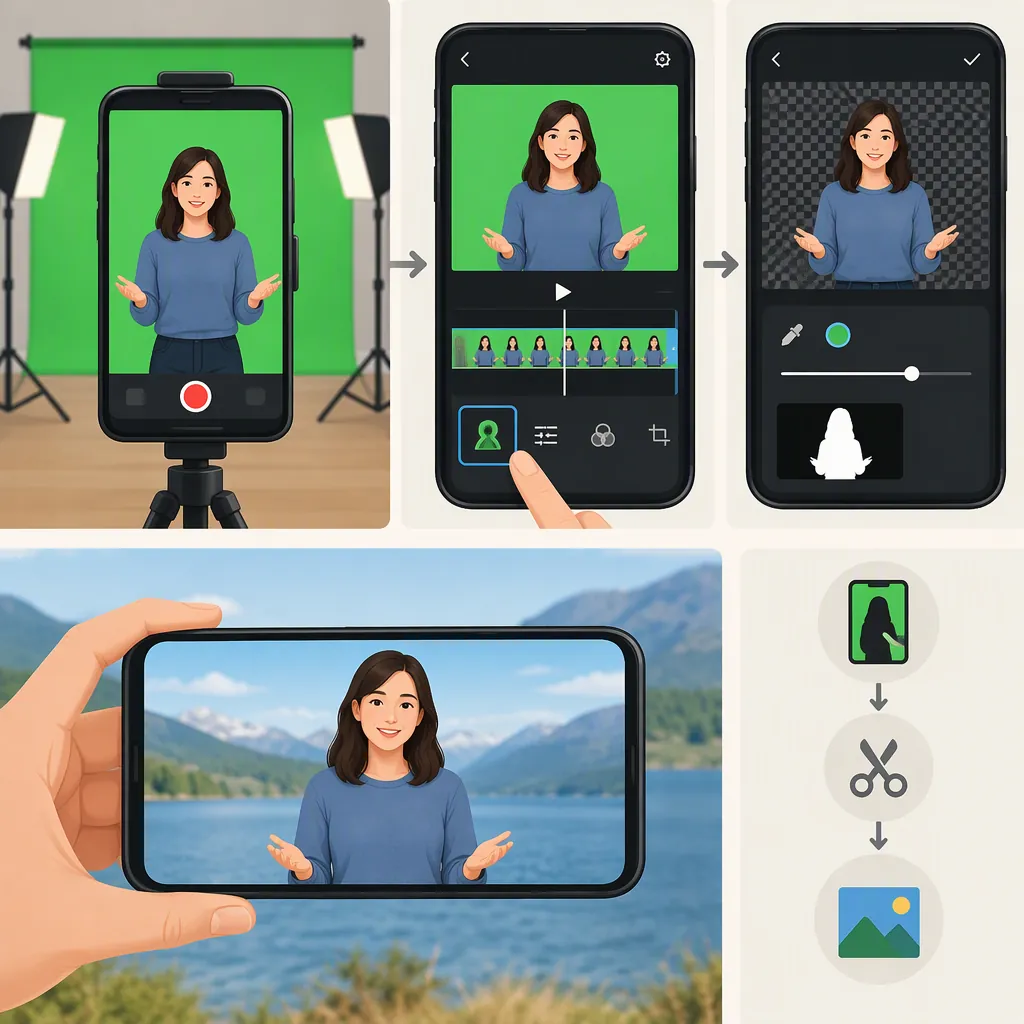
How to Edit a Green Screen on Your Phone
To edit a green screen on your phone, use a video editor with chroma key and layered video support. Import your footage, place a replacement image or video behind it, select the green color to remove, and adjust the key until the subject’s edges look clean. Preview the result before exporting. The sources support this general workflow, but do not establish identical controls across phone apps.
Choose the Right Editing Tools
Look for two capabilities: chroma key, which removes a selected color, and layers or overlays, which let a replacement background appear behind your subject. A background photo or video can fill the area made transparent by keying. [source_wevideo]
Do not assume a tool labeled “background removal” uses the same controls as chroma key. The provided WeVideo page describes mobile Background Removal separately from its detailed Keying tab instructions. Those instructions include double-clicking a clip, so they should not be treated as an exact phone tap sequence. [source_wevideo]
This guide therefore uses a general workflow rather than promising specific menu locations, free access, or matching features on every iPhone and Android device.
Prepare Your Footage and Background
Have your green-screen clip and replacement image or video ready before editing. For new footage, use a uniformly colored backdrop, keep it smooth, and aim for even lighting without strong shadows. Avoid green clothing or props you want to keep: chroma key can remove the selected color from the subject as well as the backdrop. [source_wevideo]
For existing footage, inspect the clip first. Note dark patches, wrinkles, and areas where the subject blends into the screen. Use those areas as checkpoints when adjusting the key rather than judging the result from one easy frame.
Remove the Green and Add a New Background
Use the following sequence in a phone editor that offers the required controls. Menu names and available adjustments may differ; this is not a verified tap-by-tap tutorial for a particular app.
- Import both assets. Add your green-screen footage and the replacement photo or video.
- Arrange the layers. Put the replacement background underneath the green-screen clip. WeVideo’s example places the subject on Video 2 and the background on Video 1; your editor may use different labels. [source_wevideo]
- Select the subject clip. Open its chroma key or color-key control.
- Pick the green color. If an eyedropper is available, sample the backdrop rather than the subject. [source_wevideo]
- Adjust the key. Change sensitivity or strength gradually while watching both the remaining green and the subject’s outline. [source_wevideo] [source_capcut]
- Preview the composite. Check that the new background appears behind the subject, then inspect the edges before exporting. [source_capcut]
As a practical timeline check, make sure the replacement background covers the full portion of the clip where you want it visible.
Phone Editing Checklist
- [ ] Import the subject clip and replacement background.
- [ ] Place the subject above the background.
- [ ] Select the backdrop color with the keying tool.
- [ ] Adjust sensitivity or strength gradually.
- [ ] Inspect difficult frames and moving edges.
- [ ] Confirm the background covers the intended duration.
- [ ] Preview before exporting.
Fix Green Spill and Rough Edges
After removing the background, inspect the subject’s outline for leftover green, harsh edges, and weak separation from the new scene. The CapCut reference recommends adjusting strength, feather, and spill or edge-cleaning controls. Use these only if your editor provides them; their presence in the reference does not establish availability in every mobile version. [source_capcut]
Use a small-adjustment approach:
- Green remains around the subject: Try a small sensitivity or strength adjustment, then recheck the outline.
- Parts of the subject disappear: Reduce the adjustment and check whether those areas share the keyed color. Matching colors can be removed along with the backdrop. [source_wevideo]
- The outline looks hard: Try a modest feather or edge adjustment if available. [source_capcut]
- Green coloring remains along edges: Look for a spill-cleaning control rather than relying only on stronger keying. [source_capcut]
Treat these as troubleshooting tests, not guaranteed fixes. Footage with poor separation may require a different take rather than more aggressive settings.
Review Before and After Export
Preview the composite before exporting, paying particular attention to the subject’s edges and the balance between the subject and background. This final edge check is part of the replacement workflow described in the CapCut reference. [source_capcut]
For your own quality check, watch the entire timeline rather than only a paused frame. Check moving hands, hair, the start and end of the background, and any captions. Then export using the settings available in your editor and open the saved file to confirm the result.
The provided references do not establish one universal export setting or a complete mobile feature comparison. Check your installed editor’s export options instead of assuming a particular resolution, watermark policy, or pricing arrangement.
FAQ
What Does Chroma Key Do?
Chroma key removes a selected color from footage, allowing another image or video to show through. It can remove that color from clothing and props too, not just the background.
Does the Background Have to Be Green?
No. Chroma key can work with another selected color, including blue, if the editor supports selecting it. Choose a backdrop color that is distinct from the subject and clothing.
Why Is There Still a Green Outline?
Leftover keyed color or green spill may remain around the subject. Inspect the outline and make small changes to strength, sensitivity, or spill-cleaning controls where available. Check that the adjustment does not remove parts of the subject.
Are These the Exact Steps for Every Phone App?
No. The references support the general keying and layering workflow, but not identical mobile menus. WeVideo’s page mentions mobile Background Removal while its detailed keying instructions use a double-click interaction. Confirm the controls in your installed app.
Sources
-
[source_capcut] Green screen editor | Make your video stand out in seconds
-
[source_wevideo] Green Screen Editor | Add Green Screen Backgrounds to Video | WeVideo