How to Do a Time-Lapse on TikTok
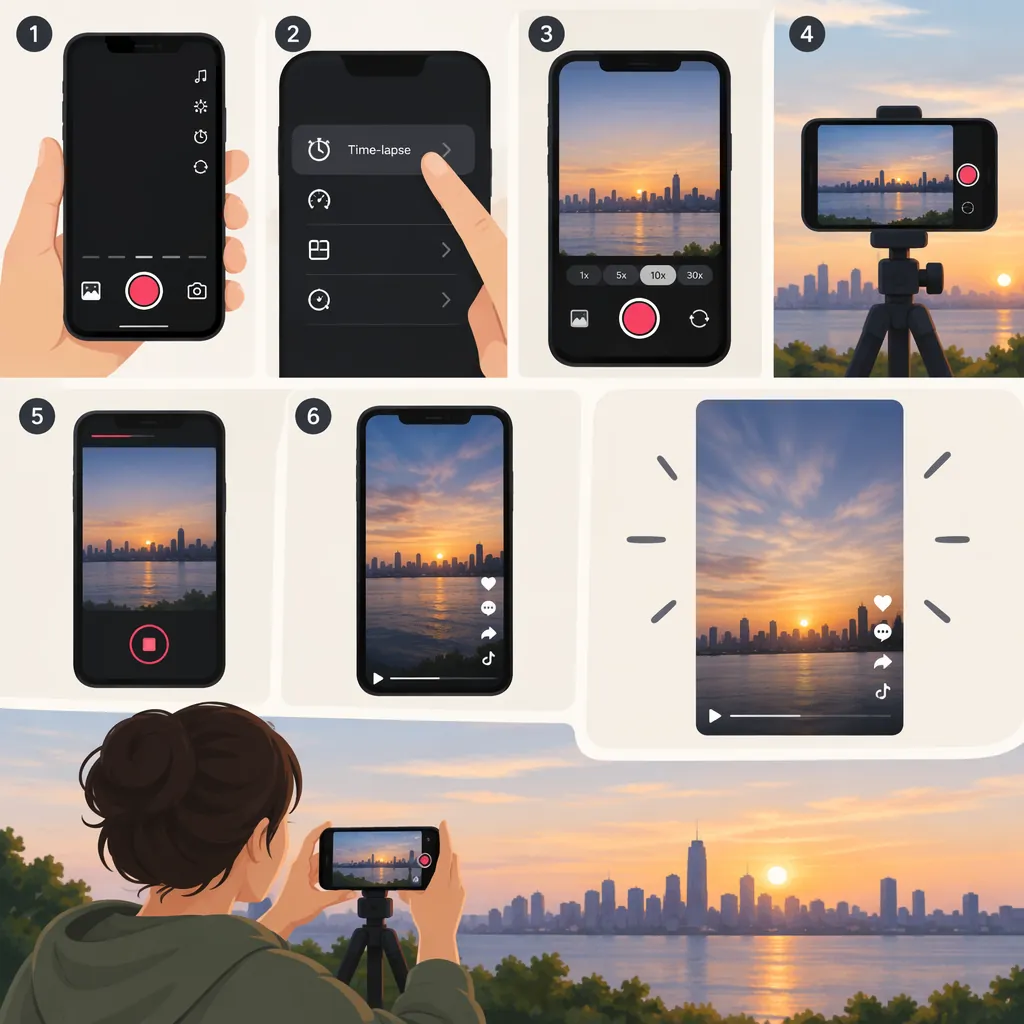
To make a time-lapse-style video on TikTok, tap + to open the camera, look for Speed, and select a faster recording option if available. Record a short test and preview the accelerated result before filming the full activity. A third-party editing guide describes TikTok’s Speed control as offering slow motion or time-lapse. [c1]
Interface note: The guide does not verify TikTok’s current control placement, speed multipliers, recording limits, or speed adjustment for imported videos. Use the options shown in your app. If the recording controls do not suit your project, prepare the accelerated clip outside TikTok and then import it.
Choose How to Create the Time-Lapse Effect
Two methods can produce a fast-moving sequence:
- Interval-capture time-lapse: A camera captures images at spaced intervals and plays them as a sequence.
- Sped-up video: Recorded footage plays faster, using a recording-speed control or a later edit.
The TikTok steps below aim to create an accelerated, time-lapse-style video. The guide’s use of “time-lapse” does not establish that TikTok provides interval-capture settings. [c1]
For an existing recording, consider adjusting its playback speed in an editor. For an activity you have not filmed yet, check whether TikTok’s recording controls or your phone camera’s time-lapse mode can accommodate the process.
Try TikTok’s Recording Speed Controls
The editing guide describes + as opening the camera and Speed as the control for slow motion or time-lapse. [c1]
- Open the camera. Open TikTok and tap +.
- Choose an available faster speed. Look for Speed among the recording controls and select a faster option if one appears.
- Set up the shot. Place your phone on a stable support. Keep the activity and its finished result within the frame.
- Record a short test. Try a simple part of the activity, then stop recording.
- Preview the test. Check that the action appears accelerated, the camera stays steady, and the progress remains understandable. Adjust the speed or framing if needed.
- Check the recording duration. Review any duration information shown in the app. Do not assume that a successful short test means the app can continuously capture the entire activity.
- Record the full sequence if the setup fits. If the controls or recording duration are unsuitable, use the outside-TikTok workflow below.
Distinguish Recording Time from Playback Time
When planning a time-lapse, keep three durations separate:
- Activity duration: How long the real-world process takes.
- Capture duration: How long your chosen tool can record that process.
- Final playback duration: How long viewers will watch the finished clip.
For existing footage played at a constant speed, a useful estimate is:
Final playback duration = footage duration ÷ speed multiplier
For example, 60 seconds of footage played at 3× speed lasts about 20 seconds. This is a mathematical example—not a promise that TikTok offers 3× speed or any particular recording limit. Accelerating playback does not guarantee that an app can capture a long activity continuously.
Prepare a Clip Outside TikTok When Needed
Use this route if Speed is unavailable, the faster options do not suit the footage, or the activity is too long for the available recording setup.
The following steps are a general workflow, not instructions for a specific camera or editor. Control names and available features will vary.
If You Have Not Recorded the Activity Yet
- Check your phone camera for a time-lapse mode. If available, review its capture controls before starting.
- Frame the beginning and ending. Leave enough room for the activity to develop without moving the phone.
- Capture a short sample. Confirm that the resulting sequence shows the change clearly.
- Record the full activity. Use the camera’s available controls and check that the setup can accommodate the planned capture.
- Save and review the video. If it needs trimming or further speed adjustment, use an editor that supports those changes.
If You Already Have a Video
- Import the footage into an editor. Choose a tool you already use that supports playback-speed adjustment.
- Trim unrelated footage. Remove unnecessary waiting at the beginning or end, while keeping enough context to show the starting and finished states.
- Select the section to accelerate. Apply the speed change to the intended clip or segment using the editor’s available controls.
- Adjust the playback speed. Start with a faster setting, then preview whether the progress remains easy to follow.
- Review the whole sequence. Check transitions, framing, the ending, and how the audio sounds after the speed change.
- Export and save the finished clip. Use the editor’s own export controls, then play the saved file to confirm the result.
Add the Finished Clip to TikTok
- Open TikTok’s creation screen.
- Look for the option to add a video from your device library.
- Select the saved clip.
- Preview it before making further edits.
The editing guide describes adding videos and photos from the device library to TikTok. [c1]
Plan a Clear Time-Lapse Sequence
Choose an activity with a visible beginning and ending, such as a drawing taking shape, a desk being organized, or a craft being assembled.
Keep the shot simple:
- Show the starting state. Make the unfinished task or arrangement visible.
- Keep the phone undisturbed. Avoid changing the camera position during the sequence.
- Leave room for movement. Keep hands, tools, and the finished result inside the frame.
- Keep lighting reasonably consistent. Aim to make the progress visible throughout.
- Show the ending clearly. Give viewers enough time to recognize what changed.
When reviewing the clip, ask whether someone unfamiliar with the activity could understand the transformation. If not, try a less aggressive speed setting where available, adjust the framing, or remove sections that do not contribute to the visible change.
Review the Clip Before Sharing
Watch the entire finished video. Check for accidental camera movement, an unclear ending, and personal details you do not want visible.
If the audio is distracting, look for sound, original-volume, or voice-over controls. The guide describes these editing options. [c1] Consider lowering unwanted original audio or adding a brief explanation of the process.
Before sharing, review the audience and reuse settings shown in your app. The guide discusses visibility, Duet, and Stitch options. [c1]
FAQ
Does TikTok Have a Dedicated Time-Lapse Mode?
The editing guide associates time-lapse with Speed, but it does not confirm a separately named current mode or interval-capture functionality. Check the recording controls available in your app. [c1]
What Should I Do If Speed Is Missing?
Prepare the accelerated clip with your phone camera’s time-lapse mode or an editor’s speed adjustment, if available. Save the finished video and add it from your device library; the guide describes library imports into TikTok. [c1]
Can I Speed up an Existing Video Inside TikTok?
Check the editing controls after selecting your video. The guide confirms library imports but does not establish speed adjustment for imported clips. If no suitable control appears, adjust the speed in another editor before importing the finished version. [c1]
What Speed Should I Choose?
Choose a speed that makes the change visible without making the action confusing. For existing footage, divide its duration by the speed multiplier to estimate the final playback length. For example, 60 seconds at 3× speed is about 20 seconds; this calculation does not establish which speed options TikTok currently provides.
Is Speeding up a Video the Same as Recording a Time-Lapse?
Not technically. Interval-capture time-lapse records images at spaced intervals, while speeding up video accelerates recorded footage. Both can show a process unfolding quickly. The guide’s description of TikTok’s Speed control does not confirm interval-capture functionality. [c1]