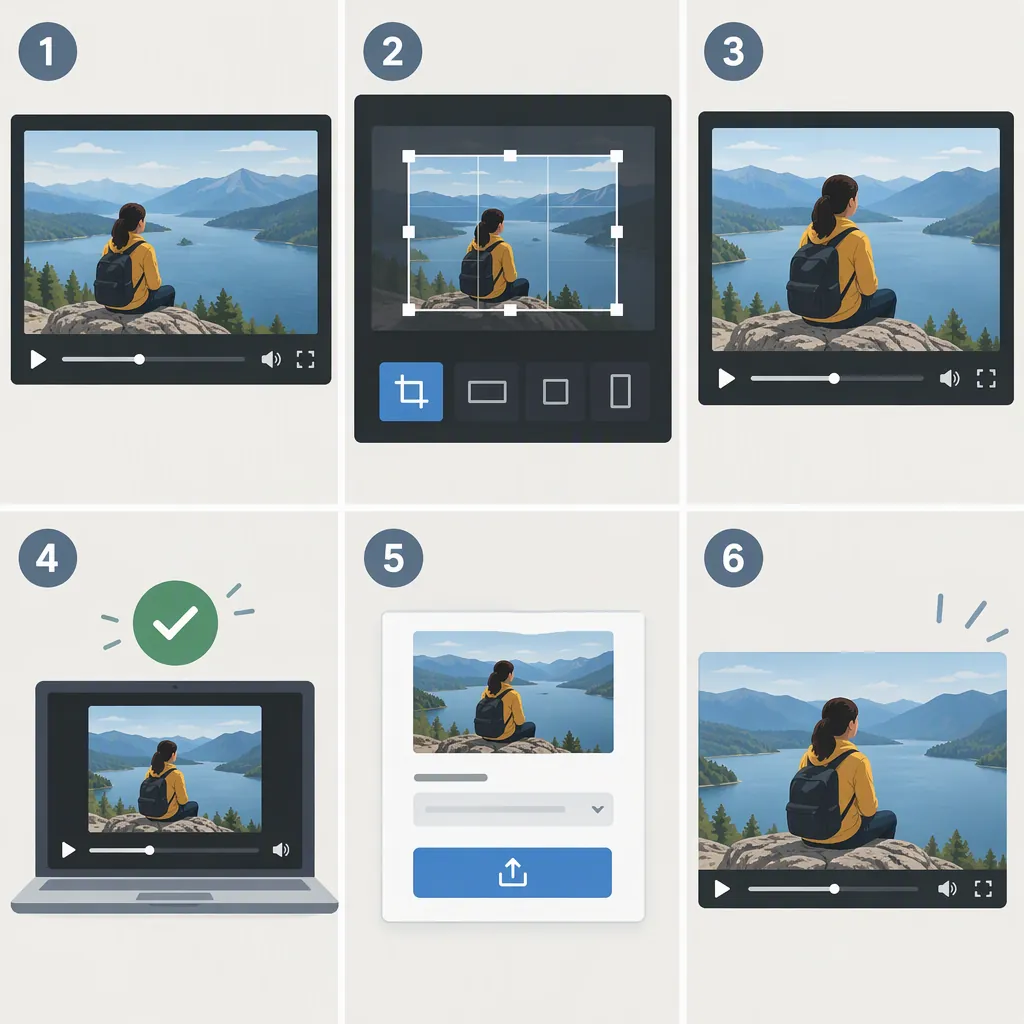
How to Crop a Video and Keep the Right Content
To crop a video, import it into an editor, select the crop tool, choose an aspect ratio or custom frame, and position the area you want to keep. Preview the result, adjust the framing, then export and check the saved file. The supplied guides describe this import–crop–export workflow, although control names vary by editor. [c1] [c2]
Understand What Video Cropping Changes
Video cropping selects the visible area of a frame and excludes content outside that selection. It can help remove an unwanted edge or concentrate attention on a subject. The supplied instructions describe selecting the area to retain and moving or resizing that selection. [c1] [c3]
Treat framing and timing as separate decisions: use cropping when the problem is what appears inside the picture, and trimming when the problem is which portion of the clip to keep. The references list cropping and trimming as separate editing operations. [c1] [c3]
Before editing, identify what must remain visible—for example, a speaker's face, a demonstration, or text needed to understand the scene. Keep a separate copy of the source so you can revisit the framing later.
Choose an Aspect Ratio Before Framing
Start with the shape required for the finished video. The supplied references include these common presets: [c1] [c3]
- 16:9: a horizontal frame.
- 1:1: a square frame.
- 9:16: a vertical frame.
These are framing options, not a complete or current list of requirements for every publishing destination. Confirm the destination's requirements separately before choosing export settings.
Use a preset when you need a specific shape. Use custom dimensions or freeform crop handles when the framing requirement is more specific; the supplied guides describe both preset and custom approaches. [c2] [c3]
Do not choose a ratio solely because it is available. First ask whether the important content will fit inside it. For a wide scene, consider an alternative layout if a narrow crop would exclude essential information.
Crop the Video Step by Step
The following workflow combines the common steps in the supplied guides rather than reproducing one editor's interface. [c1] [c2] [c4]
- Import the video. Open the clip in an editor with a crop control. Wait until the preview is ready.
- Select the correct clip or layer. Check that you are changing the intended footage rather than another element in the project.
- Choose the output shape. Select a ratio preset or enter custom dimensions, where available.
- Set the retained area. Move the crop selection and adjust its edges until the necessary content is inside it.
- Inspect the framing. Check faces, hands, objects, and any text near the edges. Leave extra room where the action requires it.
- Preview and revise. Play the cropped result and return to the crop controls if the composition needs adjustment.
- Export a separate file. Save the result, then review that file rather than relying only on the editing preview.
The exact order can differ: some editors separate canvas settings from clip cropping, while others place ratio selection directly in the crop interface. Follow the controls available in your editor. [c1] [c2]
Crop Review Checklist
- [ ] The intended clip or layer is selected.
- [ ] The output shape matches the intended use.
- [ ] Essential subjects and text remain visible.
- [ ] The framing has been checked throughout playback.
- [ ] The exported file has been opened and reviewed.
- [ ] The original source remains available.
Check More than One Frame
Do not approve a crop from a single still image. Review the beginning, middle, and end, then play the full result. Clideo's supplied guide explicitly includes previewing the processed video and returning to editing if it needs adjustment. [c2]
During review, look for a subject approaching an edge, a gesture leaving the frame, or text becoming partly hidden. If the framing fails later in the clip, try a wider selection or a different output shape. If your editor supports changing the framing over time, consult its instructions before using that feature; the supplied references do not establish a universal procedure for animated crops.
For tutorials and demonstrations, prioritize readable information over a tighter composition. A visually neat crop is not useful if it removes a step the viewer needs.
Review the Export and Recognize the Limits
After exporting, open the saved file and check its framing, playback, text readability, and sound. Confirm that the output uses the intended shape and that no essential content was lost.
Do not assume a crop guarantees unchanged image quality. Treat quality as something to inspect in the exported result, not as an outcome established by this article.
Evidence limits: The sources here are provider-authored tool pages and a provider tutorial, not independent comparative tests. They support the basic workflow and available framing approaches. They do not establish universal quality outcomes, privacy protections, current platform requirements, or identical behavior across editors. The Clideo guide also notes that tools change and directs readers to current instructions. [c2]
This guide therefore does not rank editors or repeat claims about pricing, speed, security, or watermark-free exports.
FAQ
Is Cropping the Same as Trimming?
No. Cropping concerns the visible area of the picture; trimming concerns the portion of the clip retained over time. The supplied references describe these as separate editing operations. [c1] [c3]
Can I Crop a Horizontal Video into a Vertical Video?
Yes. The supplied guides describe vertical presets and repositioning the area to retain. Choose a vertical frame, then check the entire clip to make sure the narrower selection keeps the necessary content. If it does not, consider a different layout instead of forcing the crop. [c1] [c2]
Do I Have to Use a Preset Aspect Ratio?
No. The supplied guides describe custom dimensions or adjustable crop borders as alternatives to presets. Use a preset for a defined output shape and custom framing when your requirements differ. The exact controls depend on the editor. [c2] [c3]