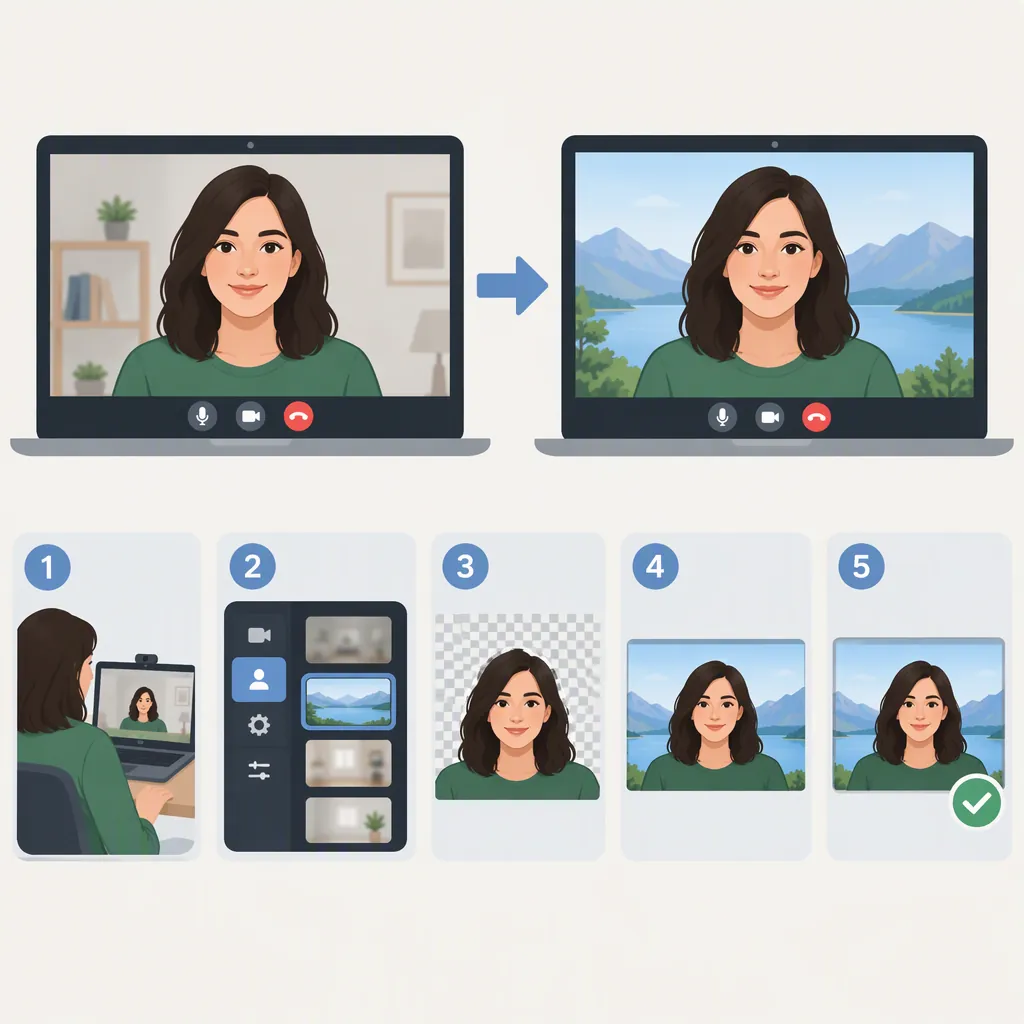
How to Change a Video Background with or Without a Green Screen
To change a video background, separate the subject from the original scene, place a new background behind it, and preview the exported result. For footage recorded without a green screen, the provided references describe automatic subject separation followed by a solid-color or transparent output. Transparent output can then be used for layering over another scene. These are documented workflows, not guarantees of clean results on every clip. [c1] [c2]
Choose a Background Editing Method
Start by deciding what you want to preserve: the original subject and movement, or only the general idea of the scene.
For an existing clip, use a subject-separation workflow rather than treating background replacement as a request to create an entirely new video. The supplied references describe automatic removal without a physical green screen, with options for transparent or colored backgrounds. [c1] [c2]
If your footage already has a green screen, look for a chroma key control in your editor. Treat keying as a separate editing step: select the screen color, inspect the subject, and adjust the result before adding a replacement scene. The supplied material mentions chroma key workflows but does not provide a detailed keying tutorial or independently tested settings. [c2]
Choose the output according to the next step:
- Solid color: Use when the plain background is the finished look.
- Transparent subject: Use when you plan to layer the subject over another image or video.
- Green background: Consider only when a later workflow requires chroma keying. Do not assume that turning an ordinary clip green fixes an imperfect subject cutout.
Prepare the Footage and Replacement Background
Keep an untouched copy of the source clip. Work on a short test segment before processing the full video, especially one that includes moving hands, loose hair, or changes in the subject's position.
The provided removal guides recommend footage with a clear subject that stands out from the background. Treat that as input-selection guidance, not a promise of accuracy. [c1] [c2]
Prepare the replacement image or video for your intended frame shape. Decide whether it should fill the frame, retain borders, or leave space for captions. A supplied mobile editing guide specifically includes cropping the background image to the video's aspect ratio. [c3]
Before uploading footage to an online service, review its current privacy and retention terms. Do not infer that a browser-based tool processes locally, and avoid uploading sensitive footage unless its handling meets your requirements.
Pre-Edit Checklist
- Preserve the original clip.
- Select a short segment with representative movement.
- Prepare a replacement background in the intended frame shape.
- Decide whether the final result should be solid, transparent, or fully composited.
- Review upload handling before using sensitive footage.
Separate the Subject and Add the New Background
Use this as an editor-neutral sequence; control names and available adjustments will vary.
- Import the test clip. Confirm its orientation and framing before removal.
- Separate the subject. Use chroma key for a recorded screen or an automatic removal option for ordinary footage, where available.
- Inspect the cutout alone. Check whether parts of the subject disappear or pieces of the original scene remain.
- Add the replacement underneath. Use a background layer or the editor's background selection control.
- Adjust the composition. Set the subject's scale and position, then compare the foreground and background lighting.
- Preview the whole segment. Do not judge the edit from a single still frame.
The supplied guides support the broad sequence of importing footage, separating the subject, selecting a background, and previewing or exporting. They do not establish that every tool offers manual edge correction or a multilayer timeline. [c1] [c2] [c3]
Check Edges, Motion, and Scene Fit
Use the following checks as acceptance criteria rather than assuming that automatic removal is flawless:
- Inspect hair, fingers, glasses, and thin objects against both light and dark backgrounds.
- Watch fast movement for missing details or unstable edges.
- Check gaps between arms and the body for leftover background.
- Compare the subject's size, camera angle, and apparent lighting with the replacement scene.
- Confirm that important captions remain readable.
If the result fails these checks, try a simpler background, revise the separation settings if available, or use manual corrections in an editor that supports them. A different background may make an edge problem less noticeable, but it does not repair the cutout.
Evidence limitation: The provided references are vendor pages and an app listing, not independent comparative tests. Their quality claims should not be treated as proof that a particular clip will retain every detail. [c1] [c2] [c3]
Preview Review Log
Clip or segment:
Intended output:
Edge issue and timestamp:
Motion issue and timestamp:
Background framing adjustment:
Correction attempted:
Export test result:
Accept or revise:
Export and Verify the Final File
Decide whether you need a finished video with the background already included or an isolated subject for later editing.
For a finished composite, export the subject and replacement background together. For a reusable cutout, check that the selected export option preserves transparency and that your receiving editor can interpret it. The provided removal documentation distinguishes transparent exports from MP4 output with a solid background; do not assume that a filename extension alone guarantees transparency. [c1]
Export a short sample and import it into the destination editor or playback environment. Check the background, edges, framing, audio, and timing before exporting the full clip.
Check current limits in the tool itself. One supplied page lists a 60-second upload limit near the upload area but a 30-second maximum in its FAQ. That inconsistency prevents a reliable duration recommendation from this reference alone. [c1]
FAQ
Can I Change a Video Background Without a Green Screen?
Yes, the provided guides describe automatic subject separation for footage recorded without a physical green screen. Test a representative segment first; the references do not independently verify accuracy for every subject or type of movement. [c1] [c2]
Should I Use a Transparent or Green Background?
Use transparency when your next editor supports the exported cutout. Consider green output when the next workflow specifically requires chroma keying. The supplied guide describes both approaches, but it does not establish which is better for every editing setup. [c2]
Can I Replace a Video Background with a Still Image?
The supplied mobile editing guide describes selecting an image as the replacement background and cropping it to the video's aspect ratio. In your own workflow, also check framing and subject placement before saving the result. [c3]
How Do I Check Whether an Export Is Transparent?
Select an export option documented to preserve transparency, then import a short sample into the intended editor and place a colored layer behind it. The provided documentation lists transparency-oriented options separately from MP4 with a solid background, so verify the export rather than relying only on its extension. [c1]