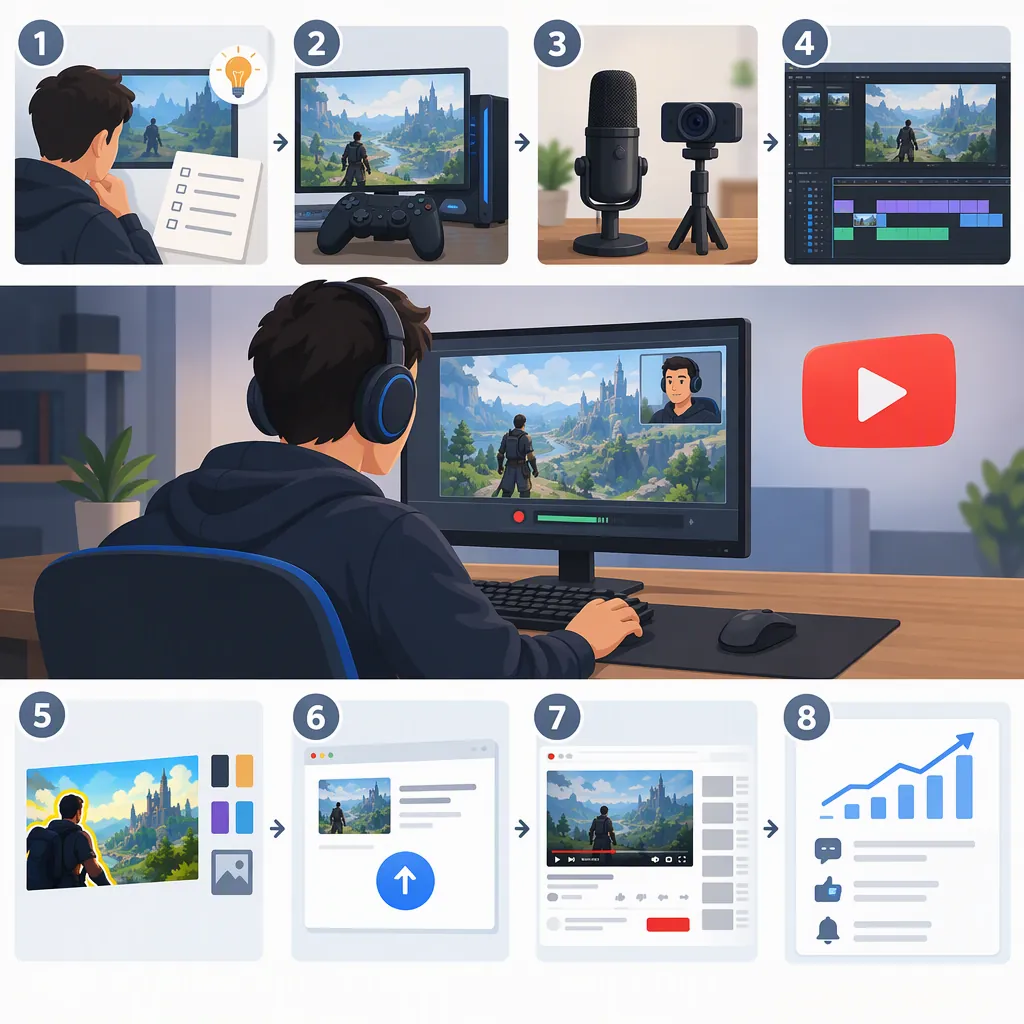
How to Make an Original Gaming YouTube Video
To make a gaming YouTube video, choose one clear idea, outline the moments you need, record your gameplay and commentary, edit around that idea, and review the exported video before uploading. Use your own explanation, challenge, or analysis to give the recording a distinct purpose. YouTube’s Android app listing confirms that you can create or upload your own videos directly in the app. [ref_1]
Choose One Clear Video Idea
Start with a question or outcome rather than a whole gaming session. For a first project, consider a single mechanic tutorial, a challenge attempt, a match breakdown, or a focused highlight story.
Write one sentence describing what viewers will get. For example: “I will explain how I approach this boss’s second phase using footage from my own attempts.” Treat this as a proposed concept, not a claim that a particular strategy works.
Build originality into the plan: explain your decisions, compare attempts, identify mistakes, or describe what changed. Avoid relying on a sequence of clips without a clear point.
Keep the scope manageable. If your idea requires several unrelated explanations, split it into separate projects.
Video Planning Worksheet
- Game and mode: [fill in]
- Format: [tutorial, challenge, breakdown, or highlights]
- Viewer question: [one question]
- Video promise: [one sentence]
- Original contribution: [your explanation, analysis, or challenge]
- Footage needed: [list the moments]
- Ending: [answer, result, or takeaway]
Prepare and Test Your Recording
Choose a recording method available on your PC, console, or mobile device. Check its current documentation for setup details; the provided references do not establish device-specific capture instructions.
Before recording the full session, make a short test that includes movement, game sound, and speech. Play the saved file back rather than judging only the live preview. Check that the intended game area is visible, speech is understandable, and the action looks acceptable to you.
If your recorder offers separate microphone and game-audio tracks, consider using them for editing flexibility. Otherwise, adjust the balance during the test. Lower game audio when it competes with your voice.
Close private messages and hide account details you do not want included. Use capture settings your device can handle consistently rather than choosing the highest available setting without testing.
Pre-Recording Checklist
- [ ] Record a short test with gameplay and speech.
- [ ] Play back the saved recording.
- [ ] Confirm that the intended screen area is captured.
- [ ] Check voice clarity during loud gameplay.
- [ ] Check movement for distracting interruptions.
- [ ] Hide notifications and private information.
- [ ] Confirm the save location and available storage.
Record Gameplay with a Story in Mind
Use a simple outline: establish the goal, show the attempts or explanation, and finish with the result. Capture the footage needed to support each part.
For live commentary, explain what you are trying, why you chose it, and what happened. Leave room for important game sounds instead of speaking continuously.
For recorded narration, capture gameplay first, select the useful moments, and then write commentary that matches what is visible. This is a useful option when playing and explaining at the same time feels difficult.
Keep a brief timestamp log while recording or immediately afterward. Note successful moments, mistakes worth explaining, and technical problems. If you demonstrate a strategy, distinguish what the footage shows from what you still need to test.
Recording Log Template
| Timestamp | Moment | Why It Matters | Commentary Needed |
| --- | --- | --- | --- |
| [time] | [setup] | [establishes the goal] | [brief context] |
| [time] | [attempt or decision] | [supports the explanation] | [reasoning] |
| [time] | [result] | [resolves the question] | [takeaway or limitation] |
Edit for Clarity and Continuity
Make a rough cut before adding decorative effects. Arrange the footage so the viewer can understand the goal, follow the important decisions, and see the outcome.
Remove loading screens, repeated explanations, and pauses that do not serve the story. Keep necessary context: a short setup may be more useful than an abrupt cut straight to the result.
Add narration where the footage alone does not explain your thinking. Use brief labels for details that might otherwise be missed, and avoid covering important gameplay information.
Listen to the entire edit. Adjust sections where game sound or added music obscures speech. If captions are included, review names, game terminology, and timing.
For added music, images, or clips, check the applicable permissions and license terms. Also review the game publisher’s relevant video-use guidance. This is a review step, not a guarantee of legal clearance or platform acceptance.
Three-Pass Editing Workflow
1. Story pass: arrange the goal, evidence, and outcome; remove unrelated footage.
2. Clarity pass: add necessary explanations, check continuity, and balance speech against other audio.
3. Review pass: check captions, private information, third-party materials, and the complete exported file.
Prepare the Title, Thumbnail, and Upload
Write a title that accurately describes the game and the specific question, challenge, or result. Avoid claiming a record, guaranteed outcome, or definitive “best” strategy unless you can support it.
Design a thumbnail around one recognizable moment or subject from the video. If you add text, keep it brief and check whether it remains readable at a small size. Make sure both the title and thumbnail match the finished edit.
Export the video, then watch that exported file from beginning to end. Check the opening, audio, text, ending, and any unexpected blank frames.
YouTube’s Android app listing states that users can create or upload their own videos directly in the app. [ref_1] Follow the current upload interface for your device and review the available visibility and audience settings before publishing.
Source limitation: The supplied app listing supports that upload capability, but it does not establish desktop upload steps, export specifications, copyright clearance, monetization eligibility, or recommendations for discovery. The workflow here is practical guidance, not a statement of YouTube’s technical requirements.
Final Upload Review
- [ ] The title describes what the video actually delivers.
- [ ] The thumbnail represents the content accurately.
- [ ] The exported file plays correctly from start to finish.
- [ ] Speech is understandable throughout.
- [ ] Private information has been removed.
- [ ] Permissions and license terms have been reviewed where needed.
- [ ] The description identifies the game and relevant context.
- [ ] Upload settings have been reviewed before publication.
FAQ
Do I Need a Facecam for a Gaming Video?
For this workflow, a facecam is optional. Start with gameplay and commentary if those communicate the idea clearly. Add a camera only when your reactions or demonstrations serve the video’s purpose.
How Long Should My First Gaming Video Be?
Choose the length around the idea rather than a fixed target. Aim to explain the setup, show the necessary evidence, and deliver the outcome without unnecessary repetition. The supplied references do not establish an ideal length or a performance advantage for any duration.
Can I Upload a Gaming Video from an Android Phone?
Yes. YouTube’s Android app listing says users can create or upload their own videos directly in the app. It does not provide a complete gameplay-capture workflow, so check your device’s recording options separately. [ref_1]
How Can I Give My Gameplay Video an Original Angle?
Use a specific question, your own recorded attempts, and commentary explaining your decisions. Show what changed between attempts or analyze why a moment mattered. Treat creative originality and permission to use game footage or other materials as separate review questions.
Sources
- [ref_1] YouTube - Apps on Google Play