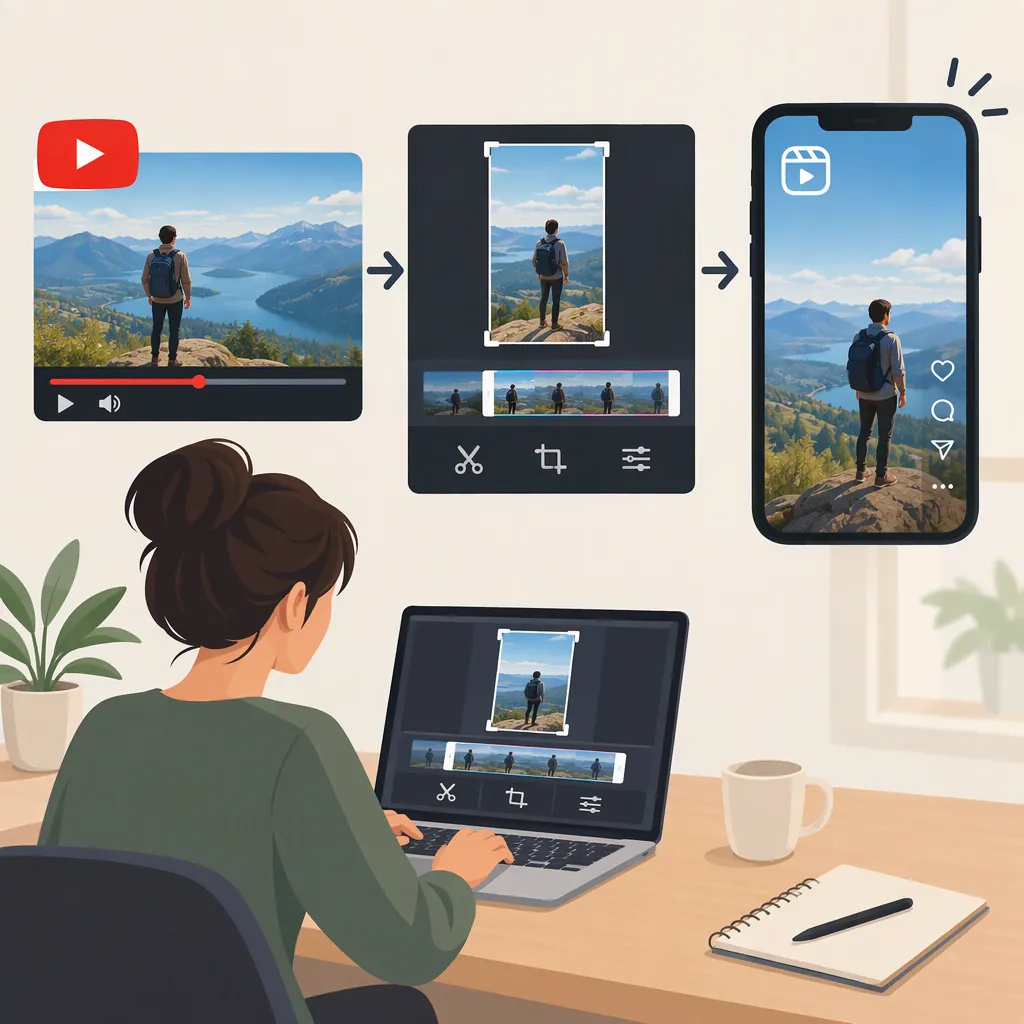
How to Make Instagram Reels from YouTube Videos
Start with a YouTube video you own or have permission to repurpose. Select a self-contained excerpt, edit it into a vertical 9:16 composition, check the audio and captions, then export and preview it in Instagram before publishing. The supplied sources describe this clipping, reframing, and captioning workflow, but they are tool-provider pages—not official Instagram specifications. [src_1] [src_2] [src_3]
1. Confirm Your Source and Reuse Rights
Use footage you own or have permission to repurpose. Both Klap and Revid explicitly limit their guidance to videos users own or have rights to clip or repost. [src_2] [src_3]
As a practical rights check, review the footage, music, images, and other third-party material separately. Do not treat a publicly accessible YouTube link as proof of permission.
For a manual editing workflow, start with an authorized source file, such as your original export. For a link-based workflow, confirm that the chosen service can process your video before building the rest of your edit around it.
Source Review Worksheet
- Source video title and URL: ______
- Original file location, if available: ______
- Basis for reuse permission: ______
- Music and third-party material to review: ______
- Unresolved permissions: ______
- Decision: proceed / replace material / pause.
2. Choose One Complete Idea
Treat clip selection as an editorial decision, not just a duration setting. Recommended starting points include a concise explanation, a demonstration with a visible result, or a question followed by a complete answer.
- Mark a candidate start and end time.
- Watch the excerpt without the surrounding YouTube video.
- Check whether a new viewer can understand the subject.
- Remove an introduction or tangent only if the meaning remains intact.
- End after the answer or result, rather than in the middle of a thought.
Avoid edits that remove a qualification, reverse the speaker's meaning, or make an example sound like a general claim. If the excerpt needs extensive background, choose a different moment or add a brief, accurate context label.
3. Reframe the Clip for Vertical Viewing
Use a 9:16 vertical canvas as the working format. The supplied Klap and Revid pages describe reframing YouTube excerpts to 9:16 for Reels. This is a source-supported editing target, not a complete statement of Instagram's current upload requirements. [src_2] [src_3]
For a manual edit, resize and reposition the footage shot by shot. Keep the important subject visible, but do not crop away information needed to understand the clip.
- Talking head: Keep the face and relevant gestures in frame.
- Interview: Check each speaker change; consider a split layout when both people matter.
- Tutorial: Preserve the controls, labels, or demonstration area. A centered crop may not be the best choice.
- Wide scene: Consider fitting the full image within the vertical canvas rather than forcing a tight crop.
Preview moving subjects and transitions. A crop that works on the first frame may fail later.
4. Review Audio and Captions
Captioning appears in all three supplied conversion workflows. Treat generated captions as a draft to review, rather than assuming they are correct. [src_1] [src_2] [src_3]
Recommended checks:
- Correct names, technical terms, numbers, and punctuation.
- Confirm that captions match the words actually spoken.
- Adjust timing so text does not linger over unrelated speech.
- Use readable contrast and avoid covering faces or essential visuals.
- Listen through every edit for clipped syllables, abrupt transitions, or distracting background sound.
- Review any music separately before reusing it on another platform.
Watch once with sound and once muted. Use the muted preview to assess whether the captions and visuals communicate the idea clearly—not as a substitute for checking the audio.
5. Export and Check the Instagram Preview
Export the finished clip, then inspect the actual output rather than relying only on the editor preview. Revid's supplied page describes MP4 download as one output option. [src_3]
Before publishing, check the clip in Instagram's current upload interface. Confirm that the video is accepted, the composition looks right, and captions or important details are not obscured by interface elements.
Source limitation: These references are commercial tool pages. They do not establish current official Instagram duration limits, file-size limits, codec requirements, or music permissions. Check those requirements in the current platform interface or official guidance rather than treating a converter's settings as authoritative.
Final Reel Review Checklist
- [ ] Reuse permissions have been reviewed.
- [ ] The excerpt makes sense without the full YouTube video.
- [ ] Cuts preserve the speaker's meaning.
- [ ] Important subjects and details remain visible throughout.
- [ ] Captions are accurate, readable, and synchronized.
- [ ] Audio is clear at every edit.
- [ ] The exported file plays correctly.
- [ ] The Instagram preview has been checked.
- [ ] Current upload requirements have been confirmed.
FAQ
Can I Make a Reel Directly from a YouTube Link?
The supplied tool pages describe workflows that start with a YouTube URL and produce edited clips. That is a conversion workflow, not simply posting the link as a Reel. Confirm reuse rights and review the resulting clip before publishing. [src_1] [src_2] [src_3]
Do I Need AI to Turn a YouTube Video into a Reel?
No. A manual workflow can follow the same editorial steps: import an authorized file, select an excerpt, reframe it vertically, add captions, review the audio, and export. AI-assisted selection does not replace checking context, framing, or caption accuracy.
How Long Should the Finished Reel Be?
For this workflow, choose the shortest version that communicates the complete idea without losing necessary context. The supplied pages describe different clip-length settings, so they should not be used to establish Instagram's current maximum duration. Confirm the current limit before exporting or uploading. [src_2] [src_3]