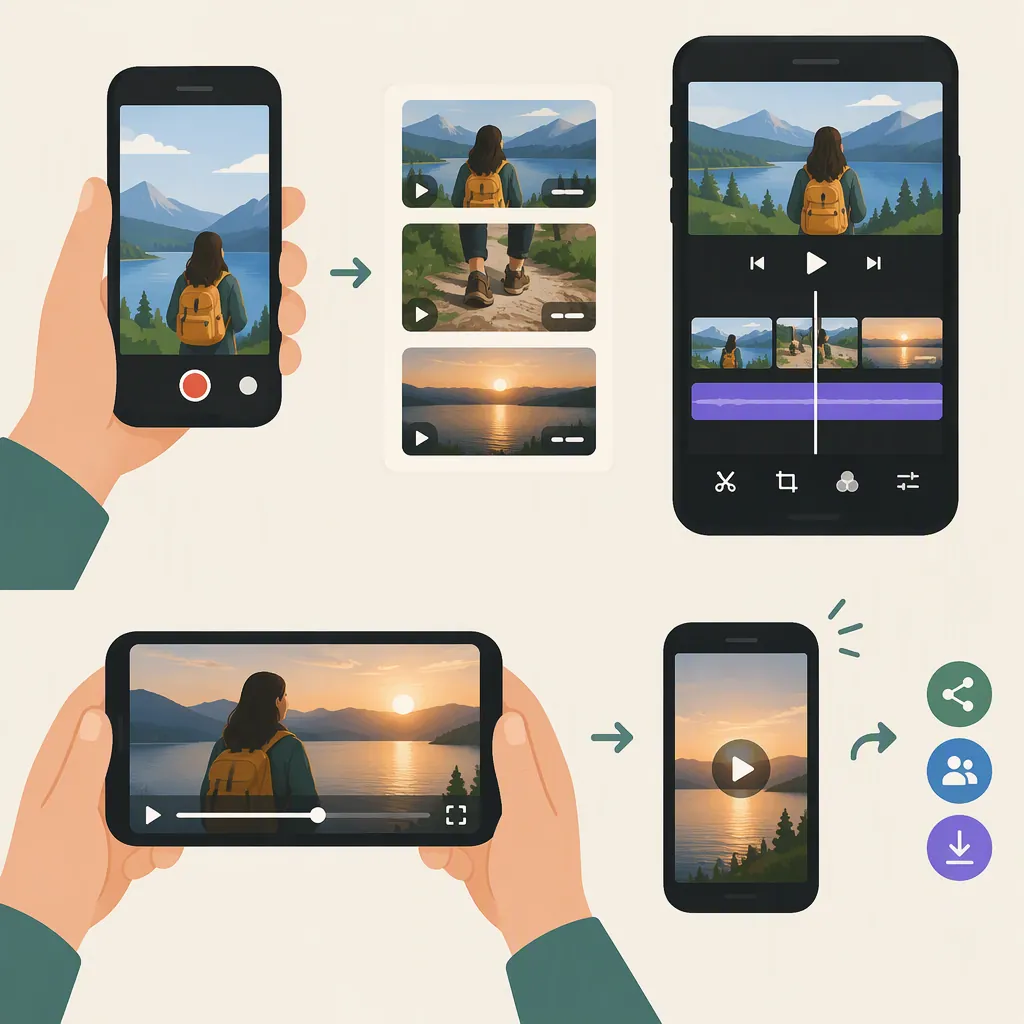
How to Make a Video with Clips from Your Phone
To make one video from clips on your phone, open a video editor that supports combining clips, start a project, and select your footage. Arrange the clips in the order you want, trim unwanted parts, check the sound, and add titles only where useful. Preview the complete sequence, then use the editor’s export or save-video option. NC State’s guide describes mobile editing tasks such as arranging footage, trimming, and adding titles and transitions; exact controls depend on your editor. [c1]
1. Choose Clips That Tell One Clear Story
Start with the footage you already have. Watch each candidate clip and choose the moments that serve the purpose of your finished video, whether that is a trip recap, a demonstration, or a family montage.
As an editing approach, give each clip a job: introduce the subject, show an action or detail, or provide an ending. Leave out repeated shots unless they add something new.
Pay attention to visibility, camera movement, and sound while choosing footage. NC State’s smartphone guide emphasizes lighting, steady recording, and audio quality. Use those priorities to assess your existing clips rather than assuming every recording needs to be included. [c1]
Clip Selection Worksheet
For each candidate clip, note:
- File or thumbnail description:
- Useful moment to keep:
- Role: opening, action, detail, or ending.
- Sound to preserve:
- Framing or privacy concern:

Then list the selected clips in your intended viewing order.
2. Start a Project and Add Your Footage
Use an editor with the basic functions needed for this task: combining clips, changing their order, and trimming them. NC State describes mobile editing workflows that include arranging footage and photos and trimming them down. [c1]
The following is a general workflow, not a verified walkthrough for a particular app:
- Open the editor and find its new-project or create-video option.
- Select the clips you want to include, using the app’s media picker or import control.
- Check that every selected clip appears in the editing sequence.
- Rearrange the clips into your planned order.
- Play the sequence once before adding effects.
Button labels, media permissions, and available tools vary. The supplied reference does not establish current app interfaces, pricing, or export restrictions.
3. Trim the Clips and Check the Framing
Trim each clip so it begins near the useful action and ends when that moment is complete. For example, consider removing the pause before someone starts speaking or the moment when the camera drops after the action. Basic trimming is among the mobile editing capabilities described by NC State. [c1]
Choose the frame shape for your intended viewing context, then preview every clip within it. The reference recommends landscape footage for widescreen and television viewing; that guidance is not a universal requirement for every destination. [c1]
For mixed portrait and landscape footage, inspect any available fit or crop options rather than applying one treatment blindly. Keep faces, important details, and existing text visible. If a crop removes essential information, try another framing option or choose a different clip.
For a first edit, favor straightforward cuts. Add a transition only when it helps signal a change in time, place, or subject.
4. Check Sound and Add Useful Text
Listen to the entire edit, especially where one clip meets the next. Keep speech understandable and check for distracting background noise or abrupt changes in loudness. NC State emphasizes that audio matters as much as the video. [c1]
If your editor offers volume controls, adjust them while listening. If you add music, keep it below speech and use audio you have permission to include. Music is optional; preserve original sound when it carries the meaning of the scene.
Use a short title when viewers need context, such as a location or activity name. Preview text over the actual footage to check readability and placement. Titles and transitions are among the mobile editing features described in the reference, but their controls and availability depend on the editor. [c1]
5. Preview, Export, and Check the Saved Video
Watch the complete project before saving the finished video. Check that the sequence makes sense without explanation and that no unwanted footage remains.
Look for an export, render, or save-video command in your editor. Follow its prompts and choose settings appropriate to where you intend to use the video. The supplied reference does not document export menus or prescribe a resolution, frame rate, or file format, so this step remains app-specific.
After exporting, open the saved video and watch it again. Confirm that it includes the complete sequence and that the picture, sound, and text are as intended. As a precaution, keep your original clips and editable project until you have checked the result.
Final Review Checklist
- The clips appear in the intended order.
- Unwanted pauses and accidental footage are removed.
- Important subjects remain visible in the chosen frame.
- Speech is understandable and music does not obscure it.
- Titles are readable and correctly spelled.
- Private information is removed or intentionally included with permission.
- The exported file opens and plays through to the intended ending.
FAQ
Do I Need a Computer to Combine Phone Clips?
Not necessarily. NC State’s guide describes editing on smartphones, including trimming, arranging footage, and adding titles and transitions. Choose a mobile editor that supports the functions you need; the reference does not verify current app compatibility or pricing. [c1]
Should the Finished Video Be Portrait or Landscape?
Choose based on the intended viewing context and inspect how your existing clips fit. NC State recommends landscape for widescreen or television viewing. For another destination, check its requirements rather than treating that recommendation as universal. [c1]
Why Does My Editor Show Different Buttons?
This article gives a general workflow rather than instructions for a specific app. The supplied guide supports basic mobile editing tasks but does not document current interfaces. Look for controls that perform the same functions: create a project, add clips, reorder, trim, preview, and export. [c1]