How to Create a Video Montage on iPhone
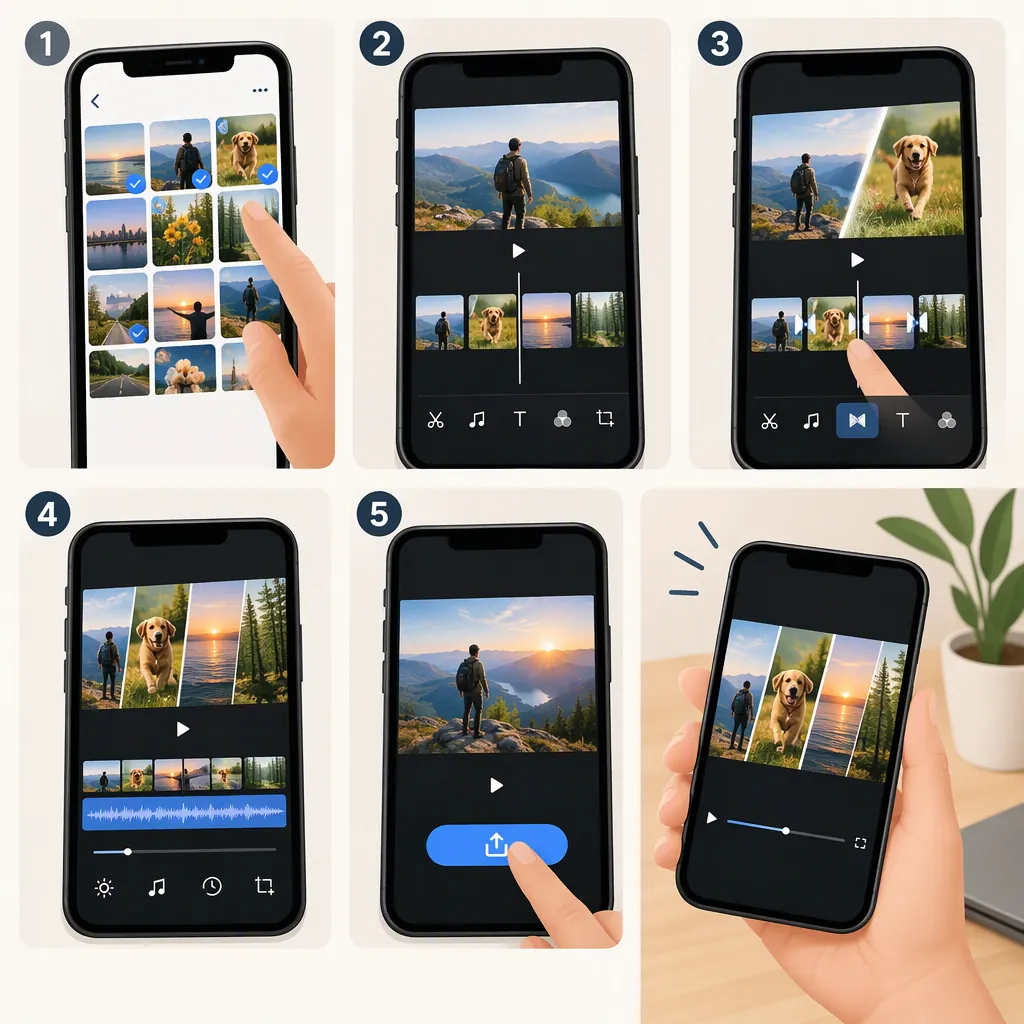
To create a video montage on iPhone, open iMovie, tap Start New Project, choose Movie, select your videos, and tap Create Movie. Arrange the clips, trim unwanted footage, and adjust transitions. When finished, tap Done, then Share and Save Video. Apple documents this workflow for combining videos from your photo library. [apple-combine]
Plan Your Montage Before Editing
For this guide, think of a montage as a sequence of selected moments rather than a collection of complete recordings. The following planning suggestions are editorial guidance, not required app settings.
- Choose one theme, such as a trip, an event, or a project coming together.
- Pick an opening clip that establishes the subject.
- Select middle clips that show different details or stages.
- Choose a closing moment that feels like an ending.
- Leave out repeated footage unless the repetition serves a purpose.
Start with a manageable selection. You can decide whether to add more footage after watching the first edit.
Simple Montage Planning Template
Theme: __________
Opening clip: __________
Middle clips, in proposed order: __________
Closing clip: __________
Moments to remove: __________
Audio to preserve: __________
Intended viewing format: __________
Create an iMovie Project and Combine Clips
Apple's support guide uses iMovie to combine videos on iPhone and states that iMovie is available as a free download from the App Store if it is not already installed. [apple-combine]
- Open iMovie.
- Tap Start New Project. If that option is not visible, tap Projects to return to the Projects browser.
- Tap Movie.
- To browse your footage, tap Media, then Video, then All.
- Tap a video, then tap the checkmark in the pop-up menu to select it. Repeat for the other clips.
- Tap Create Movie.
The videos initially appear in the order you selected them. You can rearrange them after creating the movie. [apple-combine]
Arrange and Trim the Montage
To move a clip, touch and hold it in the timeline below the preview, then drag it to a new position. If you cannot see all the clips, pinch the timeline to zoom out. [apple-combine]
To trim a clip, tap it so that a yellow border appears, then drag its left or right edge. If an edge will not extend farther, the clip has reached its maximum available length. [apple-combine]
For the creative pass, try these adjustments:
- Remove pauses before an action begins and after it finishes.
- Give important moments enough time to be understood.
- Alternate wider views with details when your footage allows.
- Watch neighboring clips together rather than judging each one in isolation.
If the sequence needs another shot, Apple's guide says to tap Add Media, then Video and All, and select the additional footage. [apple-combine]
Review Transitions and Audio
Tap the transition icon between two clips to change how they connect. Apple's guide identifies Dissolve as the default and lists None and Wipe as alternatives. [apple-combine]
As an editing starting point, try None for direct cuts between moments. Use other transitions selectively rather than changing every join simply for variety.
During playback, listen as well as watch. Note distracting background noise, abrupt sound changes, or speech you want to preserve. If you choose to add background music, use audio whose permissions you have checked for your intended use, and review whether speech remains understandable.
Source limitation: The supplied Apple guide covers combining clips, trimming, transitions, and saving. It does not provide a music-import or audio-mixing walkthrough, so this article does not give verified button-by-button instructions for those tasks.
Preview and Save Your Finished Video
Tap the play button to preview the montage. When you are satisfied, tap Done, then the Share button, and choose Save Video to save it to your photo library. Apple also lists AirDrop, Mail, and Messages as sharing options. [apple-combine]
Before saving your final version, review the entire sequence without stopping. After saving, open the resulting video and check it again.
The cited guide was published on November 17, 2023. Treat these as the documented steps rather than a guarantee that every installed version has identical labels or layout. It also does not establish export-resolution choices or platform-specific upload settings. [apple-combine]
Final Review Checklist
- The opening establishes the subject.
- Clips appear in the intended order.
- Unwanted starts, pauses, and endings are trimmed.
- Transitions feel intentional.
- Important speech is understandable.
- The ending is not accidentally cut short.
- The saved video plays as expected.
FAQ
Can I Create an iPhone Video Montage for Free?
Apple states that iMovie can be downloaded for free from the App Store and documents using it to combine videos from your photo library. This guide uses that workflow rather than a paid editing service. [apple-combine]
Can I Change the Order After Selecting My Videos?
Yes. In the iMovie timeline, touch and hold the clip you want to move, then drag it to a new position. Pinch the timeline to zoom out if all the clips are not visible. [apple-combine]
How Do I Remove the Dissolve Between Clips?
Tap the transition icon between the clips and select None. Apple's guide identifies Dissolve as the default transition and None as an available alternative. [apple-combine]
Where Does the Finished Montage Go?
Choosing Done, Share, and Save Video saves the finished video to your photo library. Apple also documents sharing it through options such as AirDrop, Mail, or Messages. [apple-combine]
Sources
- [apple-combine] How to combine videos on iPhone – Apple Support (MY)