How to Make Talking Dog Videos on TikTok
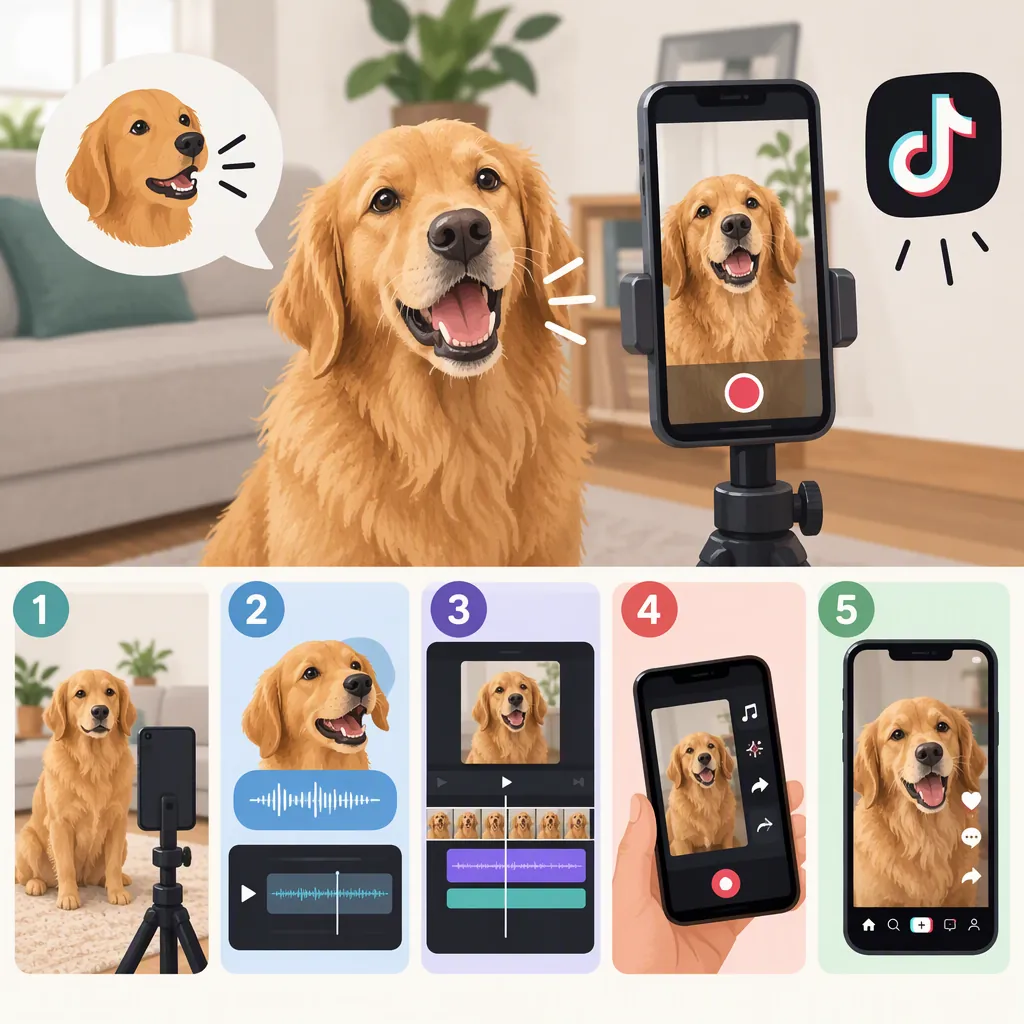
To make a talking dog video on TikTok, record or upload a dog clip, write dialogue that matches the action, and add a recorded voiceover or text-to-speech narration. Adjust the audio levels, add captions, and preview the timing. For an animated talking mouth, use a separate photo-animation workflow rather than voiceover alone. The supplied tutorials describe both approaches, but they do not independently verify current app controls or animation quality. [c1] [c2]
Choose Voiceover or Photo Animation
Decide what “talking” should mean in your video before editing.
- Voiceover over real footage: Keep your dog's natural movements and add imaginary dialogue. This is a useful starting point if you already have a clip with a clear reaction.
- Animated talking photo: Start with a dog portrait and use an animation workflow to create apparent speaking movements.
The FlexClip tutorial describes narration over existing footage as well as still-photo animation. The Mango Animate tutorial describes a photo-based workflow using text or uploaded audio. These are vendor-authored descriptions, not independent comparisons of output quality. [c1] [c2]
Adding narration alone does not animate the dog's mouth. For an original comedy clip, a well-timed glance or head tilt can be the visual cue for a line; exact mouth synchronization need not be the goal.
Prepare the Footage and Write an Original Script
Use footage you recorded or have permission to edit. Choose a moment with one readable action: looking at an empty bowl, inspecting a toy, or settling onto a cushion. Film without forcing a reaction, and stop if your dog appears uncomfortable.
For this exercise, use a vertical 9:16 composition, the format chosen for TikTok in the FlexClip walkthrough. Treat that as an editing recommendation here, not a statement of TikTok's upload requirements. [c1]
Write the dialogue after watching the clip. Build a small joke around what is actually visible rather than copying another creator's script. A simple structure is:
- Establish what the dog wants.
- Give the dog an exaggerated opinion.
- Finish on a visual reaction or short punch line.
The following script is an original example. Its timings are a starting point, not a performance benchmark.
Original Empty-Bowl Script and Edit Plan
0–3 seconds — Dog looks at an empty bowl.
Voice: “I've inspected the kitchen.”

3–6 seconds — Dog looks toward the camera.
Voice: “There appears to be a serious snack shortage.”

6–9 seconds — Hold briefly on the reaction.
Voice: “I would like to speak to the chef.”

Editing task: Trim each shot to the spoken line, then adjust the pauses to fit the dog's natural movement. Use only shots you can capture comfortably.
Add the Dog's Voice in TikTok
The supplied FlexClip tutorial describes two TikTok narration routes: recording a voiceover and converting on-screen text to speech. It also notes that the recording control may appear as “Voiceover” or within “audio editing” on some devices. Because this is third-party guidance, treat the labels below as pointers rather than guaranteed current controls. [c1]
For your own recorded voice:
- Record a dog clip or upload one from your camera roll.
- Open the editing screen and look for a voiceover or audio-recording control.
- Position playback where the first line should begin, then record the dialogue.
- Preview the result and re-record any line that overlaps the wrong action.
- If a voice effect is available, compare it with the unprocessed recording. Keep the version that remains understandable.
For text-to-speech:
- Add the dialogue using the text tool.
- Look for a text-to-speech option associated with the text.
- Select an available voice and listen to its pronunciation.
- Revise punctuation or simplify awkward wording, then preview again.
If a described control is absent, do not assume you have missed a required step. A fallback is to prepare the narration in an editor that supports audio recording, combine it with the footage, and upload the finished video.
Match the Audio, Action, and Captions
Place each line beside a visible cue. For example, start a complaint when the dog looks at the bowl and leave a brief pause before the camera-facing punch line. If the dialogue feels rushed, shorten the script rather than forcing more words into the same shot.
Reduce distracting original audio without removing sounds that help the scene. Keep optional music below the narration. The FlexClip tutorial describes volume adjustment and caption editing as parts of its voiceover workflow. [c1]
Add captions that match the final spoken words. Review spelling, line breaks, and timing manually, even if captions were generated automatically. Place text where it does not cover the dog's face, then inspect the upload preview for overlap with interface elements.
Watch once with sound and once muted. The spoken version should be easy to follow; the muted version should still communicate the joke through the action and captions.
Use Photo Animation for a Moving Mouth
If apparent mouth movement is essential, start with a clear dog portrait rather than expecting a voiceover track to change existing footage. Both supplied tutorials describe photo-based talking-dog workflows. The Mango Animate guide outlines uploading an animal image, entering dialogue or supplying audio, choosing settings, and generating a video. [c1] [c2]
A cautious workflow is:
- Choose a photo you own or have permission to use, with the face unobstructed.
- Test one short original line before making a longer scene.
- Inspect the mouth, teeth, eyes, and head movement for distracting distortions.
- If the result looks unnatural, simplify the line or use the real-footage voiceover approach instead.
- Add captions and review the final framing before uploading.
Describe the result as animated or AI-generated so viewers understand how it was made. This is a transparency recommendation, not a statement of TikTok's current labeling rules. The supplied sources do not establish current pricing, export restrictions, privacy terms, or reliable lip-sync quality.
Review the Video Before Posting
Make the final review about clarity, originality, and the dog's comfort—not predicted reach. The supplied vendor tutorials contain promotional language, but they do not establish that a particular workflow will make a video go viral. [c1] [c2]
Check the finished video in the upload preview. Use audio and images you have permission to publish, remove unintended personal details from the background, and make sure any artificial speaking effect is presented honestly.
Final Review Checklist
- The footage or photo is yours to use.
- The dialogue is original and matches the visible action.
- The voice is understandable without competing music.
- Captions match the final narration.
- Text does not obscure the dog's face or important action.
- No uncomfortable behavior was staged for the clip.
- Animated or AI-generated speaking is clearly described.
- The upload preview has been checked with sound on and off.
FAQ
Do I Need AI to Make a Talking Dog Video?
No. You can put a recorded human voice over real dog footage. The FlexClip tutorial describes this separately from its AI photo-animation workflow. Use photo animation only if you want apparent speaking movements rather than narration alone. [c1]
What If I Cannot Find the Voiceover Control?
Look for an audio-editing or recording option rather than relying on one exact label. The supplied third-party tutorial notes label differences on some devices, but it does not verify every current TikTok interface. If recording is unavailable, prepare the voiceover in a separate editor and upload the combined clip. [c1]
Can I Start with Just One Dog Photo?
Yes, the supplied tutorials describe photo-based talking-dog workflows. Use a clear portrait and test a short line first. Those descriptions are not independent evidence of animation quality, and current costs or export limitations are not established by the provided material. [c1] [c2]