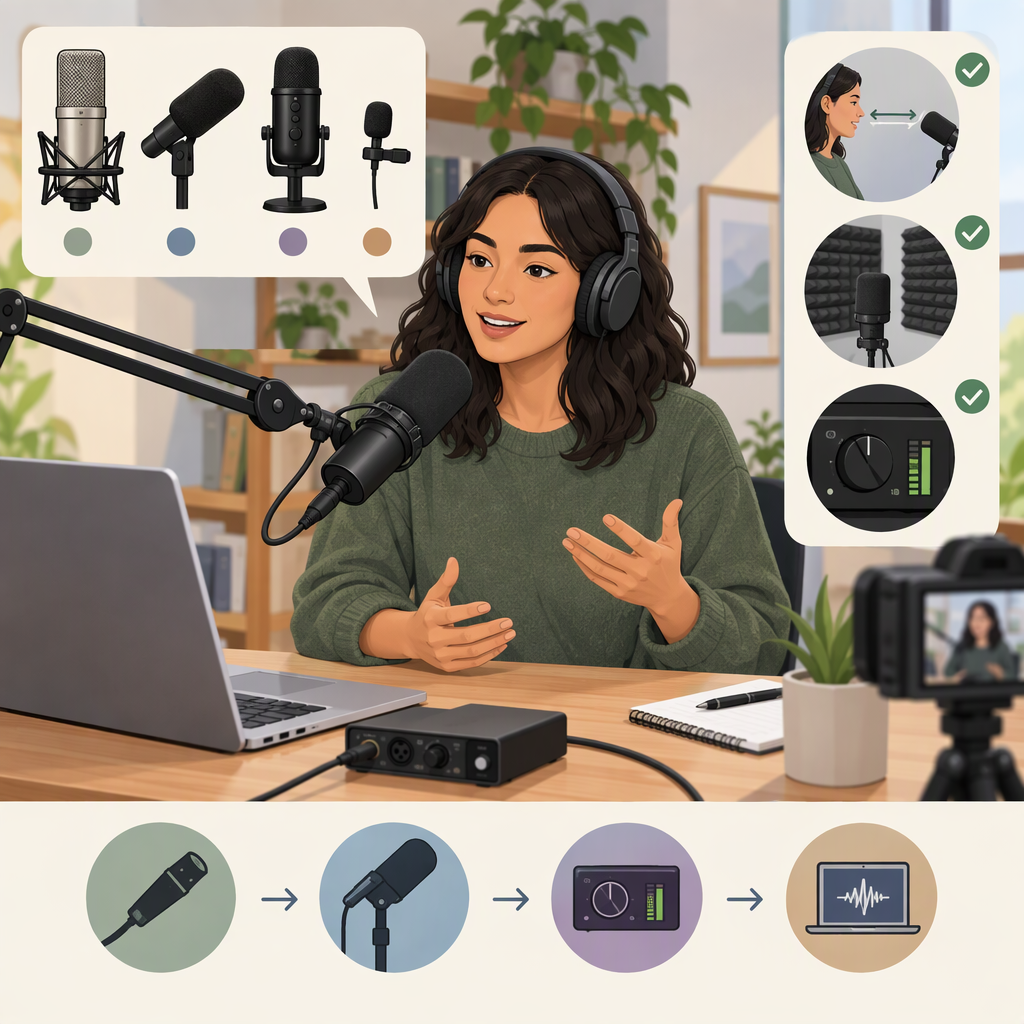
Mic for Content Creators: How to Choose and Set up the Right Microphone
There is no single best mic for every content creator. Start with where you record, how much you move, how many people need to be heard, and what device will record the sound. Then choose a microphone style and connection that fit those constraints. Before buying anything, try improving placement and recording a short test: room sound, mic position, and input settings all affect the result. Shure’s selection guidance likewise treats the application and pickup direction as central to choosing a microphone. (shure.com)
Choose Based on How You Record
Answer these questions first:
- Where will you record? A quiet, treated room, a typical bedroom, a busy location, and an outdoor shoot create different challenges. Hard, reflective surfaces can add room sound to a voice recording. (shure.com)
- Will you stay in one place or move? A mic on a desk can suit a seated presenter. A mic attached to clothing or a wireless transmitter may be more practical when the speaker moves around.
- How many voices must be captured? One close mic is a different problem from recording two people across a table. Check how many independent inputs a recording setup can accept if you need separate tracks.
- What device and app will record? A computer, camera, and phone may use different inputs. Confirm that the microphone’s output and any required interface or adapter work with the exact device and recording app.
- What is your budget for the whole setup? Include any stand, cable, interface, adapter, headphones, or power supply you need—not just the microphone.
These are practical decision questions, not a guarantee that any one mic type will sound a certain way. Microphones and recording situations differ, so use a test recording to confirm your choice.
Compare Microphone Styles and Connections
| Option | Consider it when… | Trade-off to check |
|---|---|---|
| Desktop or stand-mounted mic | You record seated at a desk and can keep a steady distance from the mic. | It occupies space and picks up changes in your position; placement and room sound still matter. |
| Lavalier (clip-on) mic | The mic needs to stay with a speaker who is moving, or should be less visible. | Clothing movement, placement, cable or wireless-system needs, and device compatibility can affect setup. A wireless lav system typically sends audio from a transmitter to a receiver connected to the recording device. (rode.com) |
| Handheld mic | The speaker can hold and aim the mic, such as in an interview or presentation. | The speaker must manage distance and handling; check how the mic connects to the recorder. |
| Shotgun mic | You want a directional mic aimed at a subject, often for video or a source that cannot be close-miked. | Directionality does not make distant sound magically louder or remove all room sound. Shure describes shotgun mics as rejecting more off-axis sound, not as reaching out to a subject. (shure.com) |
| USB mic | You want a direct digital connection to a computer or other device explicitly supported by the mic. | Check supported devices, ports, apps, and whether the mic has the input and monitoring features you need. |
| XLR mic with an audio interface | You want an analog mic connection through a separate interface, or need the inputs and controls an interface provides. | This adds equipment and setup. An analog XLR mic cannot connect to a USB port with a passive cable alone; it needs analog-to-digital conversion in an interface. (service.shure.com) |
USB and XLR describe connection paths, not a universal sound-quality ranking. A USB mic includes a digital connection path; an XLR mic generally needs an interface or recorder with a compatible mic input. An interface can also provide input gain and, depending on the model, multiple inputs. Choose based on your actual device, number of sources, and whether you want the additional gear and controls. (shure.com)
A mic’s pickup pattern is another useful specification. It describes how sensitive the mic is to sound from different directions. An omnidirectional pattern picks up sound around the mic; a unidirectional pattern is most sensitive from the front and less sensitive from other directions. Directional pickup can help reduce some off-axis sound, but it does not eliminate noise or substitute for a suitable room and mic position. (shure.com)
Example Starting Points
- Seated solo videos in a home office: Try a desktop or stand-mounted mic connected directly by USB if the exact mic, computer, and app support that route. If the room sounds echoey, address the room and mic position before assuming a different mic will solve it.
- Walk-and-talk videos: Consider a lavalier or wireless mic system that keeps the mic near the speaker. Check the transmitter and receiver connections, battery or charging requirements, and recording-device support in their manuals.
- A fixed camera filming a nearby presenter: A camera-mounted directional mic may fit if the camera is close enough and has a compatible audio input. If the speaker is far from the camera, test the actual placement rather than assuming a shotgun mic will overcome distance.
- Two-person interviews at a desk: Decide whether both speakers need separate microphones and tracks. Verify that the interface or recorder has enough suitable inputs; a single-input setup may not capture each person separately.
These are examples to guide a first test, not tested product recommendations.
Check Compatibility Before Connecting
A matching-looking plug does not by itself confirm that a mic will work. Use this checklist for the exact microphone, device, and recording app:
- Connection: Identify the mic’s output and the device’s supported input. If the mic uses analog XLR and the device only offers USB, plan for an interface or another compatible converter—not just a passive cable. (service.shure.com)
- Adapters and receiver: Check the mic or receiver manual for approved cables, adapters, and supported connection types. Phone ports and accessory support vary by model. For example, RØDE says its VideoMic Me-C+ connects directly to USB-C devices and is not compatible with iOS devices that have a Lightning port; that is a model-specific example, not a rule for every USB-C mic. (rode.com)
- Power: Check whether the mic needs a battery, charging, plug-in power, or phantom power from an interface. Focusrite notes that condenser mics require electrical power and ordinary dynamic mics do not, while some active microphones are exceptions. Do not switch on phantom power unless the mic and connected equipment documentation says it is appropriate. (support.focusrite.com)
- App and permissions: Confirm that the recording app can select the external input and has permission to use the microphone. On a Mac, Apple’s support instructions say to check the app’s microphone permission if an external input is not recording. (support.apple.com)
- Exact model and version: Read the current manuals or compatibility pages for the specific device, operating system, mic, receiver, and adapter. Do not assume that a connection supported by one model works on another.
Set up and Test Before Upgrading
- Choose the quietest practical place. Pause nearby fans or appliances if you can do so safely. Listen for traffic, HVAC, computer fans, and other interruptions. If the voice sounds hollow or echoey, try a different position or a less reflective space; hard surfaces can create reflections that make recordings sound unclear. (shure.com)
- Put the mic where the voice is. Use its intended speaking side and keep the distance and angle consistent. For a directional mic, aim it toward the speaker. For a lavalier, secure it as directed by its manual and check for clothing rub. Shure’s shotgun guidance also recommends aiming the mic at the source and getting it as close as practical for the recording situation. (shure.com)
- Select the intended input. Connect the mic or interface, choose it in the recording app, and make a brief recording. If the app’s meter does not move or the playback is silent, check the selected input, cable path, power, permissions, and device compatibility before changing microphones.
- Set input level while speaking normally. Watch the app or recorder’s meter during a test at your typical speaking volume, including the loudest phrase you expect to record. If the meter clips or the sound distorts, reduce input gain and test again. If the recording is very quiet, check the connection and input selection before increasing gain. Exact meter targets and controls vary by equipment, so follow its manual.
- Listen back on headphones. Check whether the voice is clear and consistent. Listen for room echo, background noise, plosive bursts, clothing or desk bumps, distortion, and changes in level when you move. Make one adjustment at a time—position, room, input, or speaking distance—and record another short sample.
- Test the full workflow. If you make video, confirm that the audio is recorded by the intended device and stays in sync. If you are recording two people or using a wireless system, test every microphone and channel before the full session.
A useful first step is to record the same short passage in your normal position, listen back, and note the biggest audible problem. If the main issue is echo, try the room or placement first; if it is clipping, adjust the input level; if the sound disappears when you move, reconsider mic placement or a mic that moves with you. A new microphone may help with a particular constraint, but it cannot guarantee a fix for every room, connection, or recording problem.
Quick Decision Checklist
Before choosing a mic for content creation, confirm:
- It suits whether you sit still, move, or record multiple people.
- Its placement is practical for your video or audio workflow.
- Its connection path works with your exact camera, phone, computer, interface, and app.
- You know whether it needs an interface, adapter, receiver, battery, or phantom power.
- You have tested the room, input level, and recorded playback before deciding equipment is the problem.
- The total setup—not just the microphone—fits your budget.
When in doubt, borrow or use an existing mic for a short, repeatable test before expanding your setup. Compare what you hear in the actual recording, not only the microphone’s format or specification.