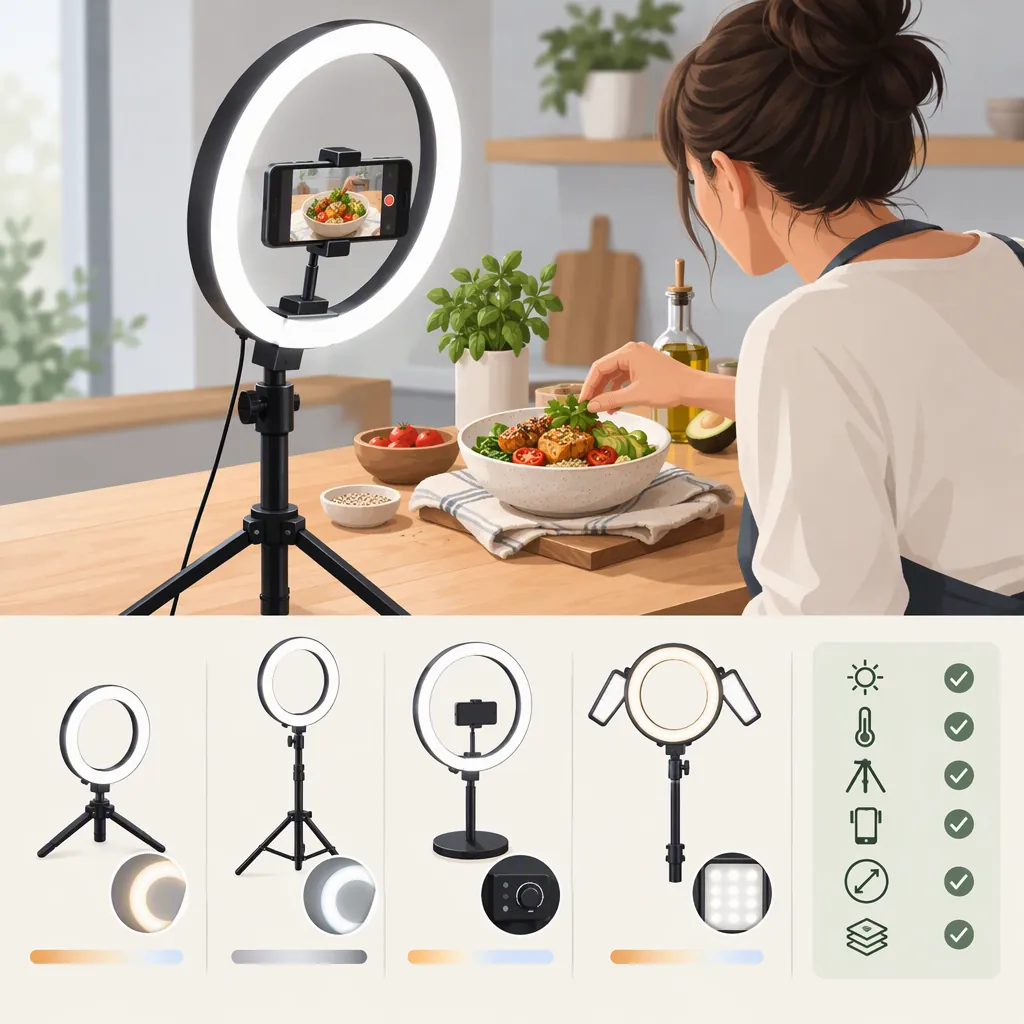
How to Choose the Best Ring Light for Food Videos
The best ring light for food videos is one that lights your actual shooting area and lets you adjust brightness, color, and placement for both food and presenter shots. A ring light can suit front-facing demonstrations and overhead food footage, but a diffused side light is worth comparing when food texture is the priority. The provided reference supports these setup approaches, not a tested ranking of ring-light models. [lighting-guide]
Match the Light to Your Main Shot
Start with the shot you film most often rather than a particular ring-light size or brand.
- Presenter-led cooking demonstrations: Consider a ring light in front of the presenter. The reference describes this placement as a way to provide even facial illumination and reduce shadows. [lighting-guide]
- Overhead preparation footage: The reference also describes placing a ring light above the food. Treat this as a starting position, then check whether your hands, camera, and utensils interfere with the light. [lighting-guide]
- Close-ups of finished dishes: Compare the ring light with a diffused light placed to the side. The reference recommends angled softbox lighting to emphasize food texture and describes reflectors as a way to soften shadows. [lighting-guide]
If your video combines all three, plan separate lighting positions. A setup that suits your face does not need to remain unchanged for a close-up of the plate.
Evaluate Controls and Tabletop Coverage
Use the following as selection criteria, not as claims that any particular product meets them. The reference discusses adjustable intensity and color temperature as advantages of artificial lighting, but it does not provide comparative measurements for ring-light models. [lighting-guide]
| Criterion | What to Check |
|---|---|
| Brightness adjustment | Can you adjust illumination without leaving the food too dark or losing detail in bright areas? |
| Color adjustment | Can the light work with the other light sources you intend to keep in the scene? |
| Tabletop coverage | At your intended position, are the bowl, cutting board, and hand movements adequately lit? |
| Positioning | Can the light reach your front-facing and tabletop positions without blocking the camera? |
| Working clearance | Can you stir, pour, and plate without touching the light or its support? |
| Reflections | Does the setup leave distracting reflections on the cookware and food you actually film? |
Do not treat diameter alone as a verdict. Instead, evaluate the complete setup at the distance and camera angle you plan to use. The supplied evidence does not establish a universally best ring-light diameter, wattage, or model.
Ring-Light Evaluation Worksheet
Record these details for each candidate setup:
- Main shot: presenter / overhead / food close-up.
- Light position and distance from the work surface.
- Brightness and color settings used.
- Coverage across the full preparation area.
- Shadows during stirring and pouring.
- Reflections on a spoon, bowl, and glossy food surface.
- Clearance for hands, camera, and utensils.
- Result: suitable / needs repositioning / compare with a different light.
Build a Simple Tabletop Test
Use a repeatable comparison before settling on a lighting position:
- Prepare a representative scene. Include a plate of food, a bowl, and a reflective utensil. Mark their positions so you can repeat the comparison.
- Set the camera framing. Include the area where your hands will move, not just the finished plate.
- Try the ring light first. Begin with the position appropriate to your shot: in front for a presenter or above for overhead footage. These are starting placements described in the reference. [lighting-guide]
- Record an ordinary action. Stir, pour, or move an ingredient through the frame. Review the result for shadows and reflections rather than judging only a still preview.
- Compare a side-light arrangement if available. The reference suggests a softbox angled roughly 45 degrees to the food and a reflector to soften the shadow side. [lighting-guide]
- Change one variable at a time. Adjust position, brightness, or reflector placement separately, then record another clip.
Keep the arrangement clear of your cooking activity. Do not improvise an overhead mount from a support that is not intended for that configuration.
Three-Clip Comparison
Clip A: Ring light in the starting position for your main shot.
Clip B: Same scene with the ring light repositioned to address the most distracting shadow or reflection.
Clip C: Diffused side light, if available, with a white reflector opposite it.

Repeat the same stirring or pouring action in each clip. Compare food detail, hand shadows, glare, background brightness, and working clearance. Record which arrangement suits this shot; do not assume the result applies to every dish.
Troubleshoot Color, Shadows, and Glare
If the scene has an unwanted color cast: Check which room lights are still on. The reference warns that ambient lighting can disrupt color balance and recommends turning it off when relying on a controlled lighting setup. It also discusses coordinating light color temperature with white balance. [lighting-guide]
If shadows obscure the food: Try changing the light position or adding a white reflector. The reference identifies white cardboard as a possible reflector and recommends a higher light position for deeper pots or dishes. [lighting-guide]
If cookware produces distracting glare: Change the utensil angle or light placement before deciding that you need different equipment. The reference recommends angling reflective utensils away from direct light and discusses polarizing filters as another option, with adjustment needed for each shot. [lighting-guide]
If the food looks too flat: Compare the ring-light arrangement with diffused side lighting. Keep some visible shadow if it helps distinguish the food's shape; the goal of the test is useful detail, not automatically eliminating every shadow.
What This Guide Can and Cannot Establish
The supplied source is a general cooking-video lighting guide covering ring lights, LED panels, softboxes, reflectors, and diffusers. It includes product examples, but it does not provide a measured comparison that establishes a best ring light. [lighting-guide]
This article therefore does not rank brands, verify product specifications, or claim hands-on testing. Its decision rule is practical: choose the arrangement that preserves useful food detail, works across your preparation area, and leaves room to demonstrate the recipe. For a presenter-heavy video, test a ring light first; for texture-focused food close-ups, compare it with a diffused side light.
FAQ
Is a Ring Light Good for Food Videos?
It can be useful for presenter shots and overhead food footage. The reference describes both uses. Test it with your actual food and cookware, and compare diffused side lighting when texture is especially important. [lighting-guide]
What Size Ring Light Is Best for Cooking Videos?
The provided evidence does not establish a best diameter. Evaluate whether the light covers your full work area at the intended position and whether its support leaves enough room for the camera, utensils, and hand movements.
Should I Use a Ring Light or a Softbox for Food Close-Ups?
Compare both if available. The reference describes ring lights as providing even illumination and recommends an angled softbox for emphasizing food texture. Choose based on the detail, shadows, and reflections in your shot rather than assuming either type always wins. [lighting-guide]
Do I Need Three Lights to Start?
You do not need to begin with a three-light test. Start with one source and assess the result, then try a reflector if shadows hide important detail. The reference describes reflector fill and recommends beginning with a basic lighting setup before exploring additional tools. [lighting-guide]