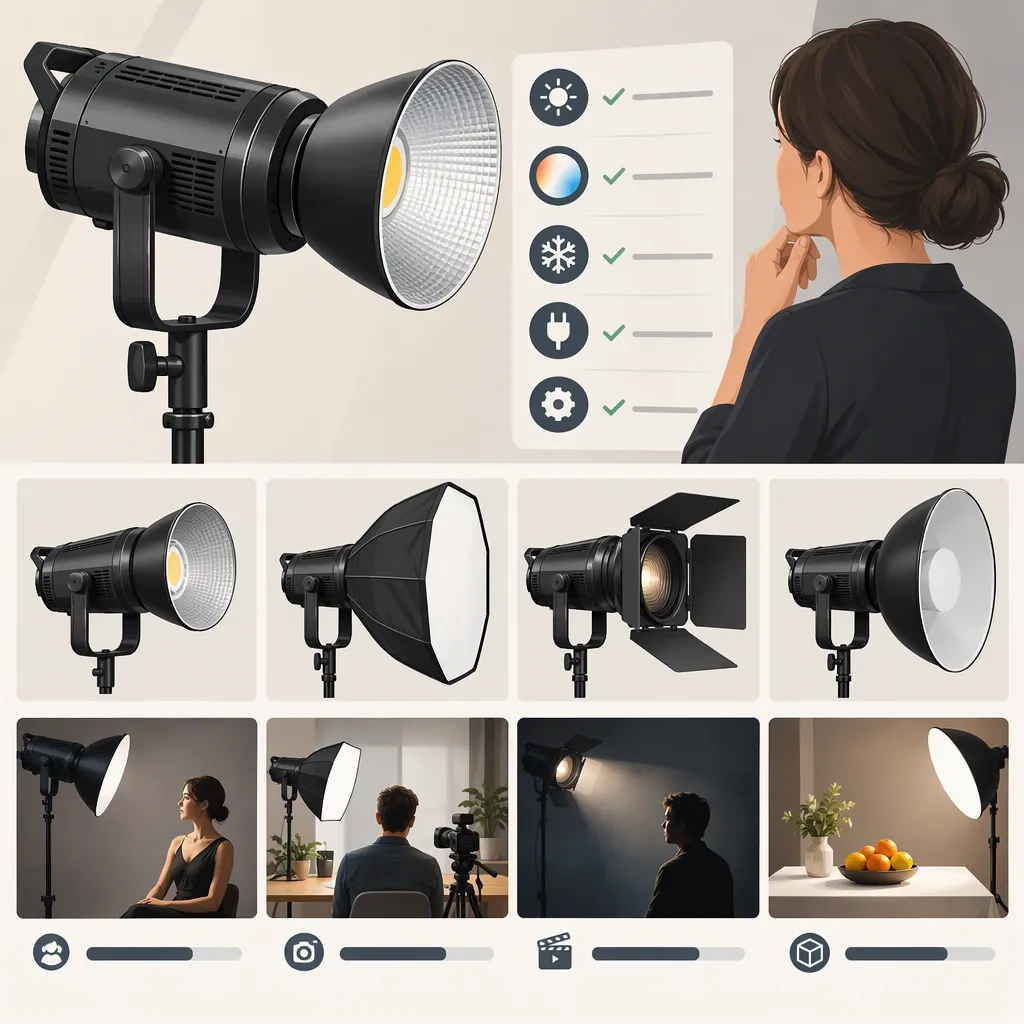
Choosing a Godox Sl300ii Led Video Light for Filming
To evaluate a Godox SL300II LED video light, verify the exact model, define your shot’s requirements, and assess the intended setup. If you can access the unit, test it with your planned modifier, camera settings, shooting distance, and microphone position. If you cannot, use matching documentation to identify unresolved requirements and keep the selection provisional.
Model and evidence limits: The Amazon listing cited here identifies the SL300III in its title and product information, not the SL300II. It is used only as evidence of that model mismatch—not to verify SL300II specifications, controls, accessory compatibility, or operating modes. [source_1] No model-specific SL300II manual or independent test is available in the material used for this guide, so output, color performance, noise, power requirements, and mount compatibility remain unverified. This guide provides a selection process, not a product recommendation.
Verify the Model Before Comparing Features
Record the model shown on the unit’s identification label, or obtain a legible image of that label if you do not have access to the unit. Match it to documentation for that exact model. Do not fill gaps with details from a similarly named light.
Before attaching accessories or powering the unit, confirm:
- Model identity: The unit label and documentation refer to the same model.
- Accessory compatibility: The intended modifier and attachment method are documented as compatible.
- Support requirements: The stand and mounting hardware meet the documented load and use requirements for the complete assembly.
- Power and operation: The power arrangement, ventilation, and intended operating conditions comply with the relevant documentation.
- Required controls: Any adjustment method essential to your workflow is documented for the exact unit.
Keep undocumented details marked as unresolved. If identity, compatibility, or safe operating conditions cannot be confirmed, pause setup and use until those questions are resolved.
Choose a Path Based on Equipment Access
If You Can Access the Exact Unit
Complete the documentation and safety checks, then follow the testing process below. Evaluate the arrangement you intend to use rather than a convenient setup that does not represent the production.
If You Cannot Access the Unit Yet
You can prepare a comparison without claiming that the light is suitable:
- List the requirements your production must meet.
- Obtain or request publicly available documentation that matches the model label.
- Record which requirements the documentation addresses and which remain unknown.
- For any available performance report, check the exact model, modifier, distance, camera settings, and other stated test conditions. Do not assume a result from a different arrangement answers your requirement.
- Prepare a test plan for unresolved image, audio, and operating requirements.
The resulting conclusion should be “candidate for further evaluation,” not “suitable for this setup.” Documentation can address documented features and operating requirements; it does not replace missing evidence about your intended filming conditions. If an essential requirement cannot be verified or tested, a firm suitability conclusion is not justified.
Define the Shot Before Evaluating the Light
Write a short lighting brief before comparing candidates. Treat the following as requirements to evaluate, not as features the SL300II is known to provide.
| Requirement | What to record |
|---|---|
| Scene | Seated interview, tabletop demonstration, wider presentation, or another specific shot |
| Placement | Light position, subject distance, available floor space, and framing restrictions |
| Light treatment | Intended modifier, desired shadow appearance, and acceptable spill |
| Camera | Frame rate, shutter setting, aperture, ISO, white balance, and recording profile |
| Environment | Window light, practical lights, other fixtures, and expected changes during recording |
| Audio | Microphone position, recording gain, and acceptable equipment noise |
| Operation | Recording duration and any essential adjustment workflow |
| Logistics | Support, power access, cable routing, storage, and transport |
Separate must-have requirements from preferences. For each must-have, specify the conditions to test, what counts as passing, and what evidence you will retain.
Use the exposure targets and monitoring conventions appropriate to your camera’s recording profile. Do not assume one numerical threshold applies to every workflow.
Hypothetical Interview Acceptance Plan
The following example illustrates how to define requirements. It is not an SL300II test, a report of product experience, or a set of measured results.
Assume a seated interview with fixed framing, a marked range of subject movement, and predetermined camera and microphone settings.
| Must-have requirement | Fixed test conditions | Acceptance criterion | Evidence to record |
|---|---|---|---|
| Subject exposure | Planned modifier and placement; locked camera settings; subject moves through the marked range | Exposure remains within the production’s predetermined target range throughout the movement | Labeled clip and monitoring observations |
| Important highlights | Same setup; include relevant skin highlights and reflective objects | No clipping that the production has defined as unacceptable | Recorded frames showing the relevant highlights |
| Facial shadows | Planned pose and movement; agreed reference for shadow appearance | Shadows remain consistent with the intended look and do not obscure required detail | Representative frames compared with the brief |
| Dialogue noise | Fixed microphone position, gain, and processing; planned light settings and session duration | No equipment noise judged distracting under the agreed review conditions | Dialogue, room tone, and a light-off baseline where practical |
Before reviewing clips, specify the target exposure range, unacceptable clipping, intended shadow appearance, and audio review conditions. If those criteria are still undefined, mark the requirement unresolved rather than deciding afterward that the result looks or sounds acceptable.
Test the Intended Setup
Once the exact unit is available and essential setup checks are resolved, use representative recordings to evaluate filming suitability. Keep a record of each test so that changes in settings or room conditions do not get mistaken for differences between lights.
1. Establish a Repeatable Baseline
Position the camera, subject, light, and compatible modifier as they would be used during filming. Record distances and angles.
Set exposure and white balance manually where available, and keep the recording profile unchanged. Note which other lights are on and whether daylight is entering the room. If ambient conditions change, record that change or repeat the comparison under consistent conditions.
When comparing candidates, begin with the same camera settings, placement, and modifier where compatible. If a candidate requires a different arrangement, document it rather than presenting the results as an identical-condition comparison.
2. Check Exposure, Highlights, and Shadows
Record a representative face or object at the planned settings.
- Use the camera’s waveform display or zebra warnings, if available, to check exposure against your predetermined targets.
- Inspect important highlights for unwanted clipping.
- Review shadow placement, background spill, and whether the subject remains adequately lit throughout the planned movement.
- Review the recorded file as well as the live preview.
If the shot fails, change one condition at a time—for example, brightness or placement—and record the adjustment. Do not count a result as passing if it requires camera settings or a light position that the production cannot use.
3. Review Color Under Fixed Conditions
Keep white balance, exposure settings, recording profile, and viewing conditions consistent. Include relevant skin tones, materials, or product colors in the test. A neutral reference can provide an additional comparison point if available.
If you see an unwanted color difference, repeat the test while controlling other light sources where practical. Change only one condition at a time to help separate environmental influences from the tested setup.
Treat this as a visual assessment for the production. It does not establish a measured color-rendering rating or certify the light’s color accuracy.
4. Test Each Planned Brightness and Shutter Combination
Record a short clip at each frame rate, shutter setting, and brightness setting you expect to use. Label the clips with those settings.
Review them for horizontal bands, pulsing, or brightness variation, both during playback and frame by frame. If a problem appears, repeat the same combination with other light sources switched off where practical, then vary one setting at a time.
These checks can help narrow down the conditions associated with an artifact; they do not prove that the fixture alone caused it. A clean clip at one setting is not evidence that every setting will be artifact-free.
5. Compare Recorded Audio with a Baseline
Keep microphone position, recording gain, and audio processing unchanged. Record dialogue and room tone with the light operating at the planned settings.
Where practical and safe, record a light-off baseline under otherwise unchanged room conditions. Compare the recordings at the same playback level, noting steady noise, intermittent sounds, or changes over time.
If noise is distracting, adjust only one permissible condition at a time and repeat the recording. Do not assume an undocumented operating mode is available, or disable cooling outside the exact model’s instructions.
6. Check the Intended Recording Duration
Evaluate the expected recording duration within documented operating limits. Note any changes in the recorded image or audio, and whether required adjustments remain practical during the session.
Record results as observations of that unit and setup. One successful session is not a universal performance or reliability guarantee.
Lighting Evaluation Worksheet
Use one worksheet per tested arrangement. If equipment is not yet available, fill in the requirements and planned conditions while leaving untested performance items unresolved.
| Field | Record |
|---|---|
| Exact model and identification label | ______ |
| Matching documentation | ______ |
| Compatibility, support, and operating checks | ______ |
| Scene and must-have requirements | ______ |
| Acceptance criteria for each must-have | ______ |
| Modifier, light position, and subject distance | ______ |
| Camera settings, recording profile, and white balance | ______ |
| Ambient light conditions | ______ |
| Brightness, frame rate, and shutter combinations tested | ______ |
| Exposure, highlights, and shadows | ______ |
| Visual color assessment | ______ |
| Banding or brightness variation | ______ |
| Microphone position, gain, and light-off baseline | ______ |
| Recorded dialogue and room-tone assessment | ______ |
| Recording duration tested | ______ |
| Clip labels or other retained evidence | ______ |
| Single-condition adjustments and retest results | ______ |
| Decision and conditions attached to it | ______ |
Record each must-have separately:
| Requirement | Test conditions and acceptance criterion | Evidence or documentation | Status |
|---|---|---|---|
| ______ | ______ | ______ | Passed / Failed / Unresolved |
| ______ | ______ | ______ | Passed / Failed / Unresolved |
| ______ | ______ | ______ | Passed / Failed / Unresolved |
Use passed only when the evidence meets the stated criterion, failed when an adequate test shows it does not, and unresolved when the criterion, documentation, or testing is incomplete. An untested requirement is not a pass or proof of failure.
Make a Setup-Specific Decision
Keep three kinds of evidence separate:
- Verified: Details supported by documentation for the exact model.
- Observed: Results from the controlled evaluation.
- Unresolved: Requirements without adequate documentation or testing.
Then apply these decision rules:
| Evaluation outcome | Decision |
|---|---|
| No access to the unit and essential performance requirements remain untested | Candidate for further evaluation; suitability unresolved |
| Model identity, compatibility, or safe operating conditions are unresolved | Pause setup and use; obtain matching documentation before proceeding |
| A must-have image or audio requirement fails | Adjust one permissible condition at a time, then retest |
| An essential requirement has not been tested adequately | Further testing needed |
| Permissible adjustments still cannot meet a must-have requirement | Not suitable for this setup |
| All must-have requirements pass and essential checks are resolved | Suitable for this setup under the documented test conditions |
Include the complete arrangement in the decision: light, modifier, support, power, cable routing, storage, and transport requirements.
A useful conclusion is narrow: “This unit meets the requirements of this interview setup at the recorded settings and placement.” Do not turn that result into a claim that the SL300II is the best light or will suit unrelated productions.
FAQ
Does the Cited Amazon Listing Verify Godox Sl300ii Specifications?
No. Its title and product information identify the SL300III. The citation supports the model mismatch, not SL300II performance or compatibility. [source_1]
How Can I Evaluate the Sl300ii If I Cannot Test It Yet?
Define must-have requirements, obtain documentation matching the model label, and list the evidence still needed. Keep the unit a candidate for further evaluation rather than declaring it suitable.
How Should I Decide Whether the Light Is Sufficient for My Shot?
Judge a representative recording against your predetermined exposure, highlight, and shadow criteria. A pass must use an arrangement and camera settings the production can actually accommodate.
Can This Guide Confirm That the Sl300ii Is Suitable for Dialogue Recording?
No. Its noise performance is unverified here. Suitability requires recorded-audio evidence under the intended microphone, light, and session conditions.
What Should I Do If Footage Shows Banding or Brightness Variation?
Repeat the affected setting combination, control other light sources where practical, and change one condition at a time. Keep the requirement unresolved until adequately tested; do not assume the fixture alone caused the artifact.
What If a Key Requirement Remains Unresolved?
Keep the selection provisional. Resolve identity, compatibility, and safe operating conditions before use, and complete essential performance checks before calling the setup suitable.