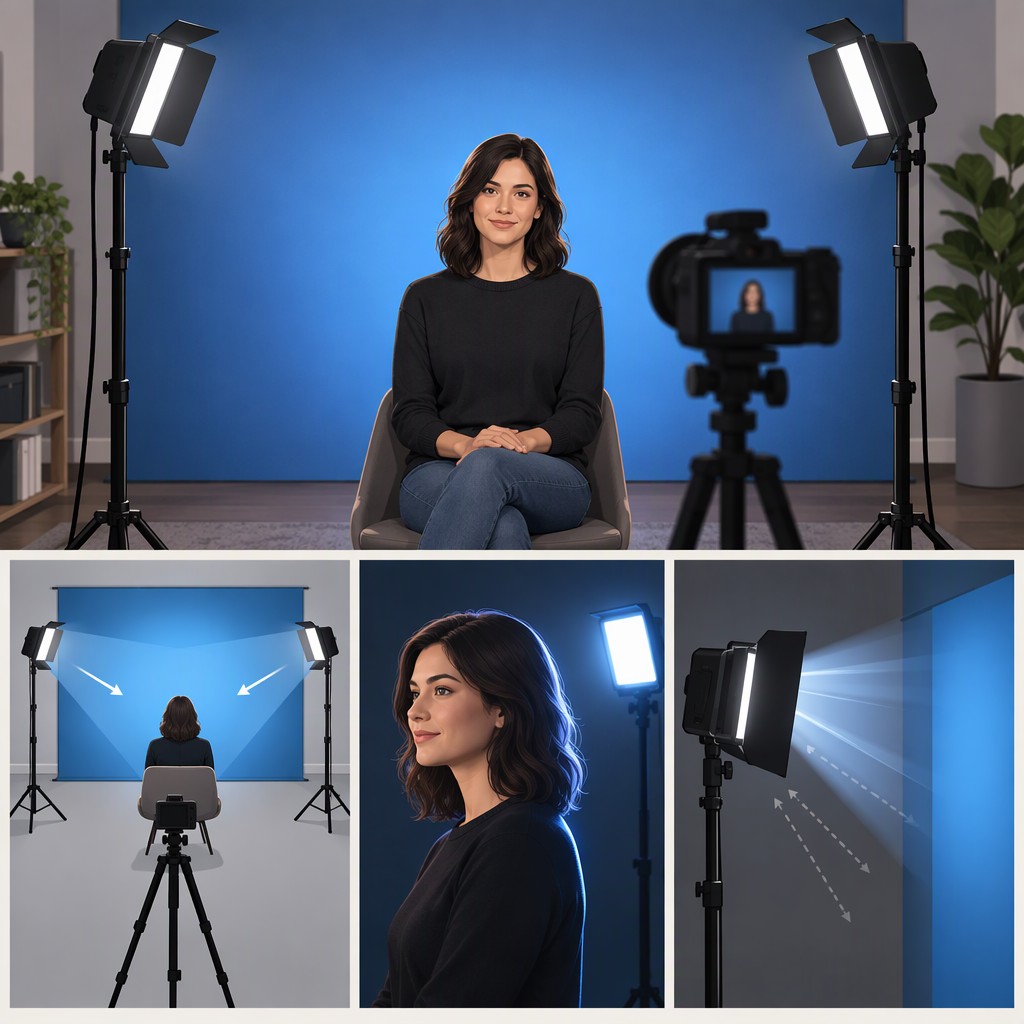
Led Light for Video Backgrounds: Setup, Rim Lighting, and Spill Control
An LED aimed at the background lights the backdrop; an LED used as a rim or hair light lights the subject’s edge to help separate them visually from the background. Choose the effect first, then position and adjust the light while watching a camera test—not just the scene by eye. There is no single distance or brightness that works for every room, backdrop, subject, and camera.
Background Light or Rim Light?
| Goal | What the LED should illuminate | What to look for in the recording |
|---|---|---|
| Background light | The backdrop, to add brightness, color, texture, or separation behind the subject | The backdrop has the look you want, without unintended light distracting from the subject |
| Rim or hair light | An edge of the subject, often around the hair or shoulders | A visible edge that separates the subject from the background without looking distracting or excessively bright |
These are different jobs. A background light is aimed at the backdrop; a rim light is aimed at the subject. A background light can also help create separation, but that does not make it the same effect as a rim light. ARRI’s lighting handbook describes background lighting as a way to add texture, color, or separation, and describes a separation light as serving to distinguish the subject from the background. (tlu.ee)
Set up an Led for a Video Background
- Decide what the backdrop should look like. You might want an even, restrained brightness, or a more visible pool of light, color, or texture. A background light can be set early or late in a setup depending on how important the background is to the look. (tlu.ee)
- Aim the LED at the backdrop, not at the subject. Start with the light directed toward the part of the background you want to affect. The exact placement depends on the size and surface of the backdrop and the space available; avoid treating any one distance as a rule.
- Record a short test and inspect the frame. Check whether the illuminated area is where you intended, whether the background looks uneven or too prominent, and whether light is spilling onto the subject. The camera image is the useful reference for the recorded result.
- Change one thing at a time. If the light is landing in the wrong area, adjust its aim. If too much light reaches the subject, redirect the beam or use a suitable control such as a flag, grid, or other beam-shaping accessory. ARRI notes that spill control affects the result of background lighting and that a grid on a softbox can limit sideways spill. The available controls depend on the light and modifier. (tlu.ee)
- Record another test after each adjustment. Reduce the LED’s output if the background is competing with the subject; increase or redirect it only if the recorded background is too dim or the effect misses its intended area. LED output controls and usable levels vary by fixture. (arri.com)
Example: If a test shows a bright patch on the backdrop and unwanted brightness on the subject’s shoulder, first redirect or narrow the background light so less of its beam reaches the subject. Then record again. If the patch is still too conspicuous, reduce output or adjust the aim. This is a practical starting process, not a tested recipe for a particular room or light.
Set up an Led for Rim or Hair Lighting
- Place the light to reach the subject’s edge. A common starting position is behind and above the subject; moving it toward the side can create a more side-on rim. The useful position depends on the camera framing, subject, and room. (bpb-us-e2.wpmucdn.com)
- Aim at the subject, not the backdrop. Adjust the angle until the edge you want—such as hair or shoulder—is visible in the camera image. A separation light is optional: if the subject already stands out clearly, adding one may not help. (poweroflighting.com)
- Check for spill and glare. Look for light falling on parts of the face or background where you do not want it, and for flare or glare in the lens. If the edge is too broad or spill is distracting, change the angle or use a suitable beam-control accessory. If glare appears, adjust the light’s position or aim and make another recording to see whether it clears. These adjustments are starting points; the result depends on the scene and equipment.
- Set the level by the recorded look. Lower the output if the edge dominates the subject; raise it only if the intended edge is missing and the light is correctly aimed. Do not assume the rim must match the key light in brightness. ARRI’s handbook gives different brightness guidance for different setups, reinforcing that the level depends on the scene. (bpb-us-e2.wpmucdn.com)
Which Led Controls Matter?
Choose controls based on the effect you want and confirm that the particular light offers them:
- Dimming or output range: Useful for adjusting how prominent the backdrop or subject edge appears. More output is not automatically better; judge it in the recorded image. (arri.com)
- Beam control: A focusable beam or a compatible grid, flag, or modifier can help direct light where it is needed and limit spill. Check which accessories are compatible with the fixture. (arri.com)
- Color adjustment: If you want a colored backdrop or need the background light to fit the scene, check what color controls the light actually provides. Do not assume every LED can produce the same colors or range. ARRI’s handbook describes its LED fixtures as offering a range of colors; that is not a claim about every LED fixture. (arri.com)
- Camera compatibility and flicker: A light that looks steady to your eye may still show flicker on camera under some combinations of fixture, frame rate, and shutter settings. Record a test using the settings you plan to shoot with. ETC recommends checking for flicker in real-world conditions; its specific calculations apply to the fixture and settings discussed in its guidance, not to every LED. (support.etcconnect.com)
Quick Troubleshooting
- Backdrop has a bright spot or looks uneven: Adjust the light’s aim or beam spread, then check another camera test. The right fix depends on the backdrop and fixture.
- Background light spills onto the subject: Redirect the light or use an appropriate beam-control method. Grids and flags can restrict spill when suitable for the setup. (arri.com)
- Rim light looks too strong: Reduce its output or change its angle until the edge supports rather than overwhelms the subject.
- Rim light creates unwanted glare: Reposition or re-aim the light, then record another test. The best correction depends on the light’s position relative to the lens.
- Flicker or bands appear in the recording: Test at the intended frame rate and shutter settings. If the effect persists, consult the light’s documentation for camera-related settings or compatibility and test any change. (support.etcconnect.com)
In short: Aim a background light at the backdrop; aim a rim light at the subject’s edge. Use a recorded test to decide whether the aim, output, or spill control needs adjustment, and choose LED controls by the effect you need—not by a product ranking or a universal setup formula.