Godox Vl300 Led Video Light: Selection and Compatibility
To evaluate a Godox VL300 for filming, first confirm the exact model, then verify its modifiers, power components, support, and controls. Use a controlled recording test to decide whether the documented setup meets your shoot’s exposure, color, and sound requirements.
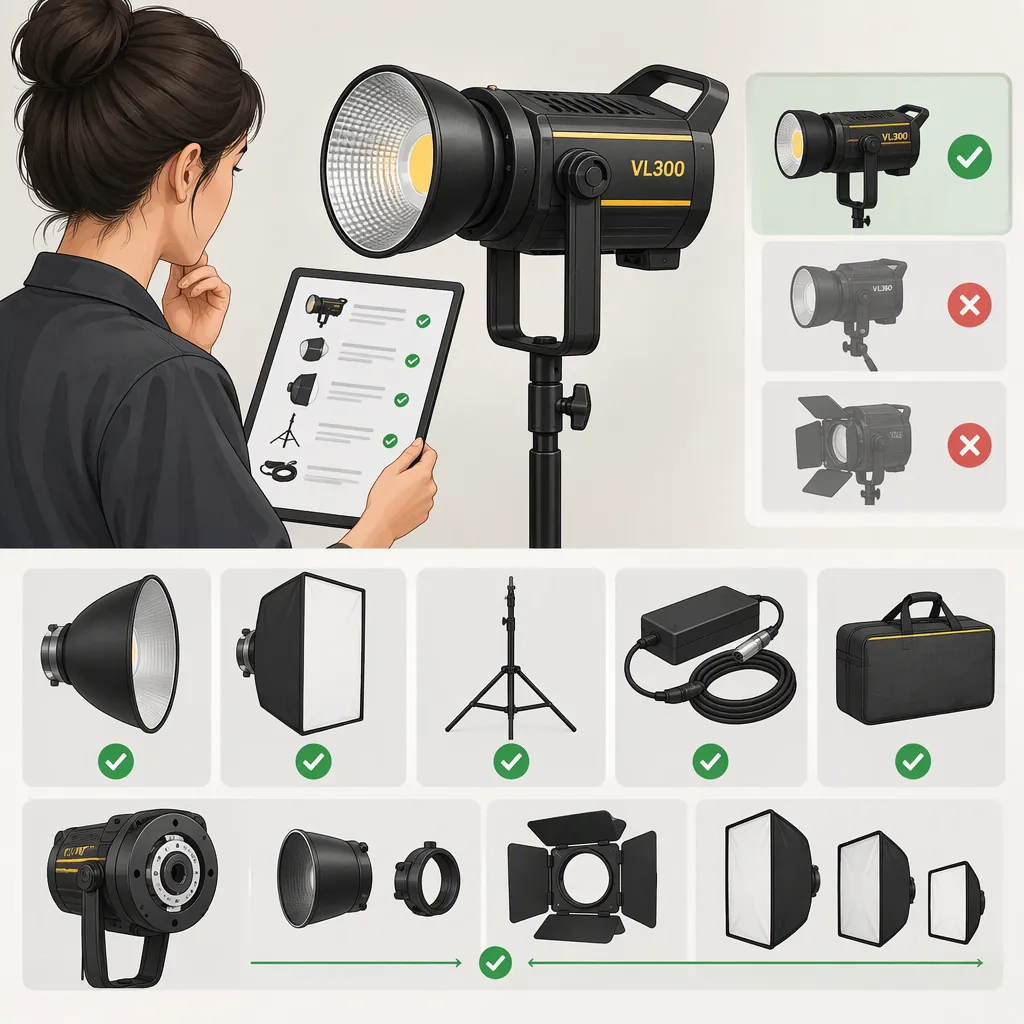
Model and evidence boundary: VL300 and VL300II are identified separately in the available references. Greentoe labels its listing “Model: VL300,” while Godox’s VLII page names VL150II/VL200II/VL300II and lists VL300/VL200/VL150 separately as related products. The Walmart reference is for the VL300 II. These references do not establish the original VL300’s detailed specifications; do not transfer II-series specifications to it. [c1] [c2] [c3]
Identify the Exact Model First
Read the model from the light’s label rather than relying on a listing headline. Record the identifiers on its controller and power supply, if present, and check that the documentation matches those components.
Godox’s VLII page provides manual download entries for the II-series models. Those entries are not confirmation of original-VL300 accessory compatibility. [c2]
For each proposed modifier, power component, or control accessory, look for documentation that explicitly covers the model on your unit. Treat an unresolved match as a question to resolve—not as evidence that the component will work.
Model Verification Record
- Light label and exact model: ______
- Controller identifier, if present: ______
- Power supply identifier and ratings: ______
- Matching manual and revision: ______
- Included components: ______
- Proposed accessories and their documentation: ______
- Unresolved compatibility questions: ______
Check the Complete Lighting Setup
The following is a general verification method, not a claim that the original VL300 supports a particular feature or accessory.
| Check | Evidence to look for | Next step |
|---|---|---|
| Modifier fit | Documented mount, accessory attachment requirements, clearance, and size or weight restrictions | If the match is confirmed, check secure attachment according to the instructions. If it is unclear, pause installation and resolve the mismatch. |
| Power components | Exact-model requirements for the supply, connectors, electrical ratings, and any supported battery arrangement | If any requirement is unconfirmed, do not connect the proposed component. Verify it against matching documentation first. |
| Stand and mounting hardware | Support ratings, mounting requirements, and the load of the assembled setup, including the modifier | If support or balance is uncertain, revise the support arrangement before testing. |
| Controls | Explicit support for the intended remote, app, or other control method | If support is confirmed, test the required functions. If not, do not rely on that control method for the shoot. |
| Replacement components | A documented match for each controller, adapter, and cable | Resolve each component separately; a shared brand or similar appearance is not enough. |
Keep compatibility and filming suitability separate. A documented component match is a reason to proceed to an operational test, not proof that the complete setup will meet your scene’s requirements.
Define What the Shoot Requires
Before testing, write down what a usable result would look like. This makes the evaluation a selection decision rather than a collection of impressions.
Specify:
- Scene and framing: Subject position, working distance, and how much space is available for the light and modifier.
- Image requirements: Intended frame rate, shutter setting, aperture, ISO, white balance, and acceptable exposure and color.
- Sound requirements: Whether dialogue is recorded nearby and what equipment-related noise would be unacceptable.
- Power and placement: Available supply, cable routing, support arrangement, and access to controls.
- Required adjustments: Which settings must be changed during the shoot and how they will be controlled.
If these requirements are still flexible, record which changes are acceptable. For example, moving the light may be practical in one scene but incompatible with the framing or available space in another.
Run a Repeatable Filming Test
Only proceed once the proposed power and mounting arrangements have been verified. These steps are suggested evaluation methods, not reported VL300 test results.
- Build the intended setup. Use the planned modifier, subject distance, support, and power arrangement.
- Create a visual baseline. Use the same reference subject or object and framing for comparisons. Lock camera exposure and white balance so automatic adjustments do not obscure differences.
- Record the settings. Note the camera settings, light setting, modifier, and distances before each sample.
- Film at the intended recording settings. Test the frame rates and shutter settings required by the project. Review exposure, color, and any visible brightness variation.
- Compare sound samples. Where conditions can be kept consistent, record room sound with the light off and then on, using the same microphone position, gain, and recording settings. Keep other equipment and room activity unchanged as far as practical.
- Check operation in the scene. Evaluate placement, cable routing, access to controls, and whether required adjustments can be made reliably.
- Change one variable at a time. If you alter distance, modifier, light setting, or microphone placement, record the change and repeat the relevant sample.
An off/on sound comparison can help identify noise associated with operating the setup, but changing room conditions can make the result inconclusive. Repeat uncertain comparisons rather than assigning every audible difference to the light.
These observations apply to the tested unit and configuration. They are not model-wide measurements of output, noise, runtime, or camera compatibility; the available references do not establish those performance characteristics for the original VL300. [c1] [c2] [c3]
Turn Test Results into a Decision
Use this as a general decision framework, not a VL300 performance conclusion.
| Result | Next step |
|---|---|
| A power, connector, or mounting match remains unresolved | Pause connection or installation and obtain matching documentation. A filming test is not a substitute for compatibility verification. |
| The setup does not reach the project’s intended exposure | If permitted by the scene, adjust distance, modifier, light setting, or camera settings within documented limits, then retest. If the required result remains unattainable, evaluate a different lighting arrangement. |
| Color or brightness variation is unacceptable in the recording | Repeat the sample with recorded, fixed settings to check consistency. If the issue persists at required settings, do not treat that configuration as suitable. |
| The light-on sound sample contains unacceptable additional noise | Where practical, adjust light placement or microphone position and repeat the comparison. If the sound requirement still is not met, change the lighting or recording arrangement. |
| Placement, support, cables, or controls interfere with the scene | Revise the layout and retest. If the required arrangement cannot be achieved safely and practically, use another setup. |
| Documentation matches and the tested configuration meets the project requirements | Record it as suitable for that configuration. Reassess when the modifier, power arrangement, camera settings, or recording conditions change. |
Filming Evaluation Log
- Exact light model and component identifiers: ______
- Project requirements and acceptable limits: ______
- Modifier, framing, and subject distance: ______
- Camera, frame rate, and shutter setting: ______
- Aperture, ISO, and locked white balance: ______
- Light setting and verified power arrangement: ______
- Visual reference and baseline sample: ______
- Exposure, color, and brightness-variation observations: ______
- Microphone position, gain, and off/on sample identifiers: ______
- Sound observations and any changing room conditions: ______
- Placement, support, cabling, or control issues: ______
- Does the setup meet each requirement? ______
- Changes made and retest results: ______
- Unresolved documentation or test questions: ______
FAQ
Can I Use Vl300ii Specifications to Evaluate a Vl300?
Not as verified specifications for the original model. The references distinguish VL300 from the II-series models. Match the documentation to the label on the light and its components. [c1] [c2]
What Should I Confirm Before Selecting a Modifier?
Confirm the exact light model, documented mount, attachment method, clearance, and any applicable size or weight restrictions. Then check the complete support arrangement.
The Walmart listing describes a Bowens mount for the VL300 II; it does not verify the original VL300’s mount or compatibility with a particular modifier. [c3]
What Should I Do If I Cannot Find Matching Documentation?
Mark the compatibility question as unresolved. Seek documentation or confirmation that explicitly identifies the light and proposed component before connecting power or installing an uncertain accessory. Godox’s referenced download entries cover the II-series models, so their presence alone does not resolve an original-VL300 question. [c2]
Can I Plan Battery Operation from the Vl300 Ii Listing?
No. The battery information in that listing belongs to the VL300 II and is not sufficient evidence for the original VL300’s supported battery components, operating requirements, or runtime. Verify the exact model’s requirements before planning a battery-powered setup. [c3]
What Tells Me Whether the Vl300 Is Suitable for My Shoot?
Use two separate checks: documented compatibility for the assembled equipment, followed by recorded results against your project requirements. Acceptable exposure, color, sound, and operation in your test support a decision for that configuration—not a universal performance claim. The available references do not provide original-VL300 measured output, noise, runtime, or camera-specific test results. [c1] [c2] [c3]