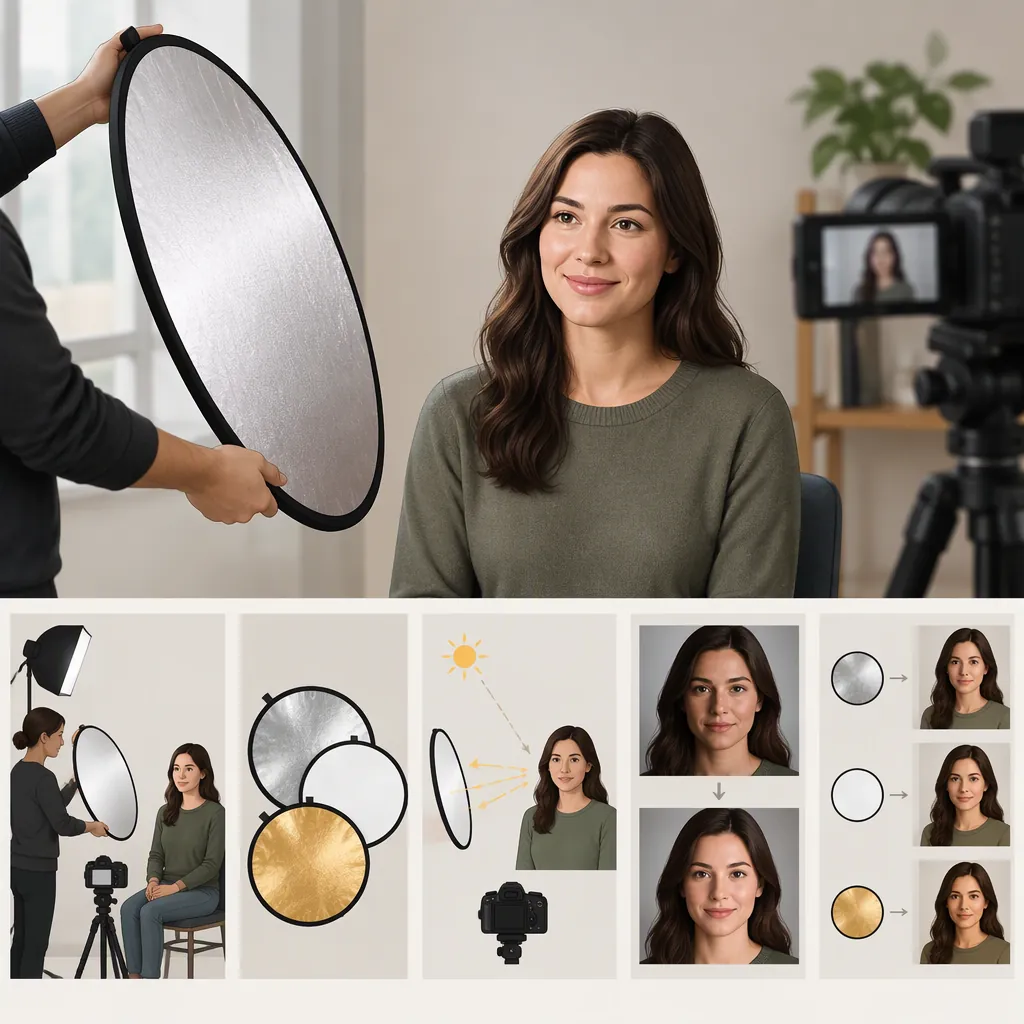
How to Use a Reflector for Video Lighting
For video, use a reflector to redirect existing light toward your subject. To fill outdoor shadows, start with a white or silver surface opposite the sun and angle it toward the subject until the shadowed area receives the amount of light you want. Keep the reflector securely supported and outside the shot. [c1]
What a Reflector Does for Video
A reflector is a lighting modifier that redirects light. It can help fill shadows without adding another lamp. Reflector kits may also include surfaces used to block or diffuse light, but those functions are different from bouncing light toward a subject. [c1]
For a straightforward video setup, choose one goal first: brighten the shadowed side of a face, change the warmth of the reflected light, or deepen a shadow. That gives you a specific change to look for as you adjust the panel.
The practical guidance here draws on LinkedIn’s AI-assisted collaborative article. Treat its surface descriptions and positioning suggestions as starting points, not guarantees of a particular result. [c1]
Choose a Surface for the Intended Effect
- White: A starting choice for soft, neutral fill that reduces shadow contrast. [c1]
- Silver: A choice for a brighter reflected effect and more pronounced detail. [c1]
- Gold: A choice when you intentionally want a warmer, golden cast. [c1]
- Black: Not a fill surface. It absorbs light rather than reflecting it and can help create darker areas or reduce unwanted reflections. [c1]
For a neutral-looking talking-head shot, start by testing white. Compare silver if you want a brighter effect. Use gold only if the warmer appearance suits the scene, and judge the result in the camera view rather than assuming a surface name guarantees the look.
Position the Reflector Outdoors or Indoors
Outdoors: For shadow fill, begin with a white or silver reflector on the opposite side of the subject from the sun. Angle the surface toward the subject and adjust until you see the desired fill. This is a starting arrangement, not a fixed angle or distance. [c1]
Indoors: Use an existing light source and angle a white or silver reflector so its reflected light reaches the subject. The cited guidance describes using these surfaces to modify artificial lighting and using black on the opposite side of the source to create a darker area. [c1]
For either setup, make one adjustment at a time. Compare the camera view with and without the reflector, then decide whether the change supports the shot. Stop adding fill when the shadows look the way you intend; eliminating every shadow does not need to be the goal.
Reflector Test Sequence
1. Choose the area you want to brighten or darken.
2. Select white or silver for fill, gold for intentional warmth, or black for a darker area.
3. Check the camera view without the panel.
4. Position and angle the panel toward the intended lighting effect.
5. Compare the result in the camera view.
6. Secure the panel and check that it stays outside the frame.
Keep the Reflector Supported and Out of Frame
A reflector can be held by hand, supported on a stand, or held by an assistant. The cited guidance notes that handholding is flexible but can be tiring and unstable; a stand should be secure and should not interfere with the shot or the subject’s movement. [c1]
Choose the support method before recording. Check the full intended framing and movement, not just the opening composition. If someone is holding the panel, agree on its position before the take.
There is no specific reflector size, working distance, or fixed angle established by the supplied guidance. Use the visible lighting result and the needs of the shot to make those choices rather than treating a single setup as universal.
FAQ
Should I Use a White or Silver Reflector for Video?
Start with white when you want soft, neutral shadow fill. Test silver when you want a brighter reflected effect. The cited guidance describes these general differences, but it does not establish a universal best choice for every scene. [c1]
Where Should I Place a Reflector Outdoors?
For filling shadows, start opposite the sun and angle a white or silver surface toward the subject. Adjust while checking the camera view; the cited guidance does not prescribe an exact distance or angle. [c1]
Why Does a Reflector Kit Include a Black Surface?
The black surface serves a different purpose from a reflective fill surface: it absorbs light and can help create shadows or reduce unwanted reflections. Use it when you want a darker area rather than more fill. [c1]