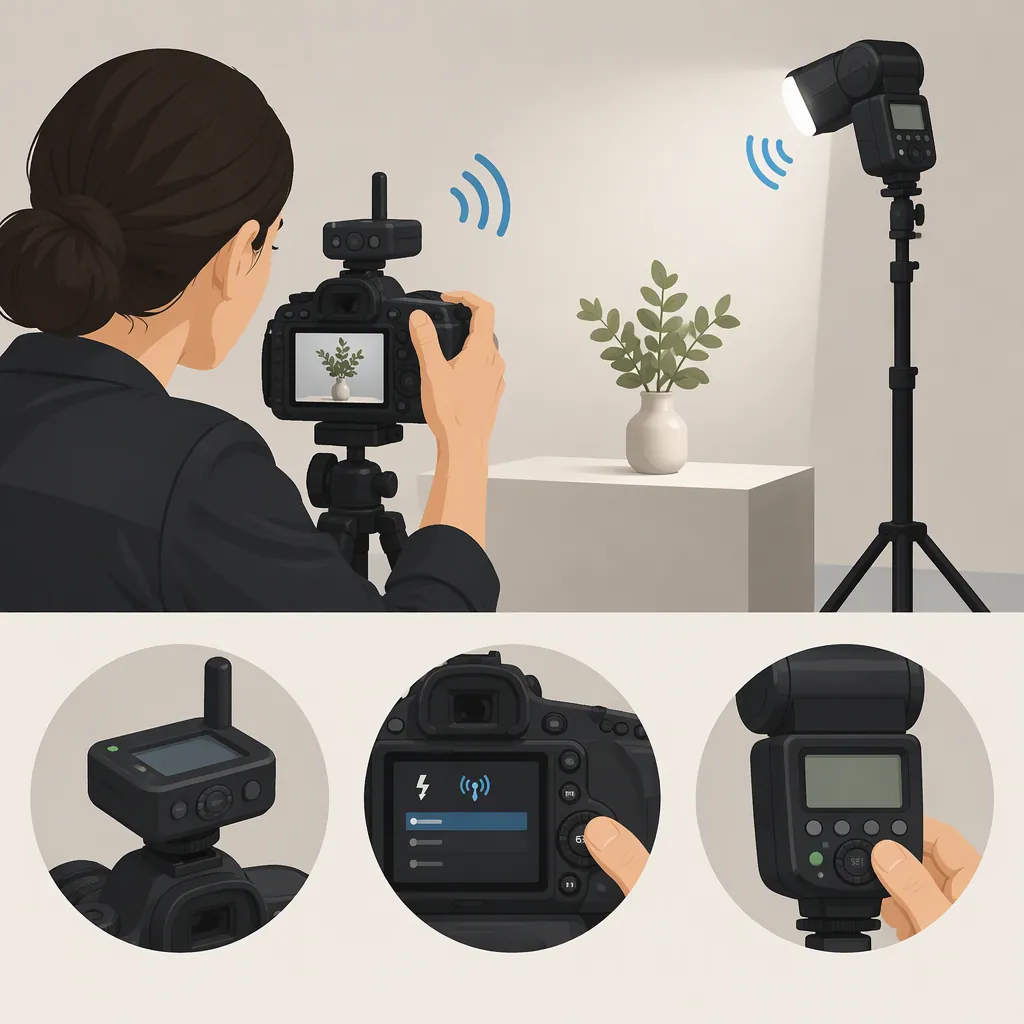
Remote Camera Flash: A Guide to Off-Camera Lighting
A remote camera flash setup lets you fire a flash positioned away from the camera through a compatible triggering system. This separates the light’s position from the camera’s position. Off-camera photographs in The Digital Trekker’s 2011 article illustrate this arrangement, with the flash placed to the left or right of the camera. [c2]
A flash trigger and a remote shutter control serve different roles. Triggering a flash also does not automatically mean you can adjust its power remotely. Start by identifying the signal path, the receiving method, and the controls your equipment supports.
What Off-Camera Flash Changes
Off-camera flash gives you a separate choice about where to place the light. The left- and right-side placements illustrated in The Digital Trekker article are examples, not a universal lighting recipe. [c2]
Light direction affects where shadows fall and how a subject’s contours appear. Light close to the lens axis can make some shadows less visible from the camera’s viewpoint. Side lighting can make differences between illuminated and shaded areas more apparent. Neither arrangement is always better.
Try a Simple Placement Comparison
- Keep the subject and camera in the same positions.
- Make a test photograph with the flash near the camera’s lens axis.
- Move the flash to one side, keeping its distance from the subject and its settings as consistent as practical.
- Make another photograph and compare the shadows, highlights, and visible detail.
Choose the direction that suits the photograph. Shadow softness also depends on the light source’s apparent size relative to the subject, while ambient light affects the balance between illuminated and shaded areas. Changing several variables at once makes the effect of direction harder to judge.
Flash Triggers Versus Camera Remotes
Do not assume that every device labeled “remote” performs the same job. Green Mountain Camera’s Remote Triggers category contains optical slave triggers, Bluetooth and infrared camera remote controls, and wireless flash radio commanders and receivers. A shared retail category does not make these devices interchangeable. [c1]
| Component | Role to identify |
|---|---|
| Camera remote | Operates the camera’s shutter or other supported camera functions |
| Flash trigger or commander | Sends a firing signal and, where supported, flash-control commands |
| Flash-side receiver | Receives the signal; it may be built into the flash or be a separate device |
Some listings in that category include brand-specific labels or exclusions. Use the exact equipment documentation to establish compatibility rather than relying on a category name or a matching connector. [c1]
How the Trigger Signal Reaches the Flash
A useful starting model is camera → triggering system → flash. The connection may be wired or wireless, and the receiving end must match the method being used.
| Triggering method | General signal path | Main checks |
|---|---|---|
| Wired connection | A compatible cable carries the firing signal from the camera to the flash | Supported connections, secure seating, and whether the cable carries only a firing signal or additional controls |
| Radio triggering | A camera-side transmitter or commander sends a radio signal to a compatible receiver | Receiver compatibility, radio mode, and matching channel, identifier, or pairing settings if the system uses them |
| Optical triggering | A flash or commander emits light that a compatible optical receiver detects | Correct optical mode, a usable light path to the sensor, and handling of preflashes where applicable |
Optical triggering is not one universal protocol. A basic optical slave may respond to another flash’s burst, while an optical control system may use coded light signals. A metering preflash can cause an unsuitable slave configuration to fire before the exposure. Check the supported optical mode rather than assuming any visible flash will provide the right signal.
Radio triggering does not require the same optical light path, but its operation still depends on equipment compatibility and the working conditions. No single range, channel procedure, or pairing sequence applies to all systems.
Triggering, Power Control, and Synchronization
Triggering tells the flash when to fire. Remote adjustment changes supported settings without requiring you to reach the flash.
The main control terms are:
- TTL flash control: Through-the-lens metering helps determine flash output automatically. Flash exposure compensation, where available, adjusts that automatic result.
- Manual power control: You select the flash output level. Depending on the setup, you may make that adjustment at the flash or remotely.
- Group control: Compatible flashes can be assigned to groups for shared or separate control.
- Synchronization: Flash firing is coordinated with the shutter so the light contributes to the exposure.
- High-speed sync: A supported operating mode for exposures beyond normal flash-sync limits. It must be supported by the relevant equipment combination.
- Second-curtain sync: The flash fires near the end of the exposure rather than near its beginning.
For a single light, reliable triggering and an accessible power setting may be sufficient. With several lights, independent group adjustment may be useful. These are setup choices, not capabilities to assume from the word “wireless.”
Set up and Test a Remote Flash
Compatibility Checklist
Before connecting equipment, establish:
- The exact camera, flash, transmitter or commander, and receiver models.
- The supported connection or wireless receiving method.
- Whether you need firing only, TTL, remote manual power, or group control.
- The camera’s documented flash-sync limits and any restrictions associated with its shutter mode.
- The system-specific connection, pairing, channel, and mode-selection procedures.
Use the documentation for the actual combination. The supplied references do not establish universal operating distances or shutter-speed values.
Basic Test Sequence
- Prepare the equipment. Check power, allow the flash to become ready, and connect or mount components according to their instructions.
- Configure the receiving path. Select the appropriate receiving mode. Match channels or identifiers, pair devices, or enable optical slave operation only if your system uses those mechanisms.
- Choose a documented starting exposure. Use a shutter mode and speed supported for normal flash synchronization before testing specialized sync modes.
- Take a photograph. Confirm that the flash fires during the exposure. A transmitter’s test button, if present, can help check part of the signal path, but it does not by itself prove camera-to-flash synchronization.
- Check the image. Look for flash illumination, uneven coverage, and excessive or insufficient brightness.
- Refine the lighting. Once triggering works, adjust placement and output. Change one variable at a time when comparing results.
Troubleshoot by Symptom
These checks are starting points, not definite diagnoses.
| Symptom | What to check first | Next step |
|---|---|---|
| Flash does not fire | Power, battery condition, flash-ready status, and secure connections | Check the receiving mode and any applicable pairing, channel, identifier, or optical sensor configuration |
| Flash fires intermittently | Whether it has finished recycling between exposures | Recheck connections and the signal path; for optical triggering, check sensor visibility and obstructions |
| Flash fires, but the image has a dark band | Shutter speed, shutter mode, and documented synchronization limits | Return to a supported normal-sync configuration and retest before enabling high-speed sync |
| Flash fires, but the whole image is too bright or dark | Camera exposure settings, flash output, subject distance, and TTL compensation if used | Change one relevant setting and compare another photograph |
| Flash fires, but remote adjustments have no effect | Whether remote control is supported and enabled | Check the selected flash mode and group assignment, where applicable |
A dark band can indicate a synchronization problem, but shadows or obstructions can also produce uneven illumination. Similarly, brightness problems do not necessarily mean the trigger connection is faulty.
FAQ
Is a Remote Shutter Control the Same as a Flash Trigger?
No. A shutter remote operates the camera; a flash trigger belongs to the flash-triggering system. Retail categories may contain both kinds of device, so the word “remote” alone does not identify the function. [c1]
Do I Need a Separate Receiver for the Flash?
Not necessarily. Check whether the flash has a built-in receiver compatible with your triggering method. Otherwise, determine whether it supports an appropriate external receiver. The supplied retailer category lists commanders and receivers separately, but that does not establish compatibility with a particular flash. [c1]
Can I Change Flash Power Remotely?
Only when the equipment combination supports remote power control. Check for remote manual output adjustment or TTL flash exposure compensation, according to the mode you intend to use. A firing-only connection may require power changes at the flash.
What Shutter Speed Should I Use with Remote Flash?
Begin with a speed and shutter mode within your camera’s documented normal flash-sync limits. If you need a faster shutter speed, verify high-speed-sync support across the camera, flash, and triggering system. If a dark band appears, return to a supported normal-sync configuration and test again rather than assuming that remote triggering guarantees synchronization.
Where Should I Place the Flash First?
A position to one side of the camera is a useful comparison with near-axis lighting, not a required starting point. The Digital Trekker’s article illustrates both left- and right-side off-camera placements. Compare your own test images to choose the direction that suits the subject and photograph. [c2]