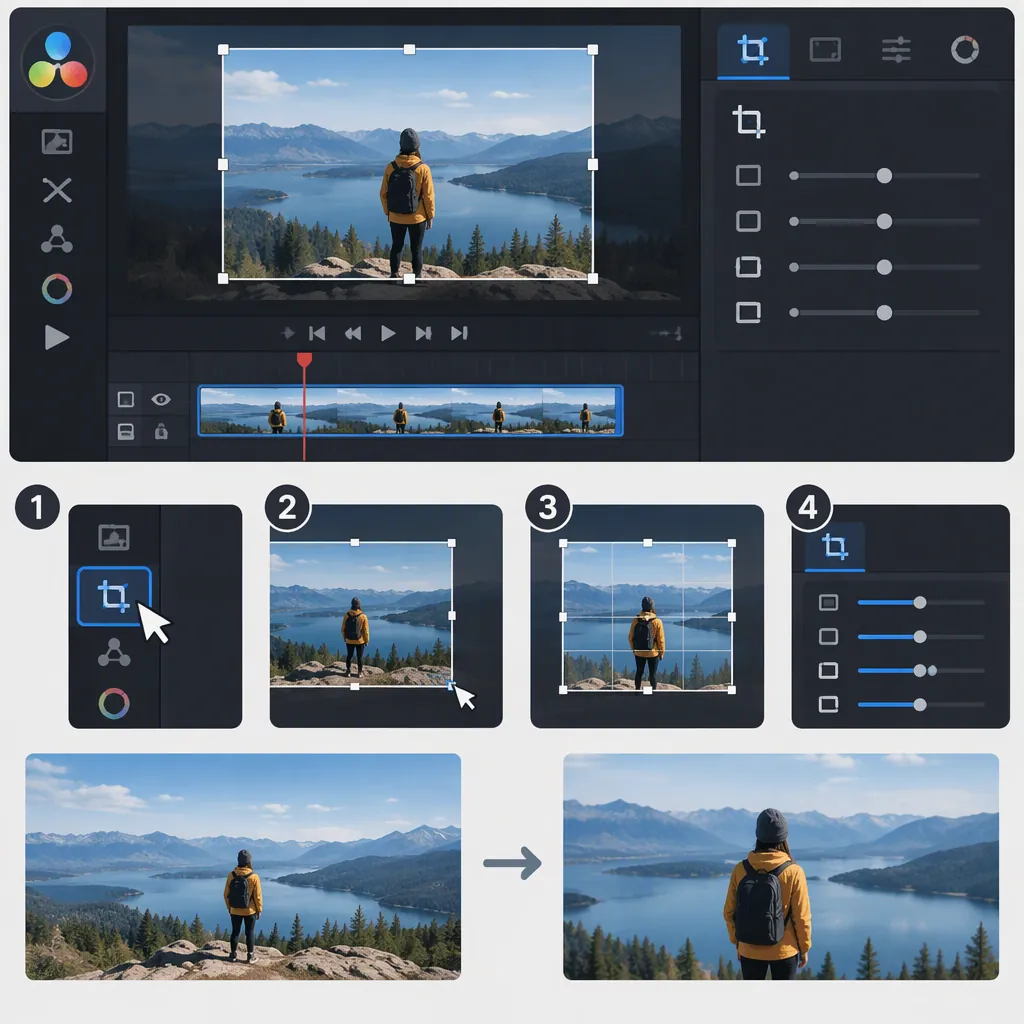
How to Crop Video in DaVinci Resolve
To crop video in DaVinci Resolve, select a clip on the Edit page, open the Inspector, and expand Cropping. Adjust the Left, Right, Top, and Bottom controls while watching the viewer. Use Transform controls for Zoom and Position if you also need to reframe the subject. Changing the output frame’s dimensions is a separate step in Timeline Settings. [c1] [c2]
Crop a Clip in the Inspector
- Import your footage through File > Import > Media, then drag the clip into a timeline. [c2]
- Go to the Edit page and select the timeline clip you want to crop. [c1]
- Open Inspector at the upper-right of the interface. In its video controls, expand Cropping. [c1] [c2]
- Adjust Left, Right, Top, or Bottom to remove the corresponding edges. Use the sliders for a visual adjustment or enter numerical values for a more precise change. [c1]
- Watch the viewer as you adjust each edge, then play the clip to check your framing throughout the shot.
These instructions follow the supplied tutorials rather than a version-specific manual. The Simon Says tutorial explicitly describes compatibility with Resolve 17 and 18; it does not establish that every interface detail is unchanged in later releases. [c2]
Choose Between Cropping and Reframing
Use Cropping to remove particular edges. This is useful when you want to exclude something at the boundary of a shot. Cropping can leave visible space around the remaining image: the Simon Says example describes top-and-bottom cropping producing black bars. [c2]
Use Transform to change the composition. Adjust Zoom to enlarge the image and Position to move the subject within the frame. The supplied tutorials describe these controls as a way to refine framing or accommodate a difference between the footage and timeline aspect ratios. [c1] [c2]
Use Timeline Settings to change the frame dimensions. Do not treat the four crop values as a substitute for choosing a vertical or horizontal timeline. The Simon Says tutorial describes changing the timeline’s horizontal and vertical pixel dimensions separately. [c2]
Before editing, decide whether the goal is to hide an edge, enlarge a subject, or change the destination frame. That choice makes it easier to select the appropriate controls.
Prepare a Vertical Frame
For a vertical deliverable, choose the destination dimensions before refining each clip.
- Right-click the timeline and open Timeline Settings. The supplied tutorial describes horizontal and vertical pixel fields there. [c2]
- For a 9:16 output, 1080 × 1920 is one example given in the Miracamp tutorial. Treat it as an example frame size, not a complete specification for every publishing destination. [c1]
- Select the clip and use Transform > Zoom and Position to frame the subject within the vertical canvas. Apply edge cropping only where it serves the composition. [c1] [c2]
- Review the whole shot, especially moments when the subject moves toward an edge.
- On the Deliver page, check the intended export dimensions before rendering. The Miracamp tutorial identifies this page as the place to configure export settings. [c1]
A useful review question is: does the important action remain visible for the entire clip, rather than just at the frame where you made the adjustment?
Vertical Framing Review Checklist
- Confirm the intended frame dimensions.
- Check the subject at the beginning, middle, and end of the shot.
- Review any text or other details near the edges.
- Check for unwanted empty areas around the image.
- Confirm the export dimensions before rendering.
Animate the Crop with Keyframes
To change the crop over time, use the diamond-shaped keyframe controls in the Inspector’s Cropping section. [c1] [c2]
- Place the playhead where the crop animation should begin.
- Set the starting crop values and click the relevant keyframe diamond.
- Move the playhead to a later point in the clip.
- Change the crop values to establish the next keyed state.
- Play through the interval to inspect the transition. [c2]
Keep the distinction between effects clear: animating crop values changes the visible edges, while reframing with Zoom or Position changes the composition. The Miracamp tutorial discusses combining crop and position adjustments for animated framing. [c1]
Check Unexpected Crop Behavior
Black bars appear: Check whether you have removed edges with Cropping when your actual goal was to fill the frame with a tighter composition. The supplied tutorial describes black bars as a possible result of edge cropping; it also describes Transform Zoom as a way to enlarge the image. [c2]
Moving the image also moves the cropped area: Inspect Retain Image Position. The Simon Says tutorial describes this option as changing how position adjustments interact with the crop, allowing framing changes rather than moving the entire cropped clip. Check the viewer while testing it in your version. [c2]
The crop edge looks too hard: The same tutorial describes a crop softness control that feathers the edge. Use it only if a softened boundary is part of the intended result. [c2]
The composition works only at one moment: Review the clip in motion. If the visible area needs to change over time, use crop keyframes rather than judging the result from a single still frame. [c1] [c2]
FAQ
Where Is the Cropping Tool in DaVinci Resolve?
Select a clip on the Edit page, open the Inspector, and expand Cropping in the video controls. The supplied tutorials identify controls for the left, right, top, and bottom edges. [c1] [c2]
Does Cropping Automatically Make a Video 9:16?
Do not rely on edge cropping alone to set the output shape. The supplied tutorials describe timeline dimensions separately from clip cropping. Set the intended vertical dimensions, then adjust Zoom, Position, and any necessary crop values to compose the shot. [c1] [c2]
Can I Change the Crop During a Clip?
Yes. Use the keyframe diamonds in the Cropping section, set an initial crop, move the playhead, and change the crop values at a later point. Play the clip to review the resulting animation. [c1] [c2]