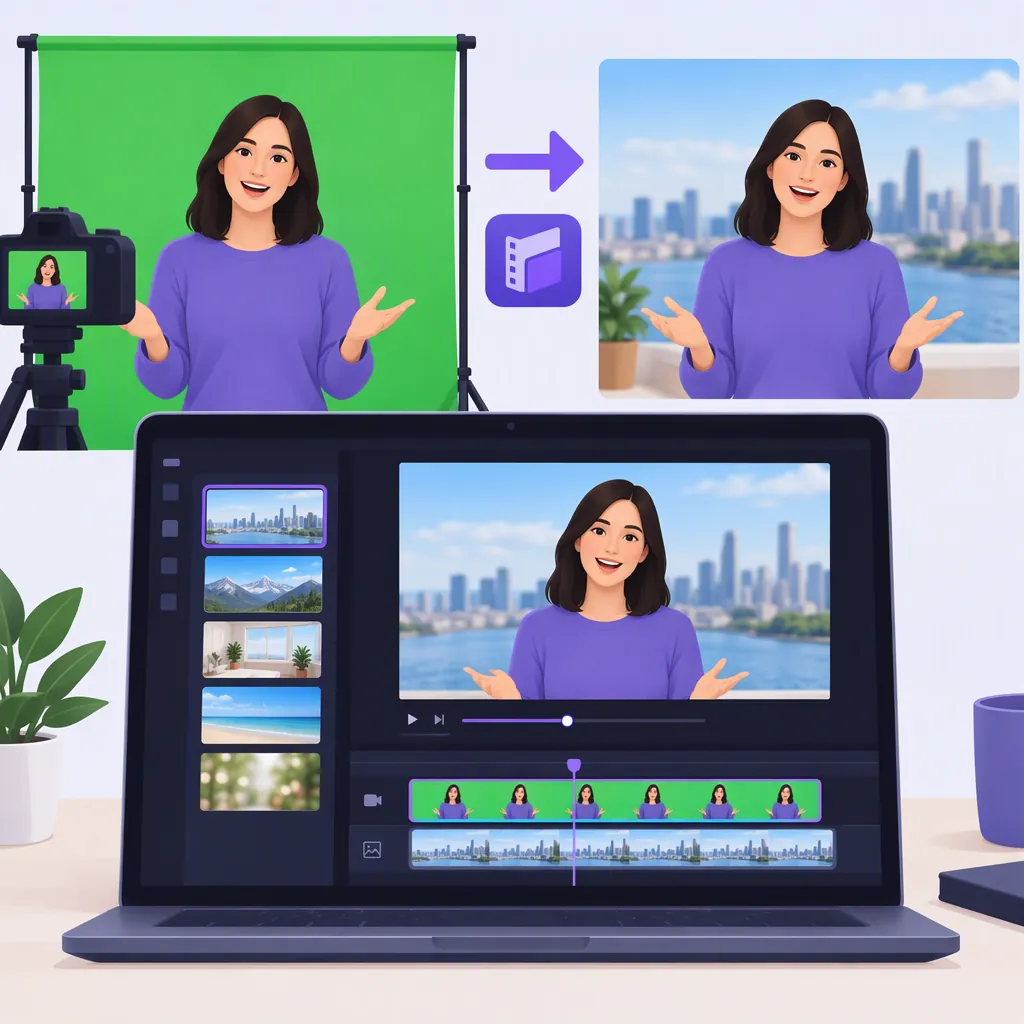
How to Use Green Screen in Clipchamp
To use green screen in Clipchamp, place your green-screen footage above the replacement background on the timeline. Select the upper clip, open Effects in the property panel, and apply Green Screen. Choose the matching screen color, adjust the screen threshold, then preview and export. The effect supports green, blue, or red screen elements; it is not a method for removing any arbitrary background. [c3]
Prepare Your Footage and Background
You need two media assets: footage containing the colored screen you want to remove, and a video or image to reveal underneath it. Clipchamp’s green screen effect replaces a selected green, blue, or red color rather than identifying every type of background. [c3]
For your own recording, Clipchamp recommends a green, red, or blue material or painted wall, with no creases or shadows and plenty of natural or artificial light. Treat that as preparation guidance, not a guarantee of a clean result. [c1]
Import your footage through the media tab’s Import Media button, or drag files from your device into the editor. If you are using stock footage, open Content Library, select the videos filter, and search for “green screen” or “chroma key.” [c3]
Layer the Clips and Apply the Effect
Follow this sequence in the timeline:
- Drag the footage containing the colored screen onto the timeline.
- Place the replacement video or image below that clip.
- Select the upper, colored-screen clip so it is highlighted.
- Open Effects in the property panel on the right.
- Select Green Screen. [c3]
The layer order matters: the colored-screen footage belongs above the background media you want to reveal. Apply the effect to that upper clip, not to the replacement background. [c3]
The supplied support tutorial describes Clipchamp for personal accounts and says the same principles apply to work and school accounts. Use the sequence above as the documented workflow; do not assume every account’s interface will look identical. [c3]
Choose the Screen Color and Adjust the Threshold
For blue-screen or red-screen footage, use the same Green Screen effect, then change the Screen Color dropdown to blue or red. Match the setting to the screen in your footage. [c3]
After applying the effect, move the Screen Threshold slider left or right to decrease or increase its intensity. Clipchamp’s documentation provides a slider-based adjustment, not a universal threshold value. [c2] [c3]
As you adjust, use the preview to judge whether the colored area is removed while the parts you want to keep remain visible. If the result is wrong, check these documented setup points before continuing:
- Is the colored-screen clip above the replacement background?
- Is the effect applied to the colored-screen clip?
- Does the selected screen color match the footage?
- Have you tested a different threshold setting? [c3]
Fit the Replacement Background
If the replacement media does not fit the opening or composition, adjust its size and position. Clipchamp’s walkthrough describes selecting the replacement clip, then using the preview’s corner handles to resize it and dragging it to reposition it. It also describes using the crop tool when fitting the underlying video. [c2]
For a vertical version, the walkthrough uses a 9:16 aspect ratio. It then applies Fill to both layers to remove black borders and repositions each clip as needed. [c2]
Check the framing after resizing: the background should cover the area you intend to reveal, and the foreground should stay positioned where you want it. This is a review step rather than a promise that one framing setting will suit every clip.
Preview and Export
Play the composition before saving. Check the background replacement during movement, not only on a paused frame, and review the size and position of both layers. The documented final step is to click Export at the top right and choose a video resolution. [c3]
Clipchamp’s feature page states that free users can access a limited selection of green-screen stock footage and templates, and that all users can save in 1080p. This does not establish that every stock asset or template is available on a free account. [c1]
FAQ
Where Is the Green Screen Effect in Clipchamp?
Select the colored-screen clip on the timeline, then open the Effects tab in the property panel on the right and choose Green Screen. [c3]
Can I Use This Effect on Footage Without a Colored Screen?
The documented green screen workflow requires a green, blue, or red screen element. It should not be treated as arbitrary background removal for ordinary footage. [c3]
Can the Replacement Background Be a Still Image?
Yes. The support guide allows a video clip or image as the replacement media. Place it below the colored-screen clip on the timeline. [c3]
What Screen Threshold Should I Use?
The supplied guides do not specify one threshold value for all footage. They instruct you to move the slider to change the effect’s intensity and preview the video before export. Adjust it while reviewing your own clip. [c2] [c3]