CapCut PC Tutorial: Edit and Export a Video on Windows
This beginner walkthrough takes you from a new CapCut Desktop project to a saved video. You’ll import clips, arrange and trim them on the timeline, preview the edit, and export the result. Interface labels below follow CapCut’s published Desktop guides; labels and available choices can vary between app versions. This is a documentation-based tutorial, not a report of hands-on testing.
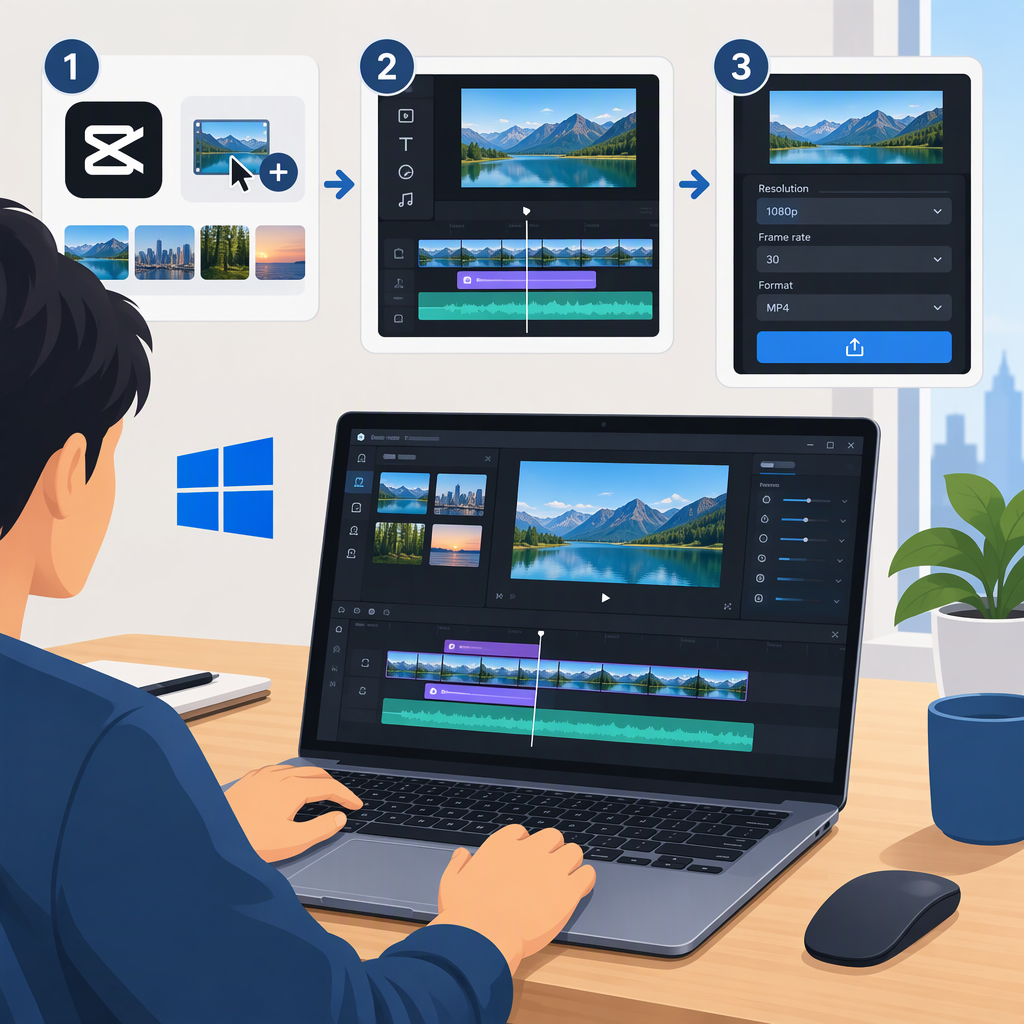
1. Create a Project and Import Your Clips
- Open CapCut Desktop on your Windows PC.
- On the home screen, choose Create project. CapCut’s Desktop guide identifies this as the starting point for editing video and audio clips already on your computer.
- In the editor, click Import and select the video clips you want to use. Alternatively, drag your clips onto the timeline if that option is available in your version.
- Wait for the imported media to appear, then drag a clip onto the timeline. Add a second clip after the first if you want to make a short sequence.
For this example, use two short clips—such as an establishing shot followed by a close-up. Put them in the order you want viewers to see them. The timeline is where you arrange and edit the clips; the preview lets you review how the sequence looks. CapCut’s published guide describes Create project, Import, and dragging clips onto the timeline as ways to begin a project. (capcut.com)
If an imported file doesn’t appear: confirm you selected the matching media category, such as video rather than photos. CapCut also recommends using files in a local folder, such as Documents or Desktop, if assets don’t display, then restarting the desktop app and trying again. (capcut.com)
2. Arrange, Trim, and Preview the Edit
Make a simple rough cut by shortening the beginning or end of a clip:
- Select a clip on the timeline.
- Move the pointer to one end of the clip and drag its edge inward to shorten it. Repeat on the other clip if needed. CapCut’s trimming guide describes adjusting a clip’s duration by dragging its edges.
- Play the sequence in the preview. Check that the first shot starts where you intend and that the change between clips feels right.
- If you trimmed too much, select the clip and drag its edge back outward. Preview again before continuing.
For a concrete example, suppose the first clip includes a few seconds of setup before the useful action. Shorten its starting edge until the action begins promptly, then trim the second clip’s ending edge to remove the tail. Play the sequence again to check that the two shots still make sense together. These are illustrative edit choices, not a tested project or a required duration. CapCut’s Desktop guidance also describes arranging clips on the timeline and previewing an edit. (capcut.com)
3. Export the Video and Locate the Saved File
- When the timeline looks right, choose Export.
- Review the export choices shown in your version. CapCut’s Desktop guide lists resolution, format—such as MP4 or MOV—and frame rate as choices. For a first export, use the options presented for your project rather than assuming one setting is best for every purpose.
- Choose a save location you can find again, if the export screen offers one, and complete the export.
- Keep the completion screen open long enough to check the destination. CapCut’s help guidance says the Open folder button on the export page takes you to the folder where the video was saved. If you closed that screen, search for the filename you chose or check the destination shown during export.
- Open the saved video and play it briefly. Confirm that the file exists and that the beginning, clip change, and ending look and sound as expected.
CapCut says the default destination may be the system’s Videos folder or a CapCut folder, but the selected path is the best guide for a particular export. If saving fails because of folder permissions, try a folder you can write to, such as Documents or Desktop, rather than a protected system folder. (capcut.com)
Quick Completion Check
- The clips appear in the order you intended.
- The preview plays through the full sequence without an unintended gap.
- The export finishes, and you can open the saved video from its destination.
If the controls in your copy of CapCut look different, use the labels visible in your app rather than assuming every version has an identical layout.