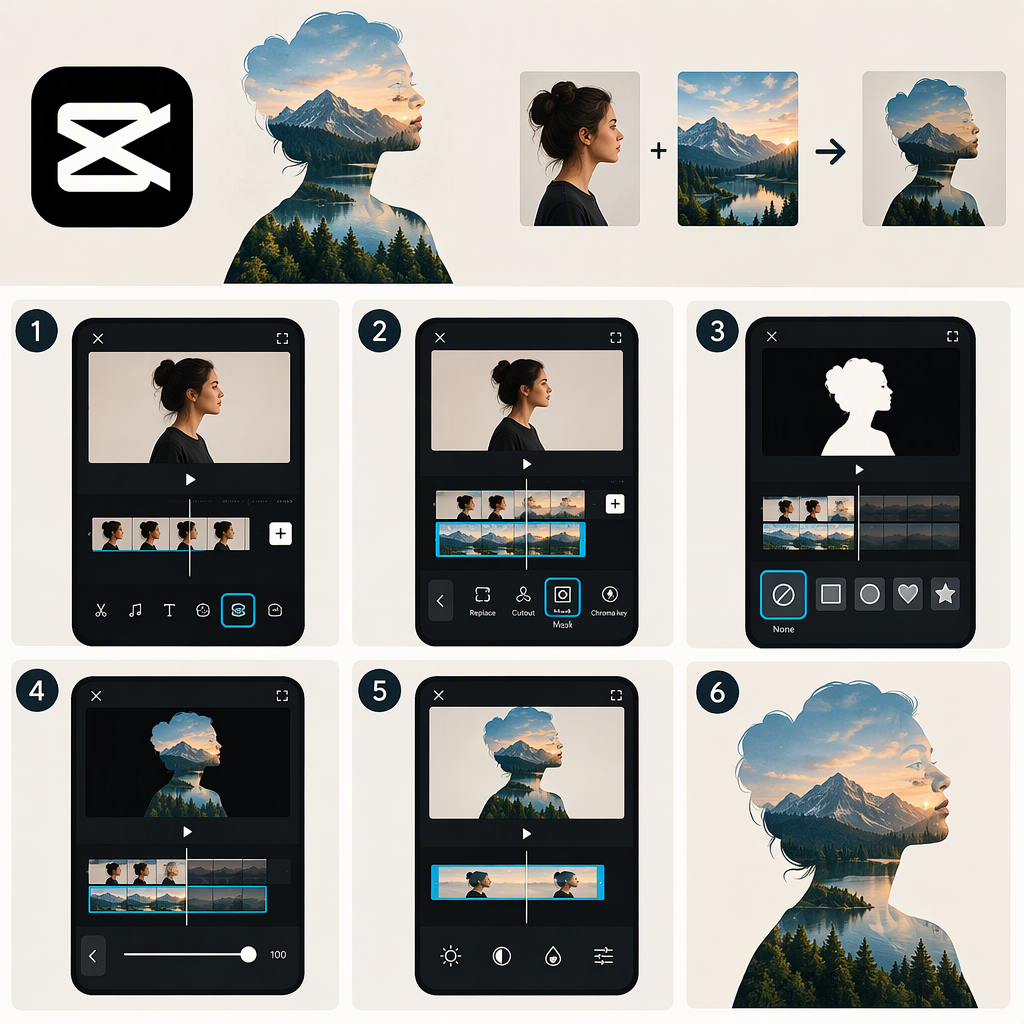
CapCut Mask Tutorial: Create a Masked Overlay Step by Step
Quick answer: Put your main footage on the timeline, add a second clip or image as an overlay, then select that added layer and apply a mask. The overlay is the extra visual layer; the mask controls which part of that layer is visible. CapCut’s desktop guidance describes selecting a timeline clip, opening Mask, and adding a mask. Its masking page also describes displaying video inside shapes such as circles. Exact controls may differ between CapCut versions and platforms, so the steps below focus on the desktop workflow documented by CapCut. (CapCut: overlay video; CapCut: mask video online)
Overlay Vs. Mask: What’s the Difference?
An overlay is a clip, image, or other visual placed over your main footage. A mask limits the visible area of a layer. Used together, they let you show only a portion of the overlay—for example, a circular inset clip over a full-frame background video. CapCut describes an overlay as one video clip superimposed on another, and its masking guidance describes putting videos inside shapes. (CapCut: overlay video; CapCut: mask video online)
Think of it this way: the overlay supplies the extra picture; the mask acts like a window showing part of that picture. A mask does not, by itself, add a new clip to the project—you need to add the overlay first.
Make a Basic Masked Overlay in CapCut Desktop
Example: Keep a full-frame base clip visible, with a second clip appearing inside a circular area. CapCut’s published desktop guidance supports importing media, placing clips on the timeline, and applying a mask to a selected timeline clip. Menu wording and the available mask choices can vary, so treat the labels below as the documented workflow rather than a promise that every version looks identical. (CapCut: add overlays on CapCut; CapCut: overlay video)
- Start a project and import the footage. Open CapCut desktop, choose New project, and use Import to bring in your base clip and a second clip for the inset.
- Place the base clip on the timeline. Drag the main footage into the timeline. This is the background that should remain visible around the masked area.
- Add the overlay. Put the second clip on a layer above the base clip, aligning its start with the section where you want it to appear. CapCut’s overlay guide describes placing imported video or image media over the base video. (CapCut: add overlays on CapCut)
- Select the overlay clip. Make sure the upper clip—not the base clip—is selected. CapCut’s desktop overlay guidance says to select a timeline video and choose Mask to add a mask. (CapCut: overlay video)
- Open Mask and add a shape. Choose Mask in the editing controls and add a mask. If the available choices include a circle, use it for this example. CapCut’s online masking page describes displaying video in shapes including circles, but mask choices may vary by editor or version. (CapCut: mask video online)
- Position and size the visible area. Adjust the mask and overlay in the preview so the intended part of the second clip appears within the circular area. CapCut’s online masking page documents position, rotation, and size adjustments; the exact controls in desktop may differ. (CapCut: mask video online)
- Preview the result. Play the section and check that the base clip remains visible around the inset, the overlay appears only where intended, and both clips last for the desired duration.
Expected result: the main clip fills the frame, while the second clip appears in a limited, circular region. This is a simple masked overlay; it is not the same as a picture-in-picture overlay with the second clip shown as an unmasked rectangle.
Adjust the Mask and Fix Common Problems
CapCut’s masking page documents a Feather control for changing how the masked video’s border appears, alongside position, rotation, and size adjustments. A softer edge may suit a blended composite; a sharper edge may better suit a clean inset. If your version exposes Feather, preview the change and choose the edge that fits the footage. (CapCut: mask video online)
| What you see | What to check |
|---|---|
| The overlay covers the whole frame | Select the upper overlay clip and confirm a mask has been added to that clip. The desktop workflow applies the mask to the selected timeline video. (CapCut: overlay video) |
| The inset is in the wrong place or the wrong size | Re-select the overlay and adjust the mask or layer position and size in the preview or controls available in your version. (CapCut: mask video online) |
| The edge looks too hard or too soft | If Feather is available, adjust it and replay the section to compare the edge. (CapCut: mask video online) |
| The overlay disappears before the base clip ends | Check the overlay clip’s timeline duration and extend it if needed. CapCut’s overlay guidance identifies duration as an adjustable part of the overlay. (CapCut: overlay video on video) |
| The result looks different from these steps | Confirm you are editing the overlay layer and look for the mask controls available in your platform and version. CapCut publishes separate desktop, app, and online editing guidance, so interface paths should not be assumed to match across all three. (CapCut: add overlays on CapCut; CapCut: overlay video on video) |
Before You Finish
Scrub through the full section, not just one frame. Check that the masked overlay stays positioned as intended, the base footage remains visible outside it, and the overlay’s timing matches the moment you want to emphasize. This walkthrough covers a basic masked overlay; it does not assume that mask inversion, tracking, or mask keyframing is available in every CapCut version.