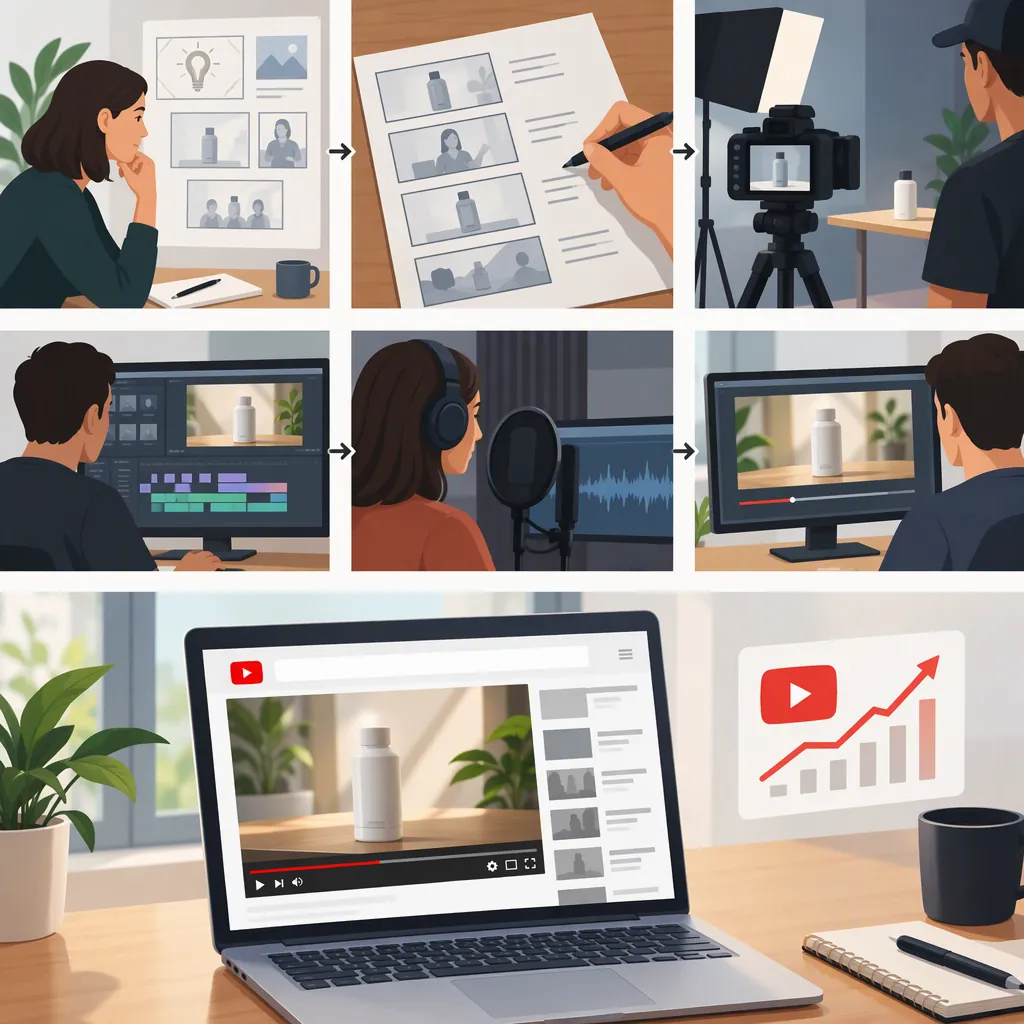
How to Make a YouTube Commercial: Script, Tools, and Edit
To make a YouTube commercial, define one audience and message, choose the intended ad format, write a script and storyboard, gather footage and audio, and edit a clear opening, demonstration, and ending. Choose production tools by testing them with your actual materials—not just comparing feature lists. Review the exported video before preparing paid distribution; Humble&Brag and Jyll Saskin Gales describe YouTube campaign setup as a separate task in Google Ads. [c1] [c2]
Start with One Audience and One Message
Before opening an editing tool, write down who the commercial is for, what it should communicate, and what viewers should understand by the end.
Humble&Brag recommends one idea per ad, while Jyll starts with defining the audience. Use those principles to focus the brief, not as promises of campaign performance. [c1] [c2]
For a first draft, avoid combining a company history, several demonstrations, and multiple offers. Choose one message you can show accurately with the materials available.
One-Page Commercial Brief
Fill in these fields before scripting:
- Intended audience: One specific viewer group.
- Communication goal: One thing viewers should understand.
- Main message: A single sentence.
- Supporting evidence: An approved demonstration or documented fact.
- Intended placement: The ad format to verify before final production.
- Draft runtime: A working length, not an assumed platform requirement.
- Available materials: Footage, photographs, logo, screen recordings, and audio.
- Ending: One clear takeaway.
- Review owner: The person responsible for accuracy and permissions.
Verify the Format Before Setting the Runtime
Both guides describe skippable in-stream ads with a skip option after five seconds and six-second bumper ads. Jyll’s format discussion explicitly refers to 2021, so these descriptions should be treated as background rather than current specifications. Confirm the intended placement’s current requirements in the campaign interface before finalizing runtime and export settings. [c1] [c2]
Record the requirements you verify—including accepted duration, dimensions or aspect ratio, and file settings—alongside the brief. This gives you a delivery checklist for testing tools and reviewing the finished file.
Write a Script You Can Show on Screen
Jyll presents the ABCD structure: Attract, Brand, Connect, and Direct. Her explanation covers an attention-getting opening, early brand identification, a relatable story, and clear direction. [c2]
Translate that framework into four production decisions:
- Opening: What situation will viewers recognize?
- Identification: What brand, organization, or subject is being introduced?
- Demonstration: What can the footage accurately show?
- Ending: What single point should viewers remember?
Write the visual and spoken elements together. If a sentence has no corresponding image, decide whether it needs a new shot, on-screen text, or removal. Avoid unsupported results, invented testimonials, and artificial urgency.
Blank 30-Second Script and Storyboard
This timing is an editorial exercise, not a YouTube specification. Read the script aloud and adjust the draft rather than forcing a rushed delivery.
| Draft timing | Visual | Voiceover or on-screen text |
|---|---|---|
| 0–5 seconds | Show the viewer’s relevant situation | [Describe the situation in one short sentence.] |
| 5–10 seconds | Identify the brand or subject | [State what is being introduced.] |
| 10–23 seconds | Show one accurate demonstration | [Explain only what the footage supports.] |
| 23–30 seconds | Hold a simple closing image | [Give one clear takeaway.] |
Review: Does each sentence have a visual purpose? Is every factual statement supportable? Can anything be removed without losing the main message?
Filled Example: A Fictional Community Workshop
The following is a fictional teaching example, not a real event announcement or a claim about an organization’s services.
- Audience: Local residents curious about basic clothing repairs.
- Main message: The workshop introduces how to sew on a button.
- Materials: A title card, close-up demonstration footage, and recorded narration.
| Draft timing | Visual | Sample narration or text |
|---|---|---|
| 0–5 seconds | Close-up of a shirt with a missing button; small workshop title | “A missing button can leave a shirt unfinished.” |
| 5–10 seconds | Title: “Neighborhood Repair Workshop” | “This workshop introduces a basic clothing repair.” |
| 10–23 seconds | Close-ups of positioning the button and stitching through it | “The demonstration shows how to position a button and stitch it in place.” |
| 23–30 seconds | Finished button beside the workshop title | “Neighborhood Repair Workshop: an introduction to sewing on a button.” |
The example turns one message into visible actions without adding testimonials or outcome claims. For a real commercial, replace the fictional details with verified information and ensure the demonstration matches the narration.
Choose Production Tools Around Your Materials
Separate visual preparation, video editing, and campaign setup. You may need one production tool or several, but each should solve a specific task.
Start with the material that carries your message. Then test whether a candidate tool can perform the required work.
Tool-Neutral Workflow Selection Table
These are selection criteria, not verified capabilities of any particular product.
| Your starting materials | Workflow to evaluate | Test task | Pass standard |
|---|---|---|---|
| Existing live-action footage | A video-editing workflow with trimming, cropping, text, and audio controls | Import two representative clips, trim them, arrange them, and add a title and spoken track | Important action remains visible after cropping; cuts follow the script; text and speech are clear in the export |
| Static photographs and a recorded voiceover | A scene-based workflow with image-duration and audio controls | Arrange three images, set how long each remains visible, and align them with narration | Images do not stretch or crop important details; each stays visible for its corresponding sentence |
| A screen demonstration | A screen-recording and editing workflow | Capture a short task using non-sensitive sample data, trim pauses, and add explanatory text | Relevant controls and results are readable; the action matches the explanation; no private information appears |
| A mix of video, photographs, and narration | A workflow that lets you arrange mixed media and adjust audio separately | Build a short sequence containing each material type | Scene timing, framing, and audio can be adjusted without disrupting the rest of the sequence |
Run a Small Export Test Before Committing
Use representative materials rather than an empty project:
- Import one clip or image and one audio file.
- Arrange two scenes in the intended order.
- Trim a pause or change an image’s duration.
- Test cropping and text placement in the intended frame shape.
- Adjust speech and supporting audio separately, if your project needs both.
- Export using the delivery settings you have verified.
- Play the exported file and check image quality, text, synchronization, and sound.
- Check current licensing terms, watermark conditions, and export restrictions.
If a required task cannot be completed in the test, revise the workflow or evaluate another tool before building the full commercial.
Where Canva Pro and Google Ads Fit
Jyll mentions using Canva Pro to create an ad. That mention does not verify its current features, pricing, export capabilities, or suitability for your materials. Apply the same sample-project test before selecting it. [c2]
Google Ads serves a different purpose: both guides describe it as the place to set up YouTube advertising campaigns. It is not a substitute for producing and reviewing the video. [c1] [c2]
Gather and Organize the Materials
Turn the storyboard into a shot list before recording or collecting assets. For each scene, identify the picture, spoken audio, on-screen text, and permission status.
Use descriptive filenames such as:
01_opening_missing_button02_workshop_title03_button_demonstration04_closing_imagevoiceover_draft_01
Keep original files separate from working copies and exports. If you still need footage, capture the actions the storyboard requires and review a short test recording before continuing. Check that the relevant detail is visible and any recorded speech is understandable.
Completion check: Every storyboard row has usable material, or a clearly identified item still to be produced. Resolve missing assets before polishing the edit.
Edit the Commercial from Rough Cut to Final File
The following workflow does not depend on a particular software interface. Complete the message first; add decorative effects only when they serve it.
| Step | What to do | Completion check |
|---|---|---|
| 1. Import and organize | Bring in the approved materials and group them by storyboard scene | You can locate each scene’s picture, audio, and text without guessing |
| 2. Build the picture sequence | Arrange clips or images in storyboard order | The opening, identification, demonstration, and ending are present |
| 3. Trim the rough cut | Remove unnecessary pauses, repeated shots, and material unrelated to the message | Every remaining shot contributes information |
| 4. Align narration and action | Place the spoken track and adjust scene timing around it | The viewer sees the relevant action while hearing its explanation |
| 5. Add essential text | Insert names, labels, or closing information where needed | Text is readable and does not cover important visual details |
| 6. Review sound and captions | Adjust audio so speech remains understandable; check any captions against the narration | Supporting sound does not obscure speech, and captions match what is said |
| 7. Export and inspect | Export using the verified delivery settings, then play the file outside the editor | The actual file—not just the preview—passes the review checklist |
If the narration runs longer than the draft, shorten unnecessary wording or revise the scene timing. Do not solve every timing problem by speeding up speech.
Final Review Checklist
Humble&Brag recommends clear visuals and legible text for mobile viewing. Check the commercial on a small screen as part of the review. [c1]
- The opening establishes the subject promptly.
- The commercial communicates one main idea.
- Demonstrations match the spoken claims.
- Names, prices, dates, and other factual details are accurate.
- Speech is understandable throughout.
- Essential text is readable and remains visible long enough to read.
- Captions, if included, match the speech.
- A silent viewing reveals whether essential information needs on-screen wording.
- Asset permissions and licensing terms have been reviewed.
- Export settings match the currently verified placement requirements.
- The exported file has been watched from beginning to end.
Keep Production Separate from Paid Distribution
A finished commercial is the creative asset, not a complete advertising campaign. Humble&Brag and Jyll discuss campaign goals, audience selection, budgets, and video selection within Google Ads. [c1] [c2]
Review those campaign settings separately from the video. Do not assume that historical menu labels, suggested runtimes, or budget recommendations apply unchanged.
Scope note: These third-party guides provide production principles and campaign context, not current platform specifications. Their advice does not establish a universal best editor, guaranteed ad approval, or expected campaign results. [c1] [c2]
FAQ
How Long Should a YouTube Commercial Be?
Choose the intended ad format first, then write to its currently verified requirements. A 30-second storyboard is a drafting exercise, not a universal rule. Both guides describe six-second bumper ads, while Jyll’s broader format discussion explicitly refers to 2021. [c1] [c2]
Can I Use Canva Pro to Make a YouTube Commercial?
Jyll mentions using Canva Pro to create an ad, but her guide does not document its current editing workflow or export capabilities. Test your own footage, audio, text placement, and required export settings before choosing it for production. [c2]
What Should Appear in the First Five Seconds?
Show a relevant situation and identify the subject promptly. Jyll recommends attracting attention and introducing the brand early; both guides describe skippable in-stream ads as skippable after five seconds. These are reasons to make the opening purposeful, not a guarantee that viewers will continue watching. Confirm current format requirements before final production. [c1] [c2]